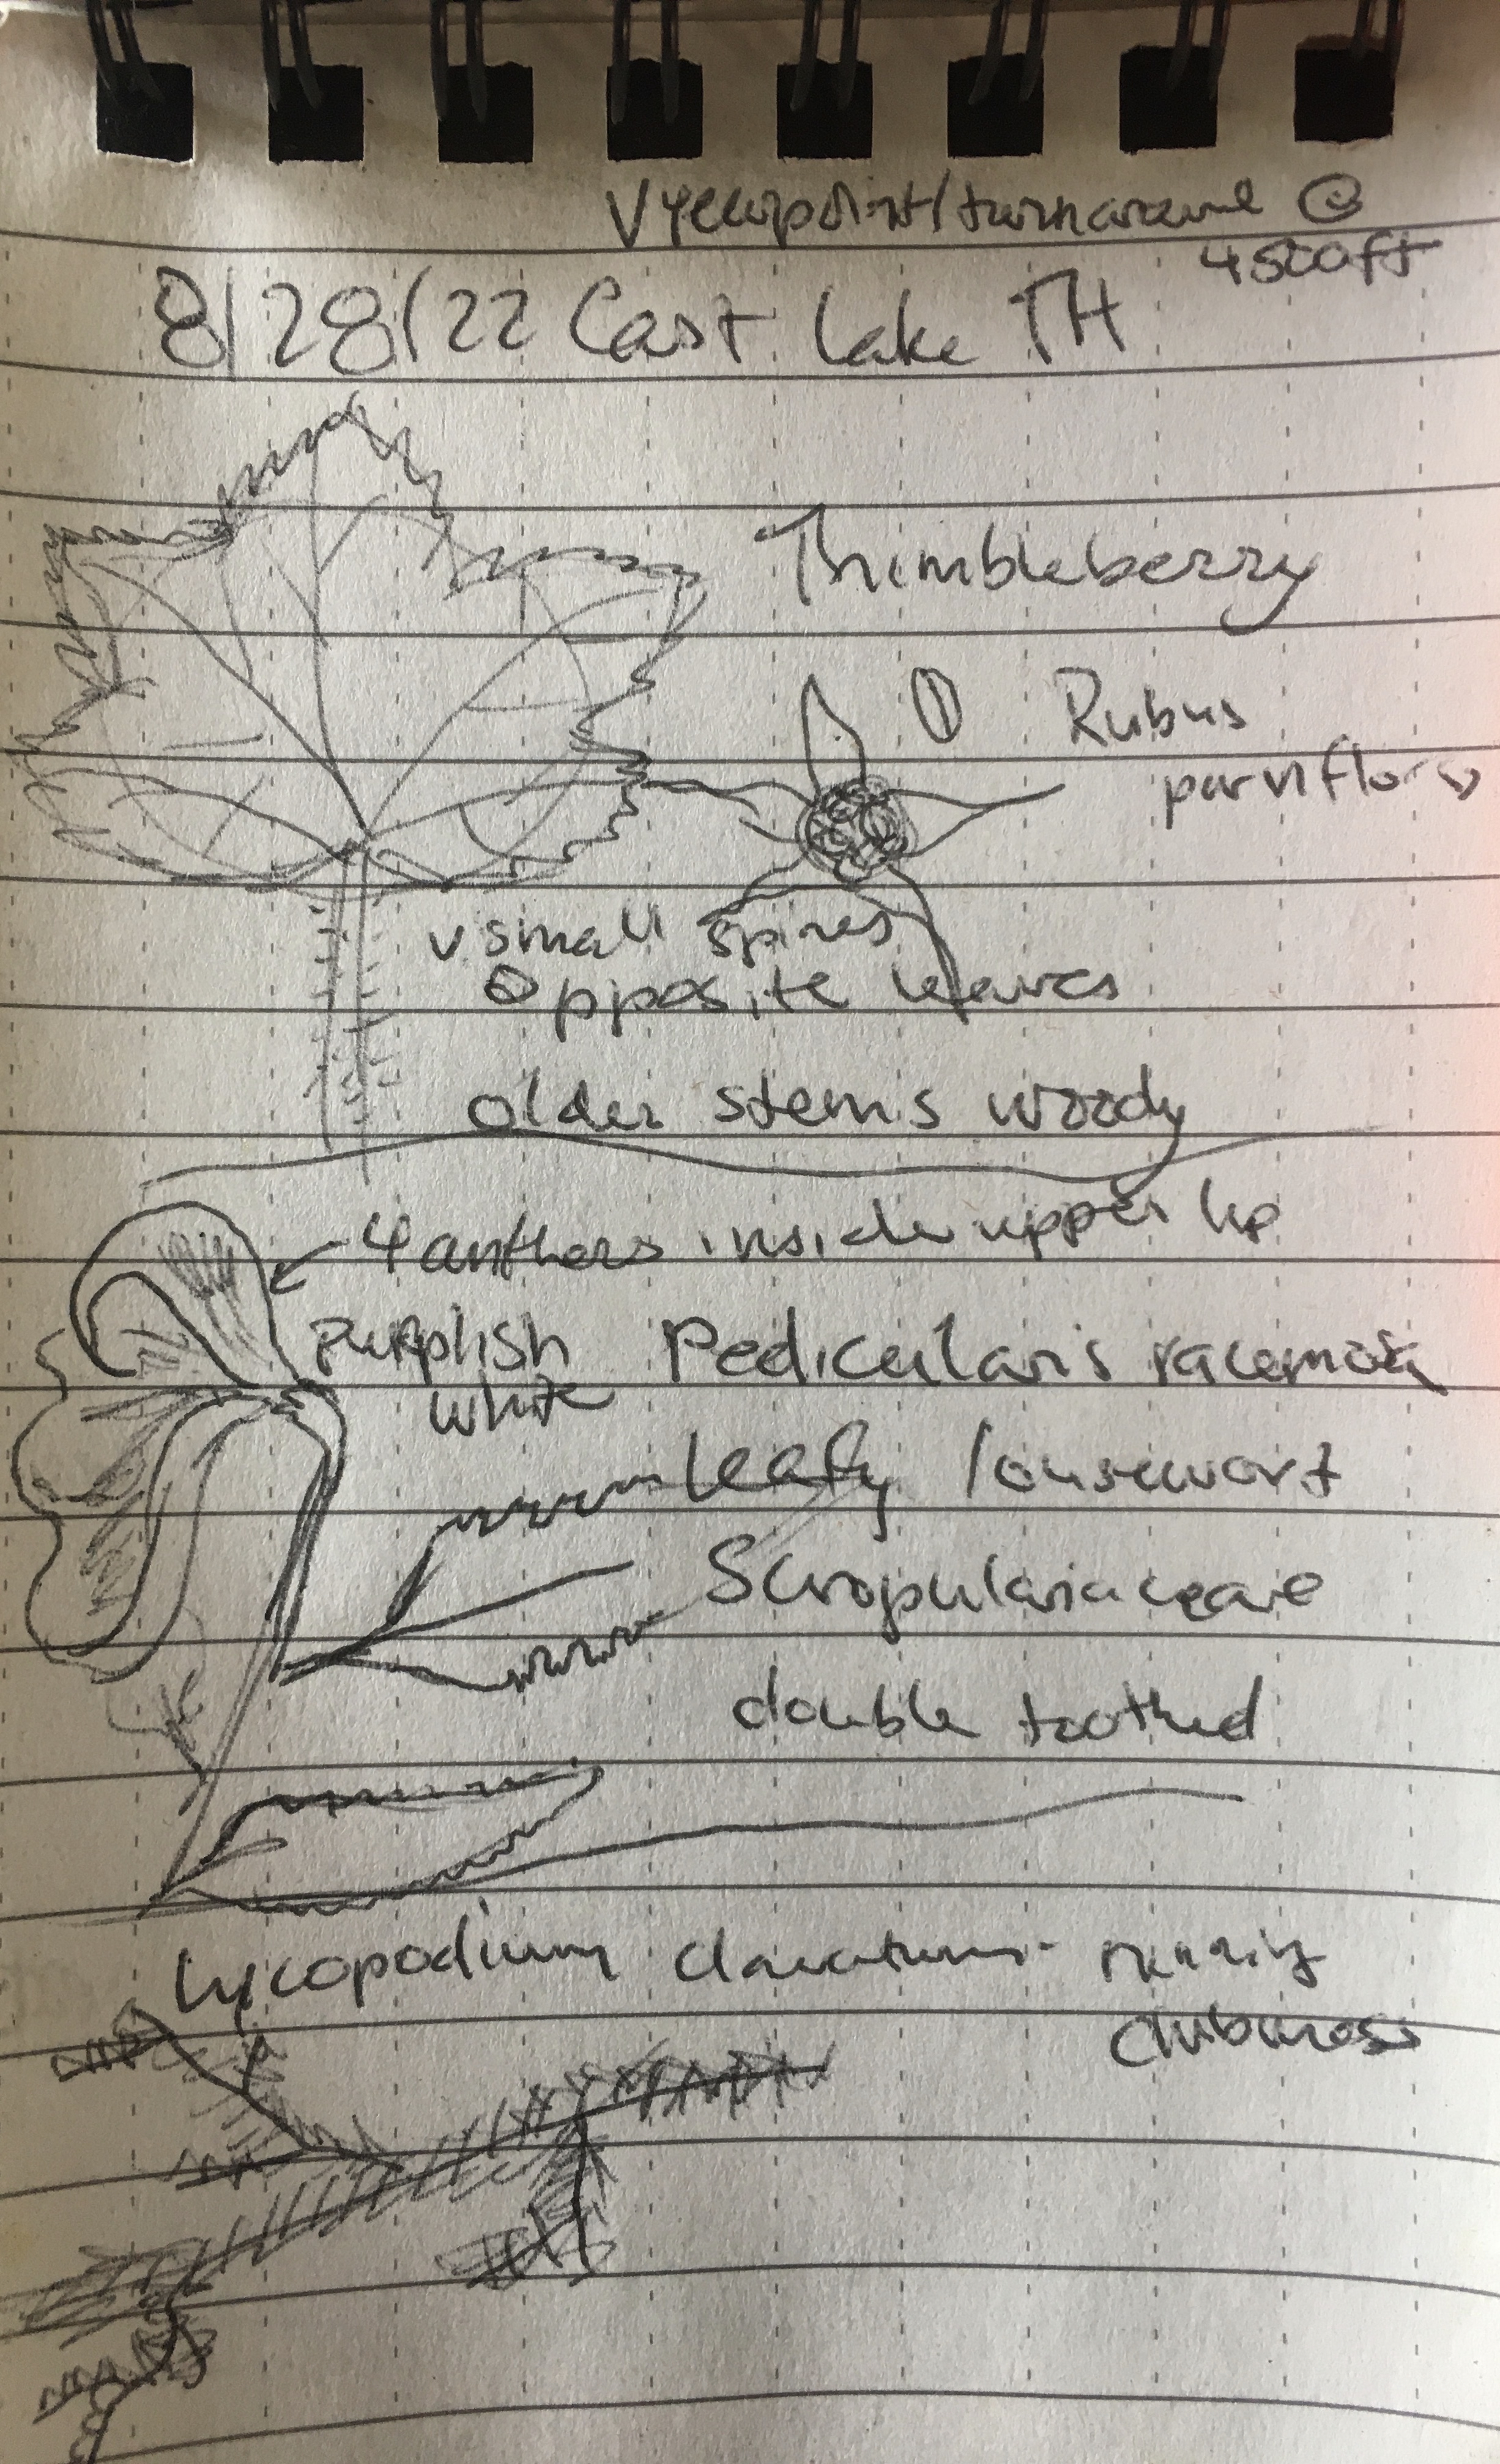
There are several species within genus Pedicularis commonly encountered in the Cascades. They range from the low, creeping sickletop lousewort (P. racemosa) to the tall, spiky bracted lousewort (P. bracteosa), and many of them have rather whimsical flowers resembling elephant heads.
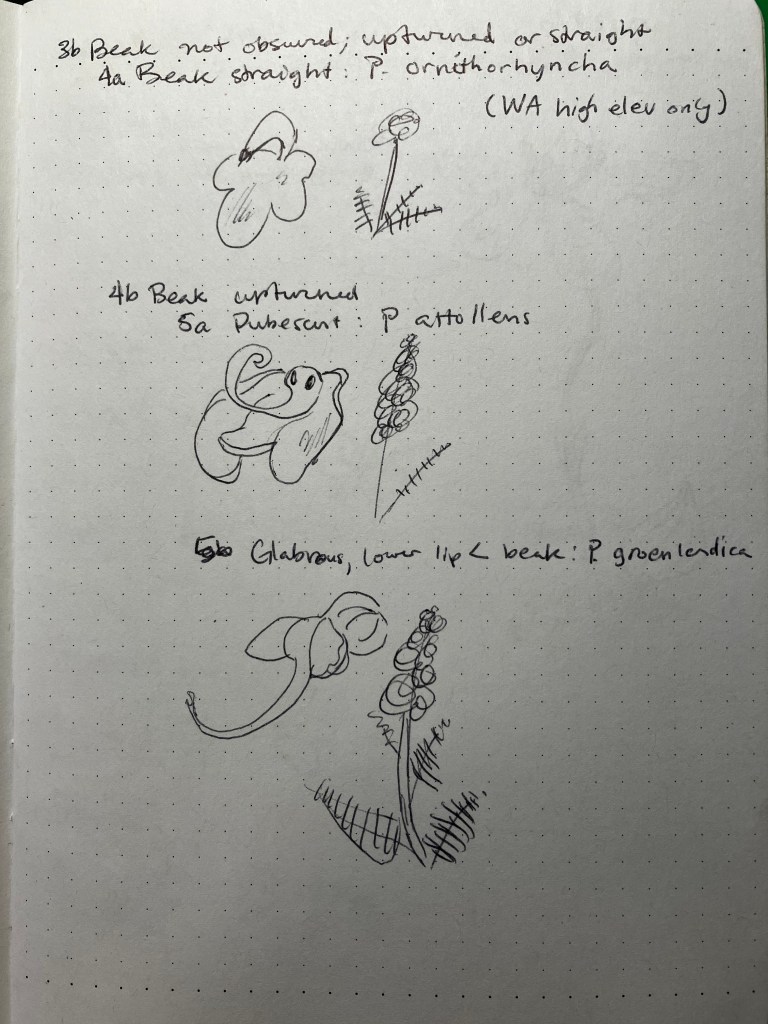
Remembering which one is which in the moment is not one of my strengths, so I made an illustrated version of the identification key. I encounter sickletop lousewort most frequently, and luckily it is readily identifiable because its leaves are only toothed and do not have deep lobes. However, if it’s not flowering time, distinguishing the others can be fairly tricky, as they have similar leaves and habitats.
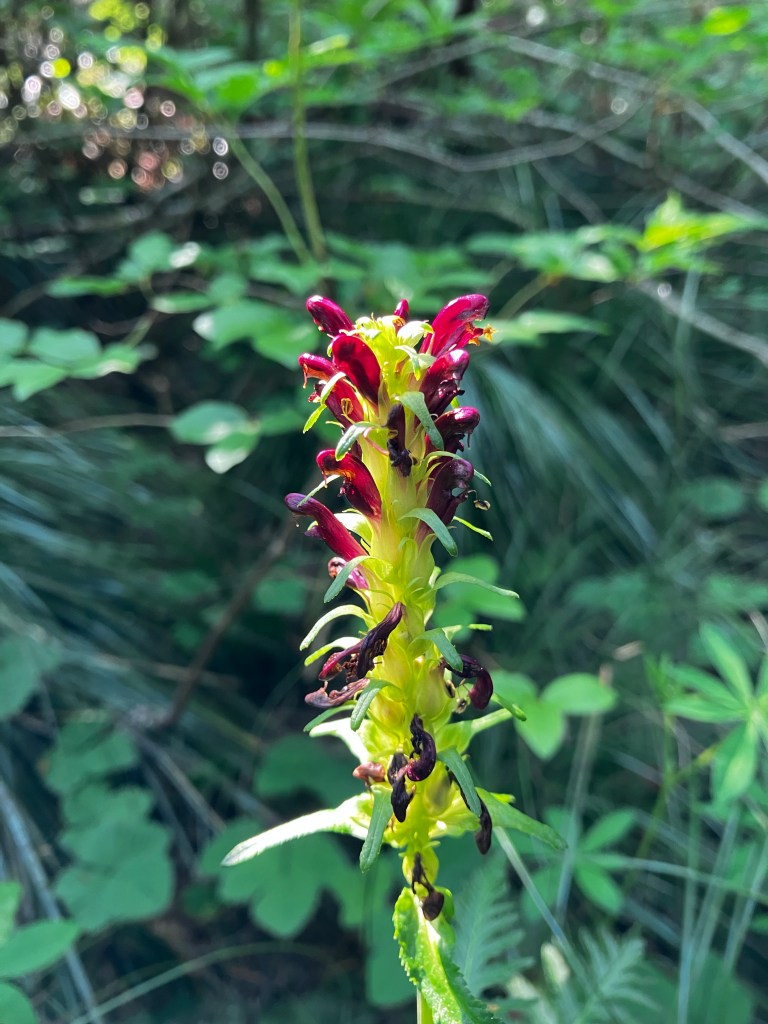
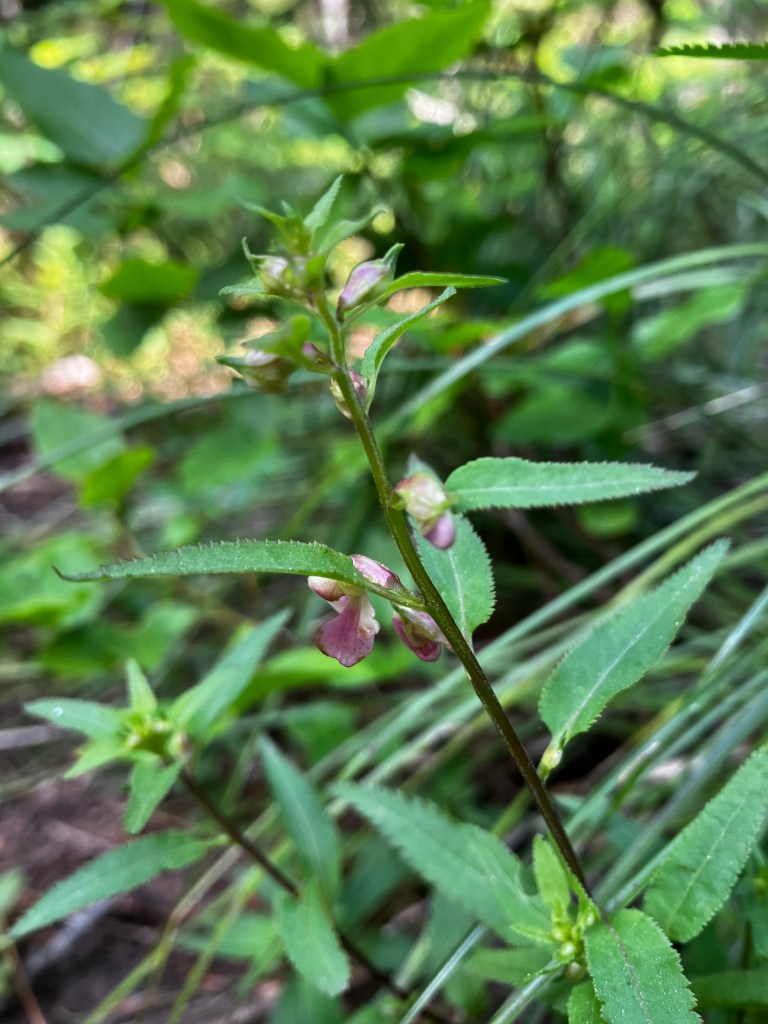
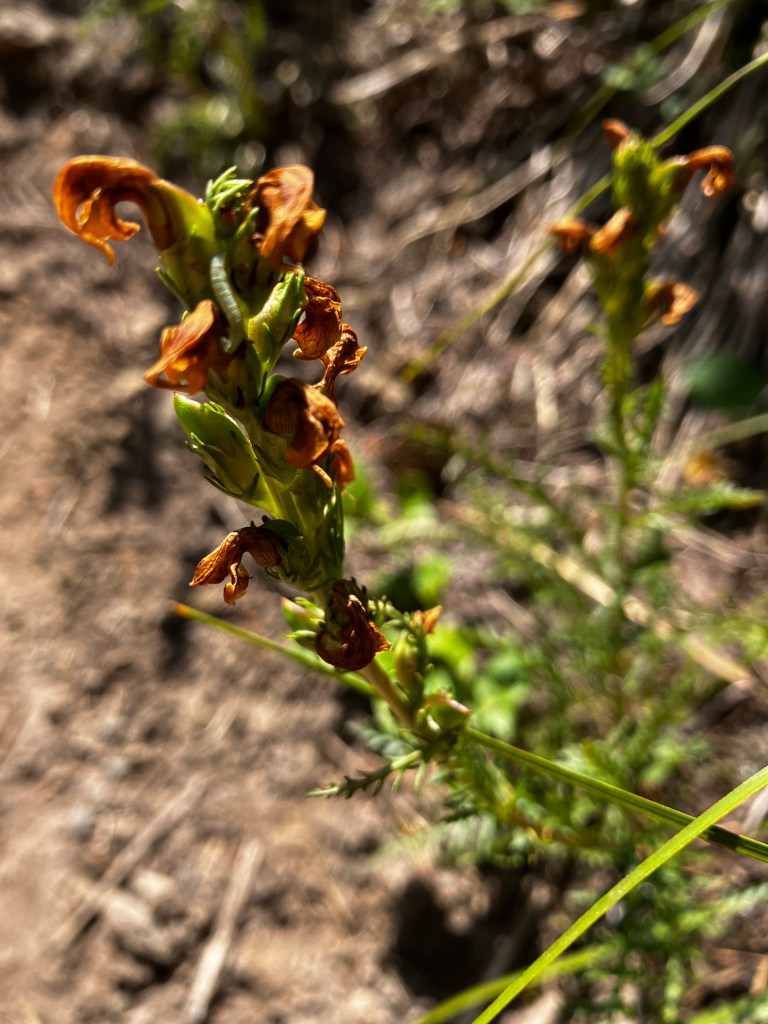
P. bracteosaP. racemosaP. contorta (dead flowers)
On my most recent backpacking trip, I encountered three lousewort species, shown above. Note the deep purple flowers on P. bracteosa – this species can be quite variable and most reference photos I’ve found show it with pale yellow flowers.
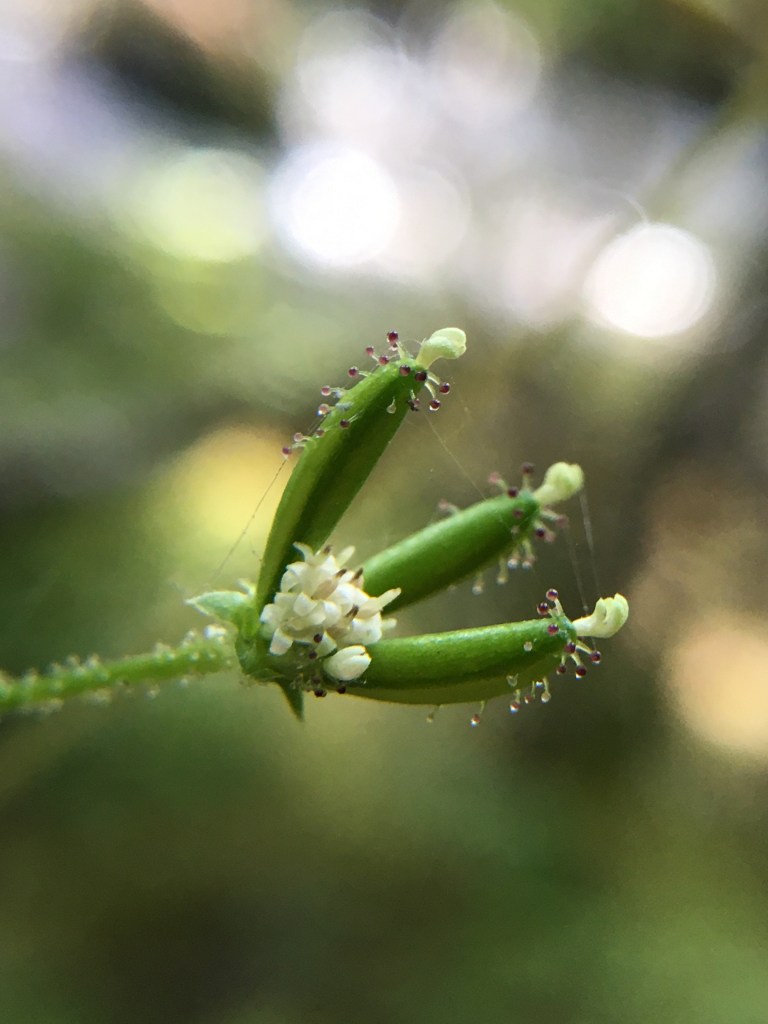
Another fun aster! I found a patch of pathfinder plants showing flowers and fruit on my hike this week and spent nearly 30 minutes just lying on the trail and trying to get good photos of them. Even with a macro lens, getting in-focus pictures of the tiny flowers was quite difficult. Contrast that with the large, recognizable leaves – even when not flowering, the triangular leaf shape with a light underside makes this a relatively easy plant to identify.
Pathfinder plant has distinct triangular leaves that are smooth green on top, light woolly green beneath
Compound flower of pathfinder plant: fruiting pistillate flowers with staminate flowers in center. The fruits bear stalked glands on the upper half. The stems are covered in stalked glands as well. It’s a sticky plant.
Asters do this fun thing where what looks like a singular flower head is actually a cluster of smaller flowers. For example, a sunflower is a circle of “ray flowers” around a circular field of “disk flowers.” The next time you see one, get a closer look and try to find the pistils/stamen in the component flowers. Last week’s plant, white-flowering hawkweed, is all ray flowers. Pathfinder plant is all disk flowers. Not all the flowers have the same bits, though. The center of the composite flower head bears staminate flowers, with pistillate flowers surrounding them. The elongated fruits then grow from the pistillate flowers.
Fruits getting bigger… staminate flowers remaining in center
Eventually only the fruit remains. I like how perfectly pentagonal this one is!
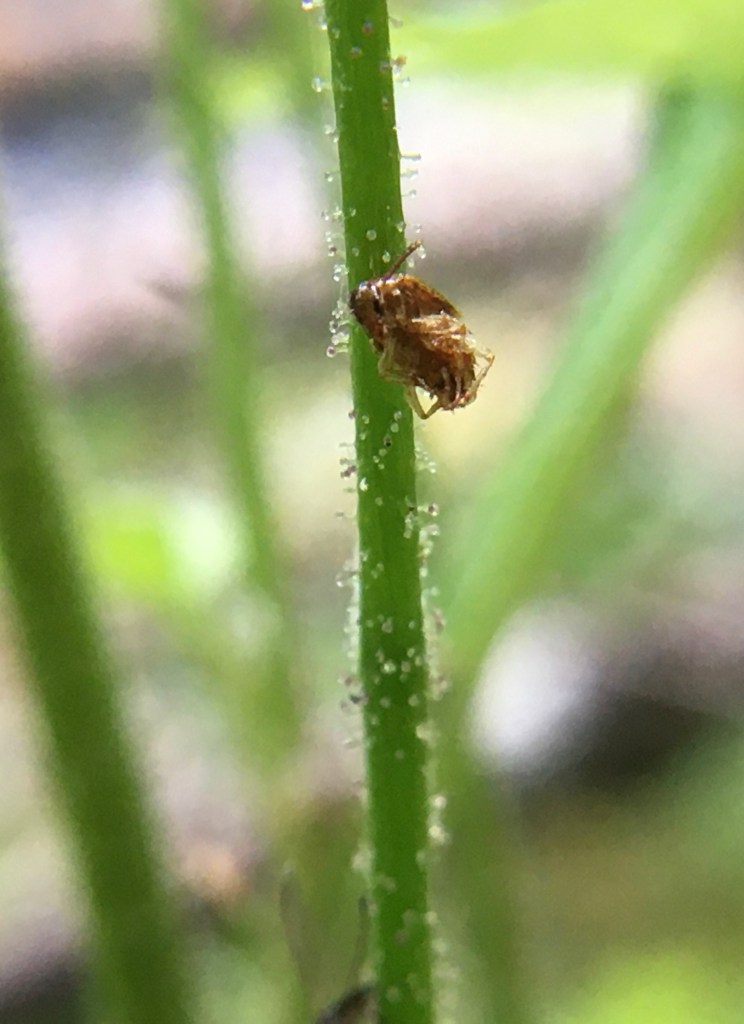
Sticky hairs cover the stems and fruits of pathfinder plant. I found multiple insects stuck in them. I don’t know if this is carnivory (it certainly looks a bit like a sundew), or the plant simply limiting the types of insects able to access its flowers. Either way, cool and creepy!
A tiny bug stuck on the even tinier sticky hairs on the plant stem
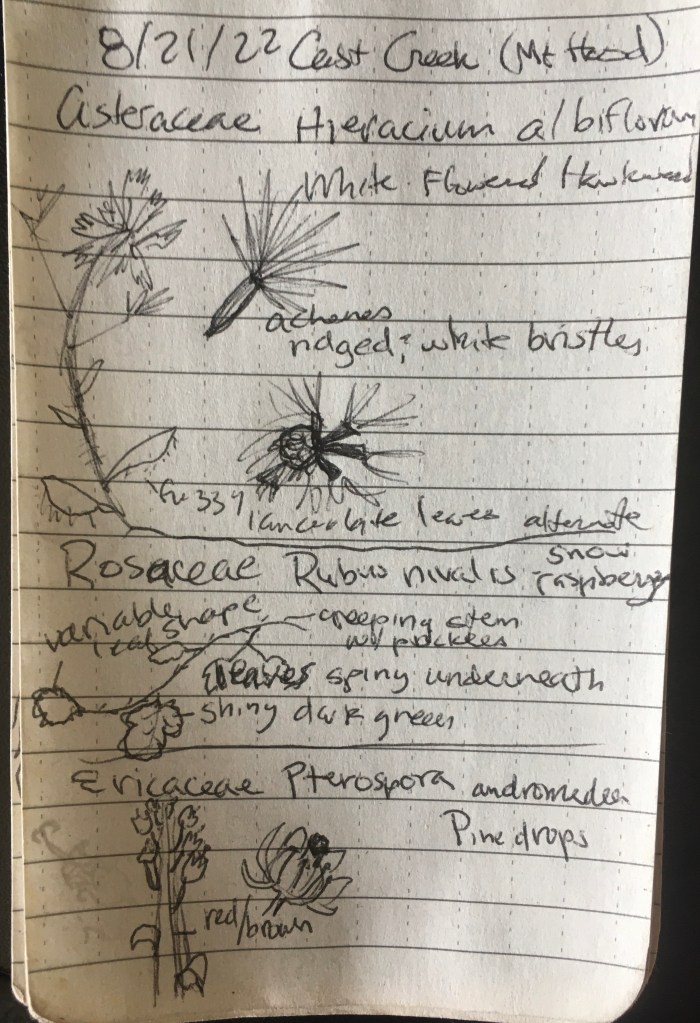
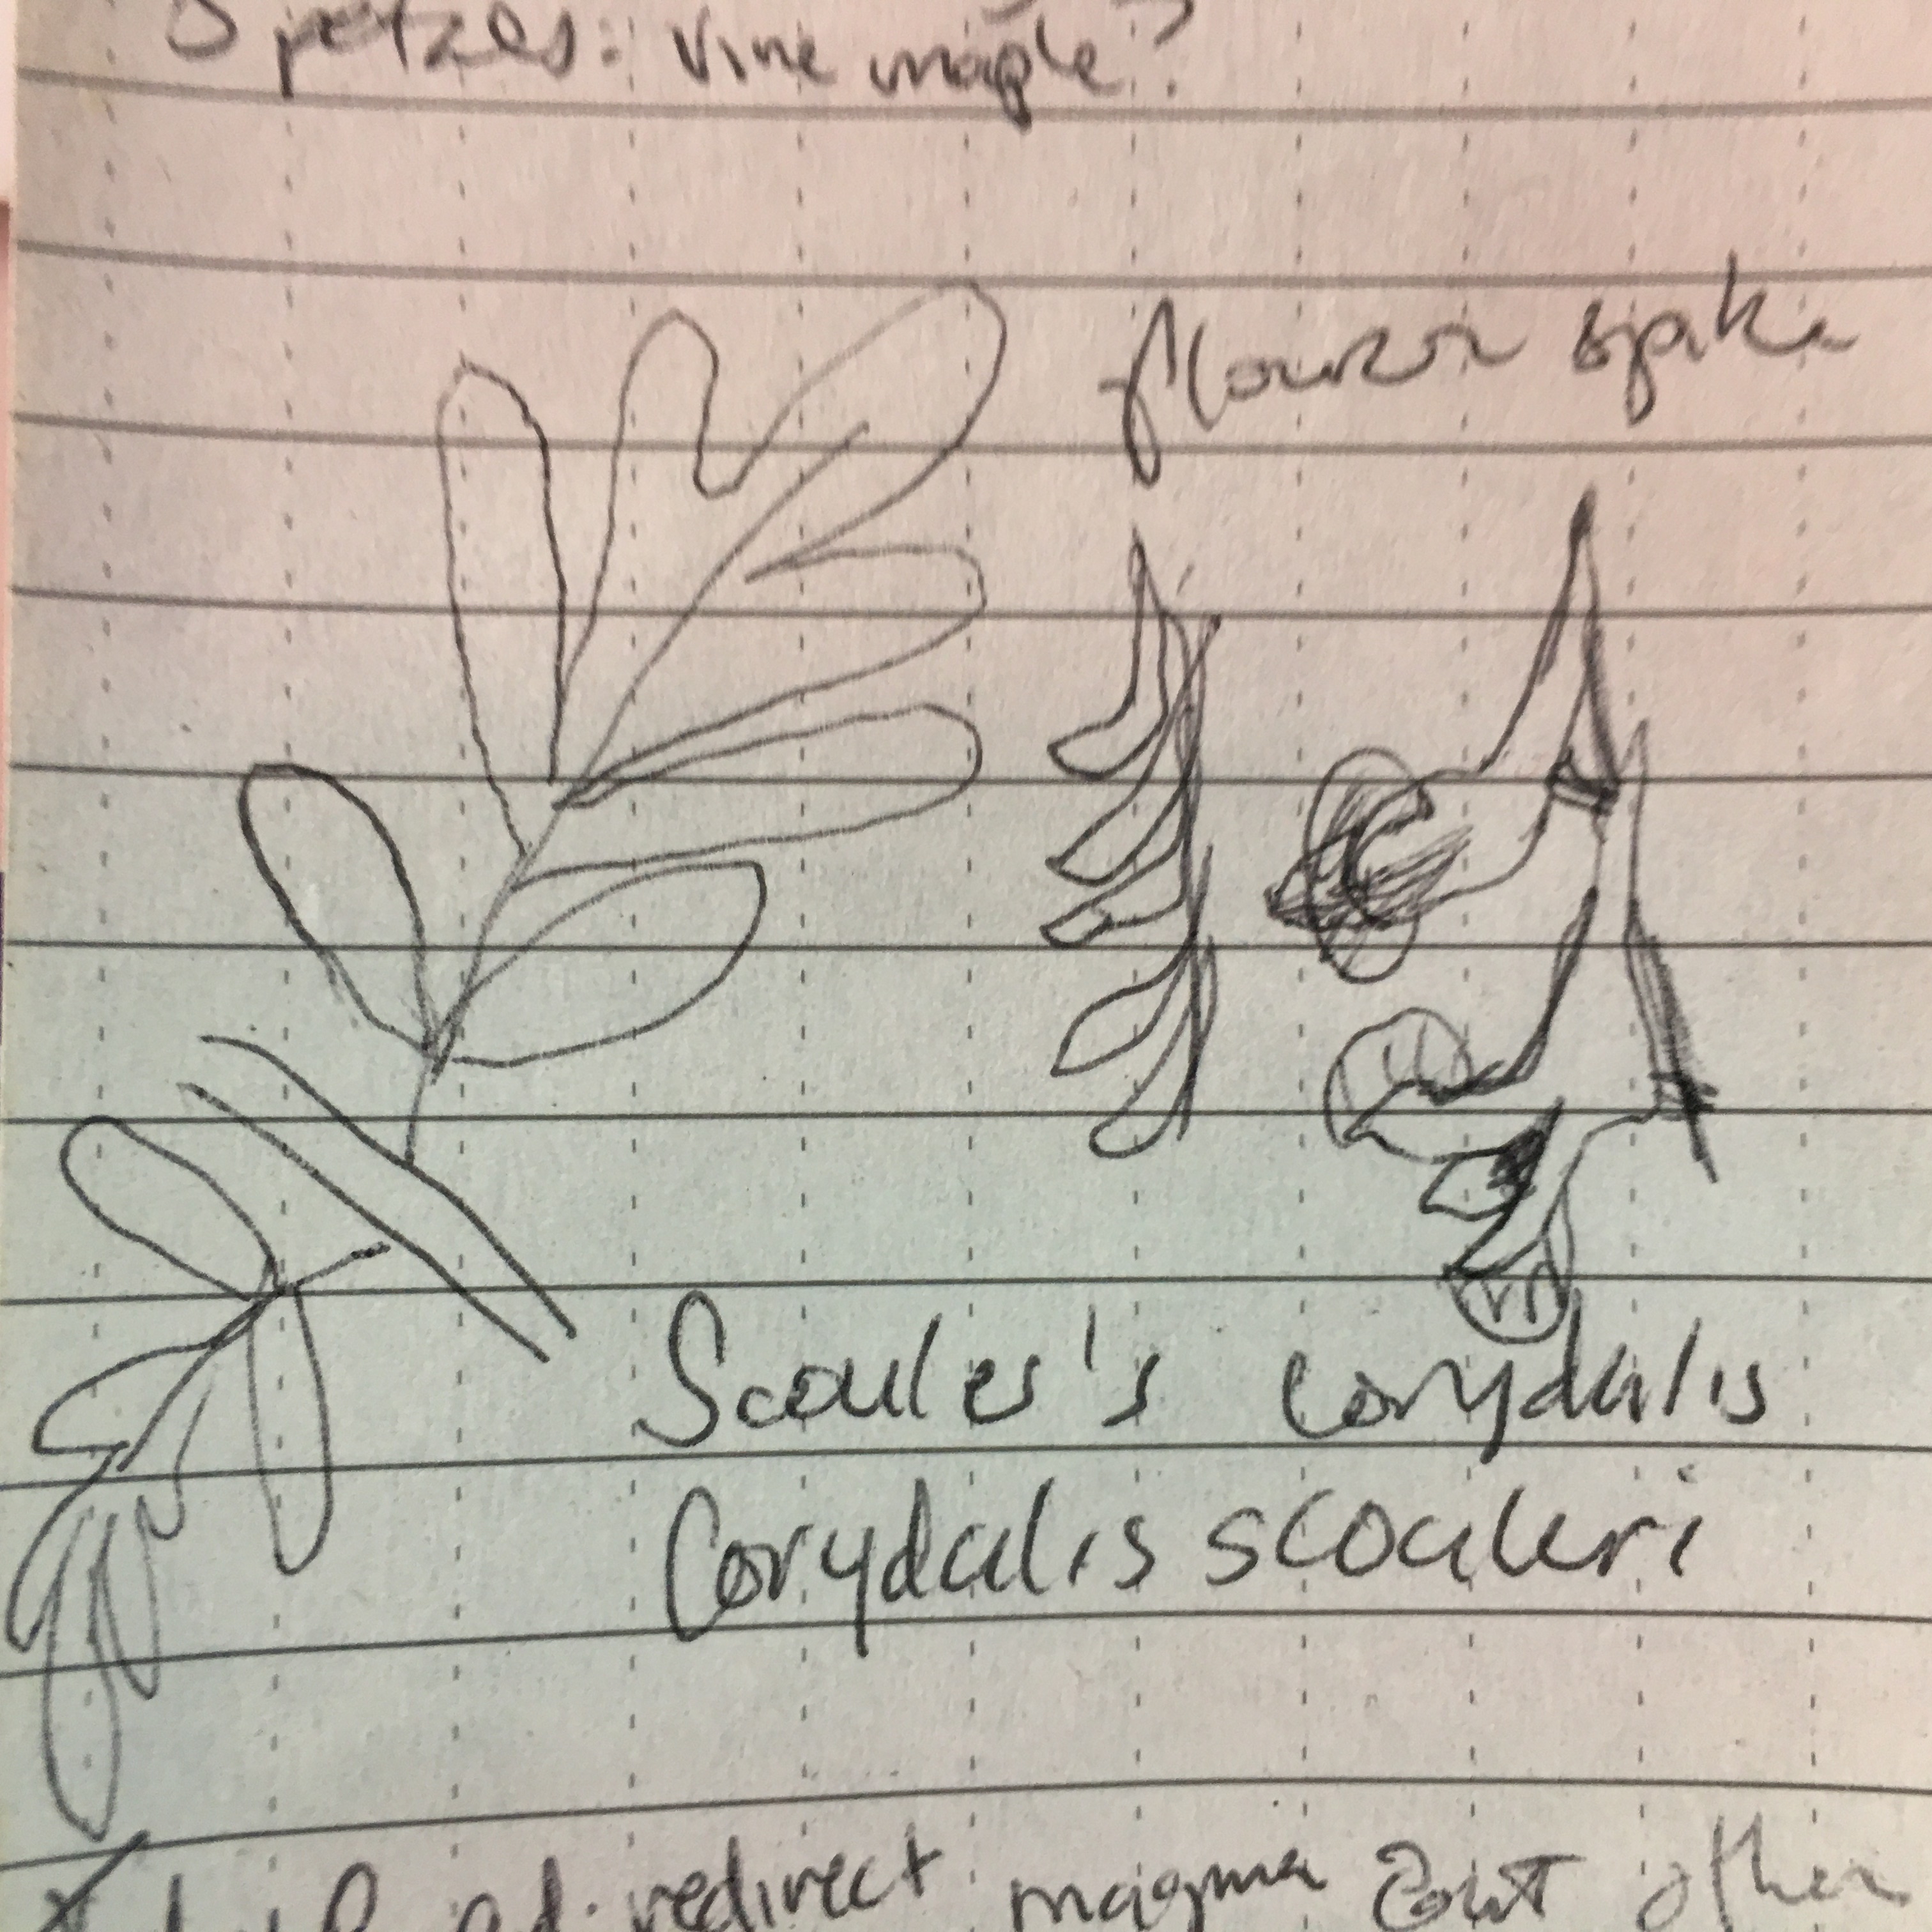
It’s been my goal to learn a couple new plants every time I go hiking. This week, one of my new plants is white-flowered hawkweed (Hieracium albiflorum), an aster with hairy leaves. It’s a good time of year to identify this particular plant because both its flowers and seeds are present, and reproductive structures really grease the wheel of plant identification. Below are my field sketches, and my macro photos of the flower and the seedhead (both quite small!). Identification source: Gilkey and Dennis dichotomous key.
Someone asked me recently how to learn the local plants. The answer is practice and time! I took three years of Mandarin language courses during grad school, and the process of learning to read and write Chinese characters is really similar to learning to identify plants. I learned to read and write by recognizing each character’s component strokes, then recognizing the component characters making up the new character, then recognizing whole multi-character words, then phrases, and so on. Much like the component strokes of a character, plants are identified by components such as leaf margins and petal structure, which eventually can be seen as one whole “character”. All of this takes a lot of effort, and repeatedly seeing the same plant species (reading the same “character”) many times helps. Using dichotomous keys can be mystifying and full of jargon at first. I got started with a photographic guidebook and then moved on to text-only dichotomous keys.
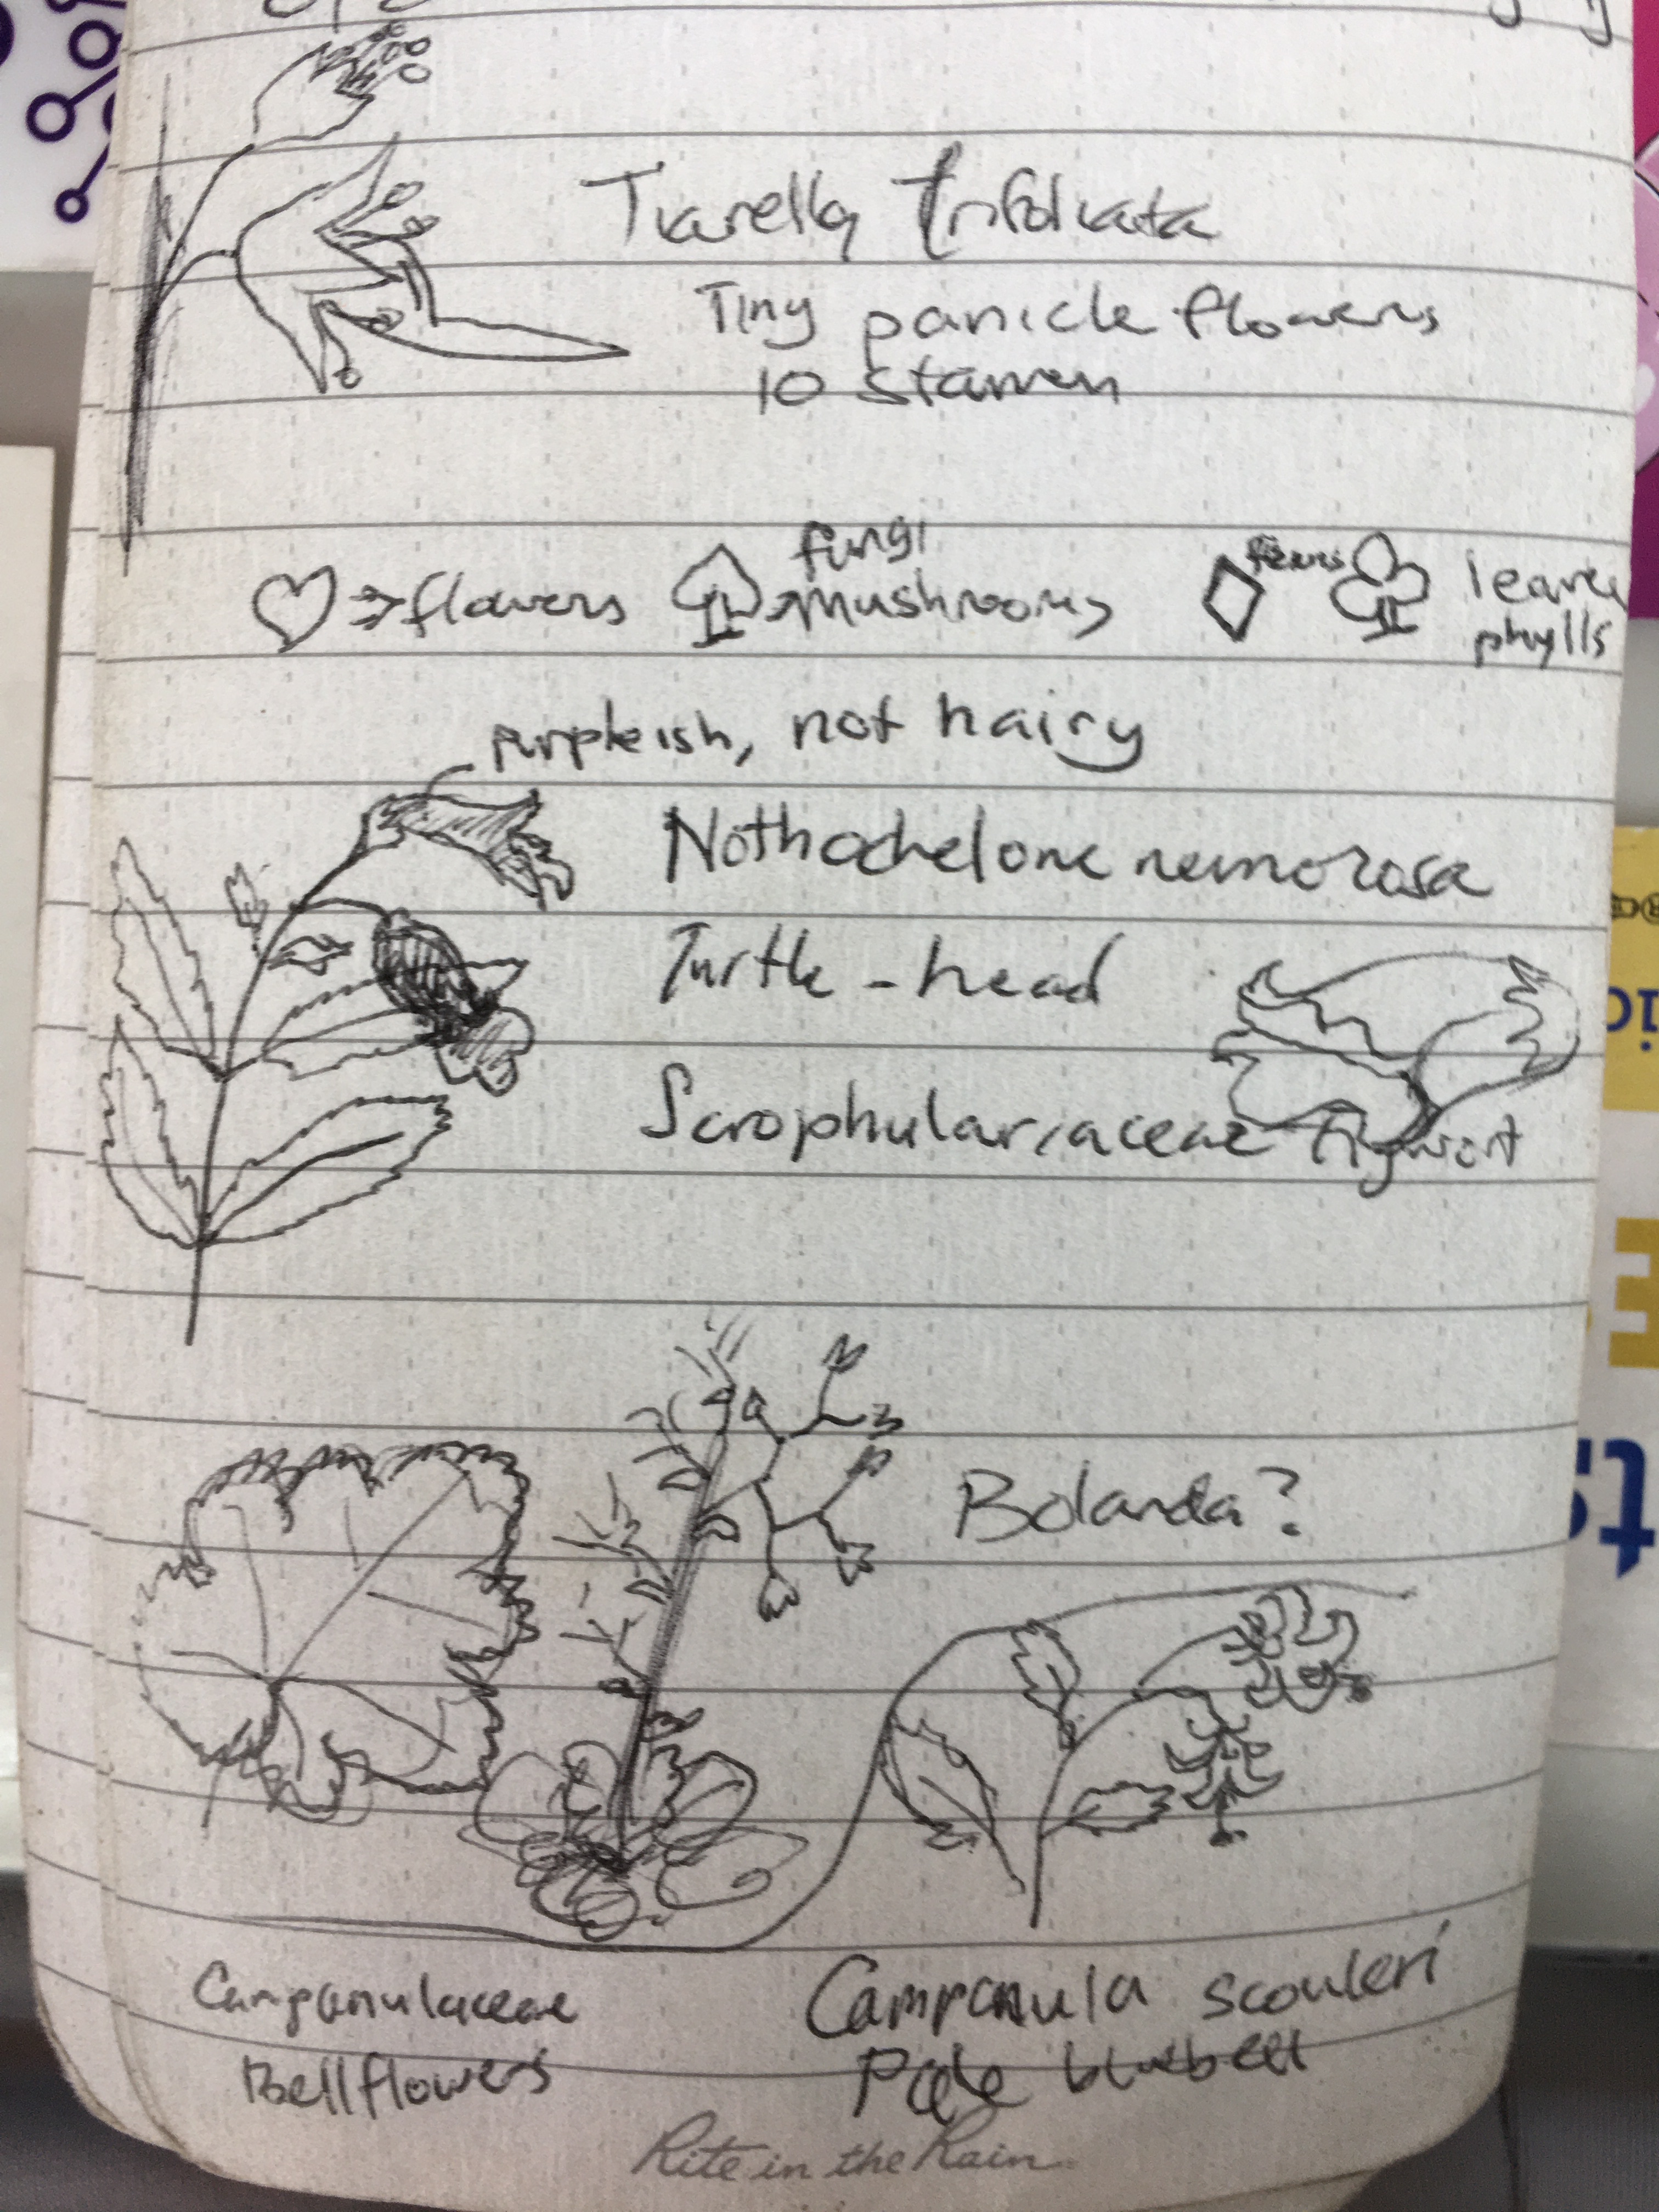
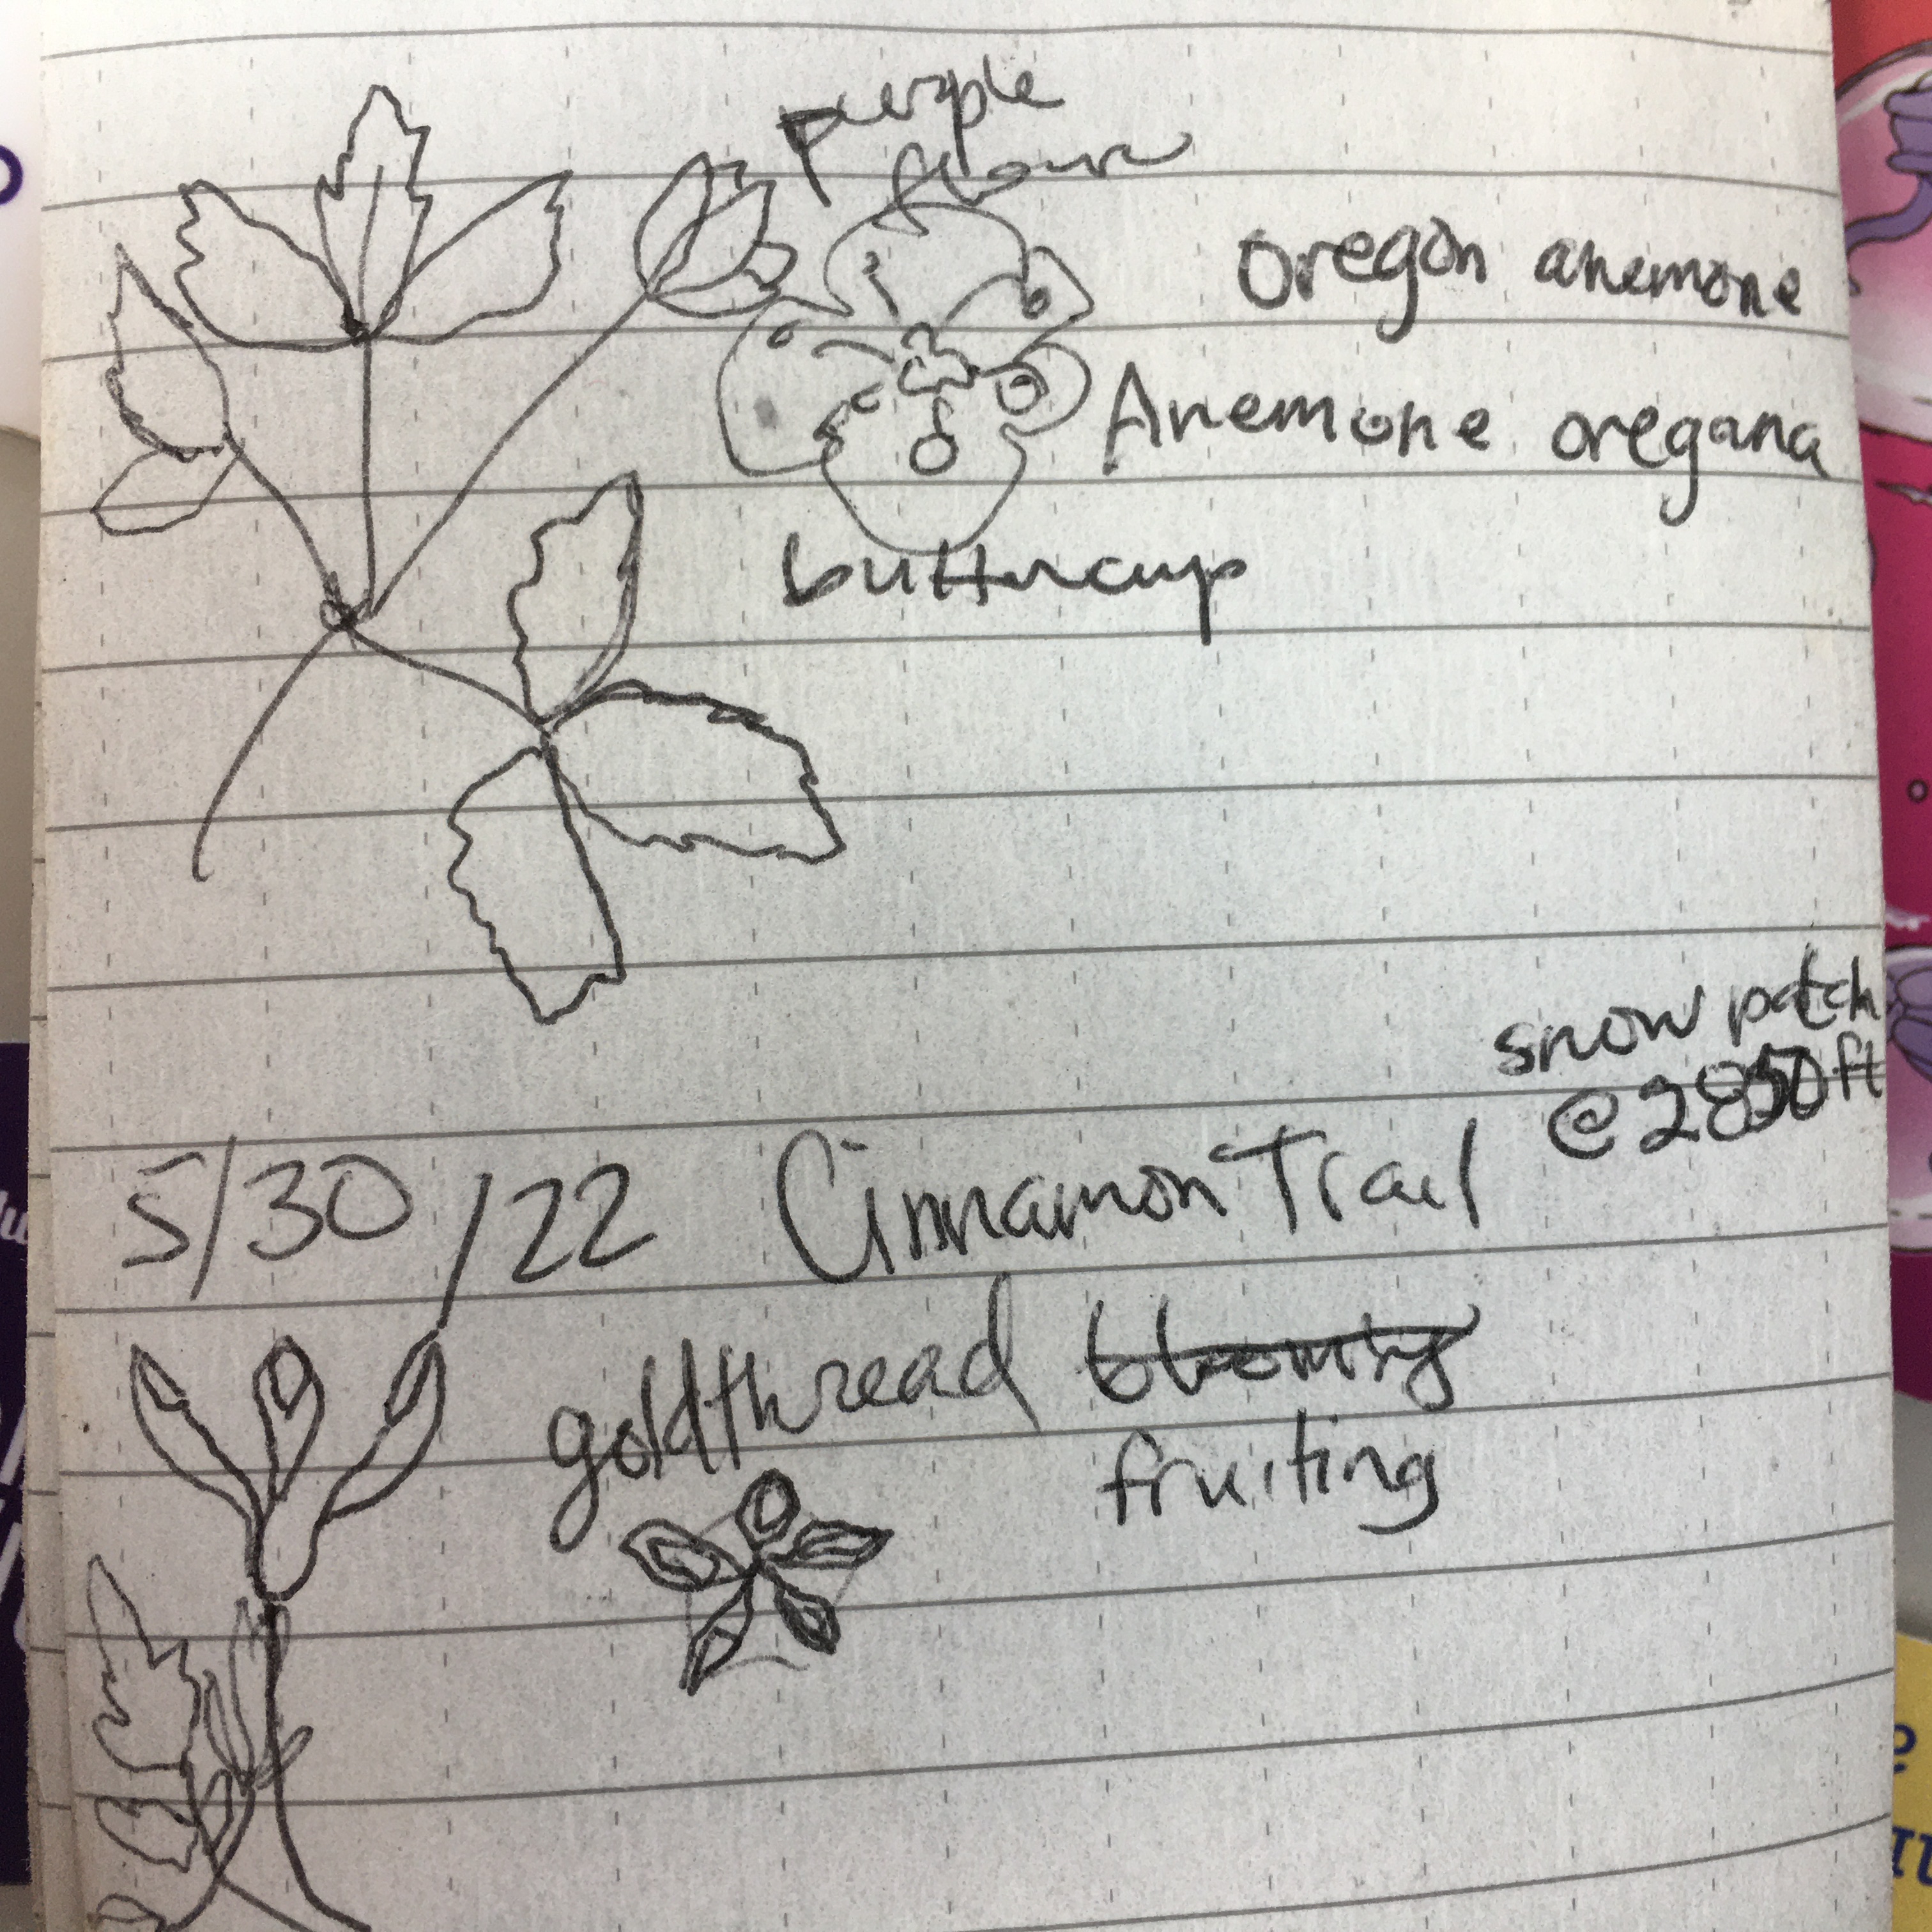
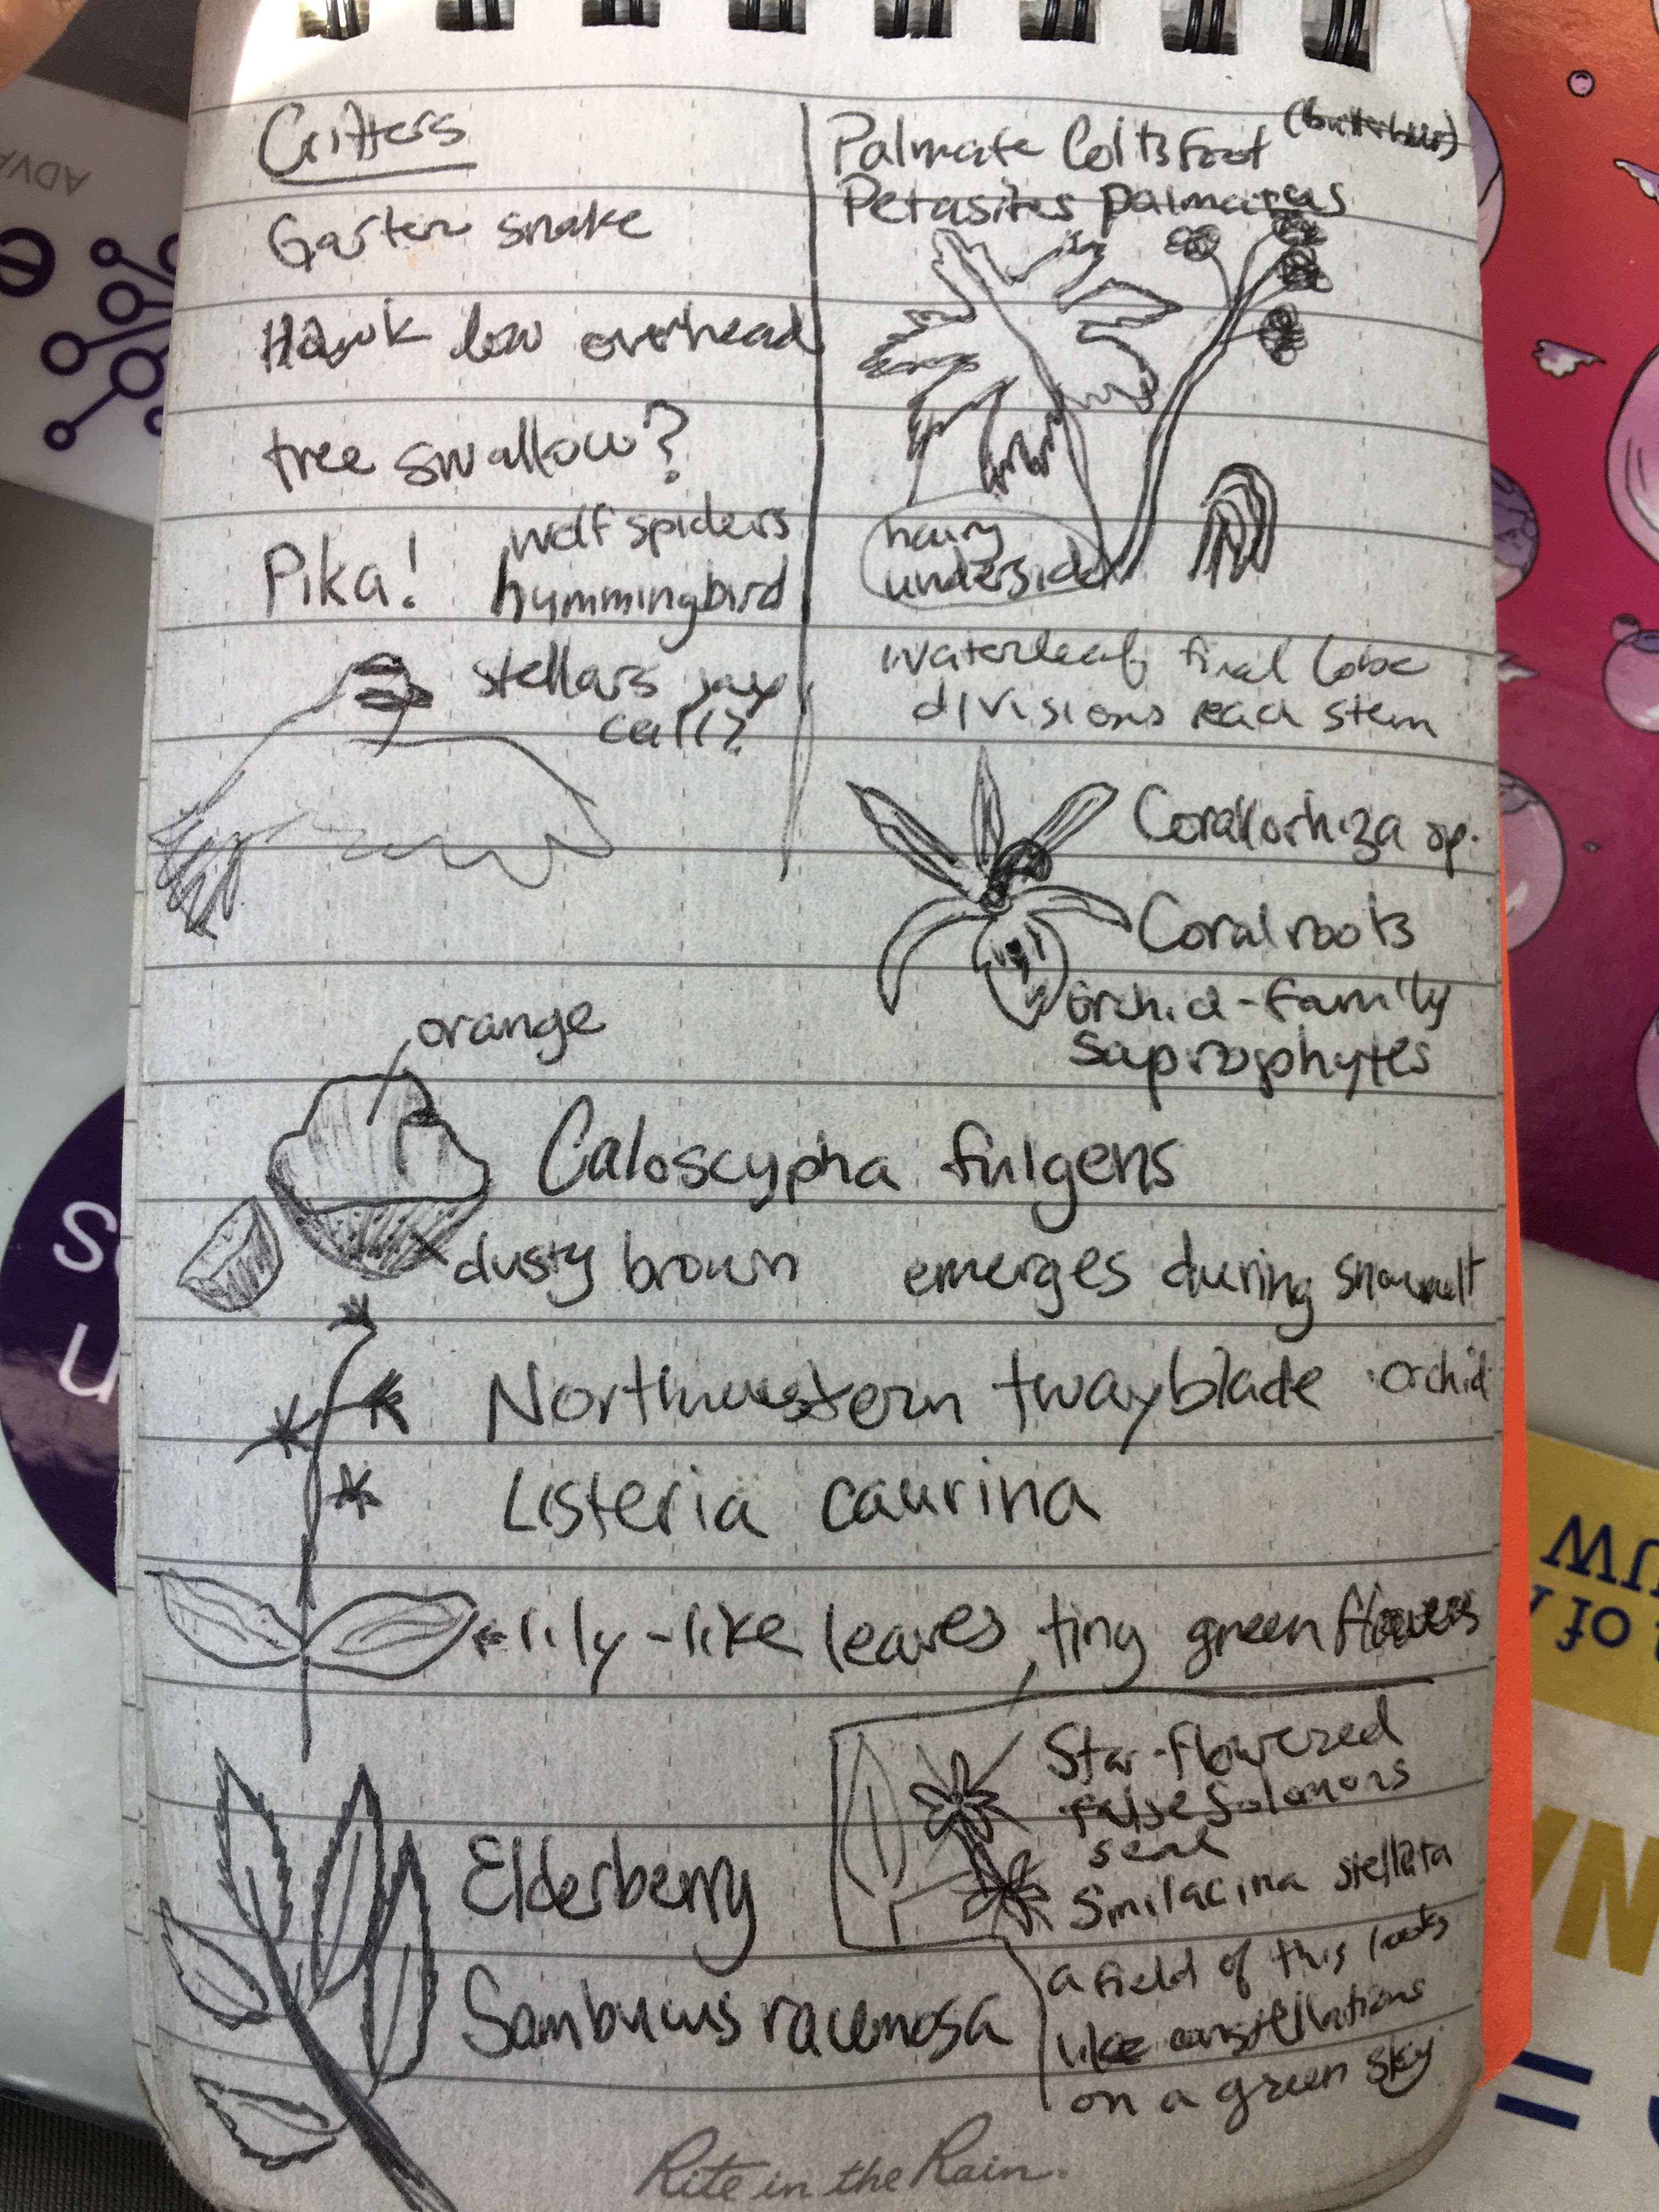
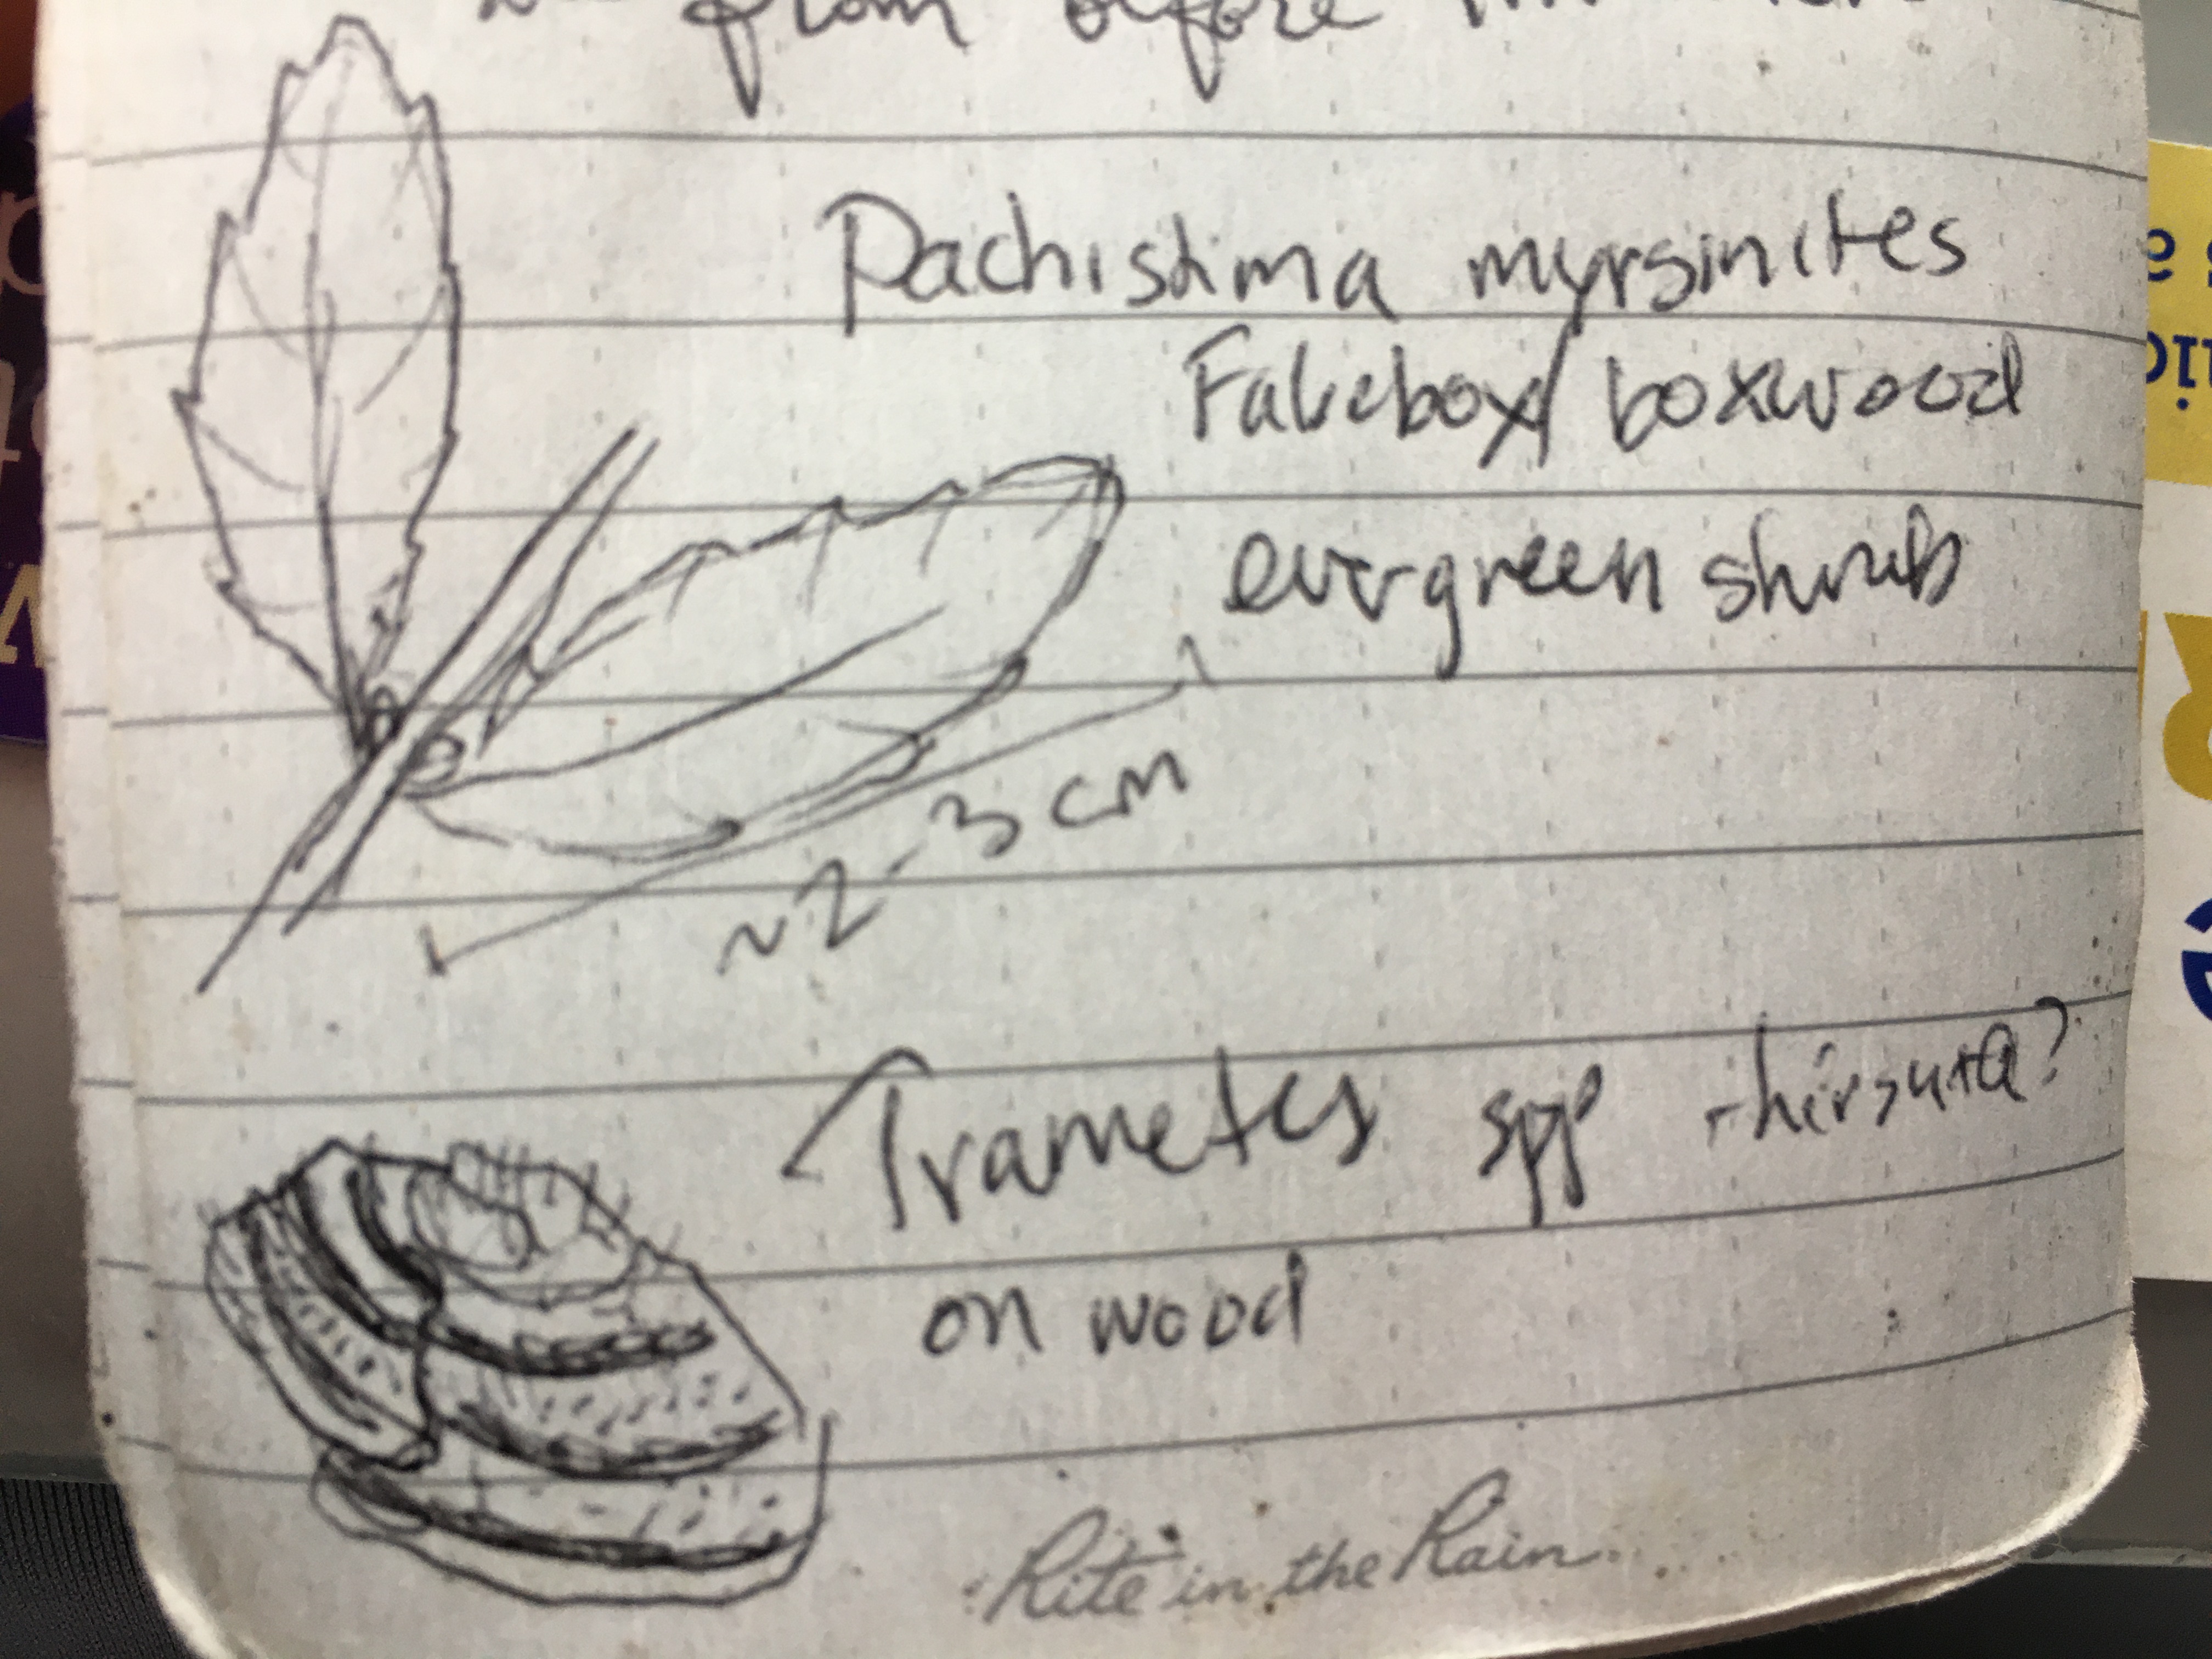
As an example of my plant-learning process, I am posting below some excerpts from my hiking journal. Over the last several years, I have learned bit by bit what the component characteristics of different plant (and some fungi) taxa look and feel and smell and taste like, gradually expanding the number of plants I recognize. Physically writing and drawing out what I experience has helped me commit these characteristics to memory. Identifying plants really is a whole-body experience and I get a lot of satisfaction from even just identifying what family a plant is in; it makes me feel like I am surrounded by familiar friends out on my hikes. I hope you enjoy perusing my field sketches!
I recently completed a second AmeriCorps term with the National Park Service, working in the Ocean and Coastal Resources branch. My task was to research ballast water transport of invasive species and report on ways the parks might respond to the issue.
Humans transport organisms all over the world in a variety of ways, from muddy boots to bugs tucked in produce shipments. One prolific vector is ballast water: water that vessels – often very large cargo ships – use to maintain buoyancy in different voyage and cargo conditions. Vessels typically uptake ballast water straight from the ocean and all the little aquatic organisms in it come along for the ride. This includes critters ranging from human pathogens like E. coli to microscopic crab larvae. Ballast water has introduced some very high-profile invasive species to new locales, such as the zebra mussel to the Great Lakes.
Luckily, we’ve developed multiple treatment strategies for reducing the organism load in ballast water, and increasing levels of regulation mean that invasive species transport will continue to decrease over time. (Of course, it’s another one of those environmental issues where you think “if only we started this fifty years ago instead of twenty…”, but I try not to dwell on that too much.)
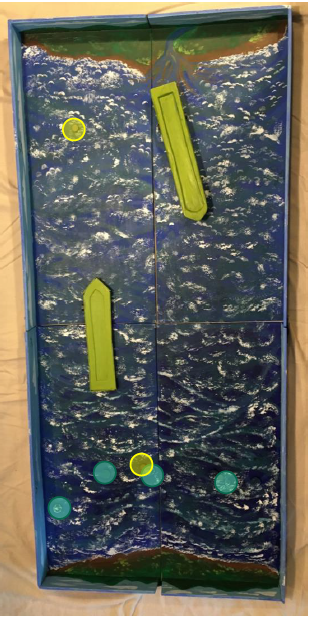
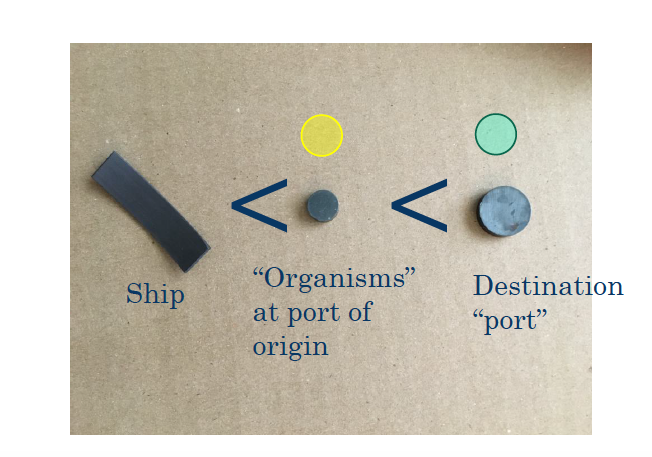
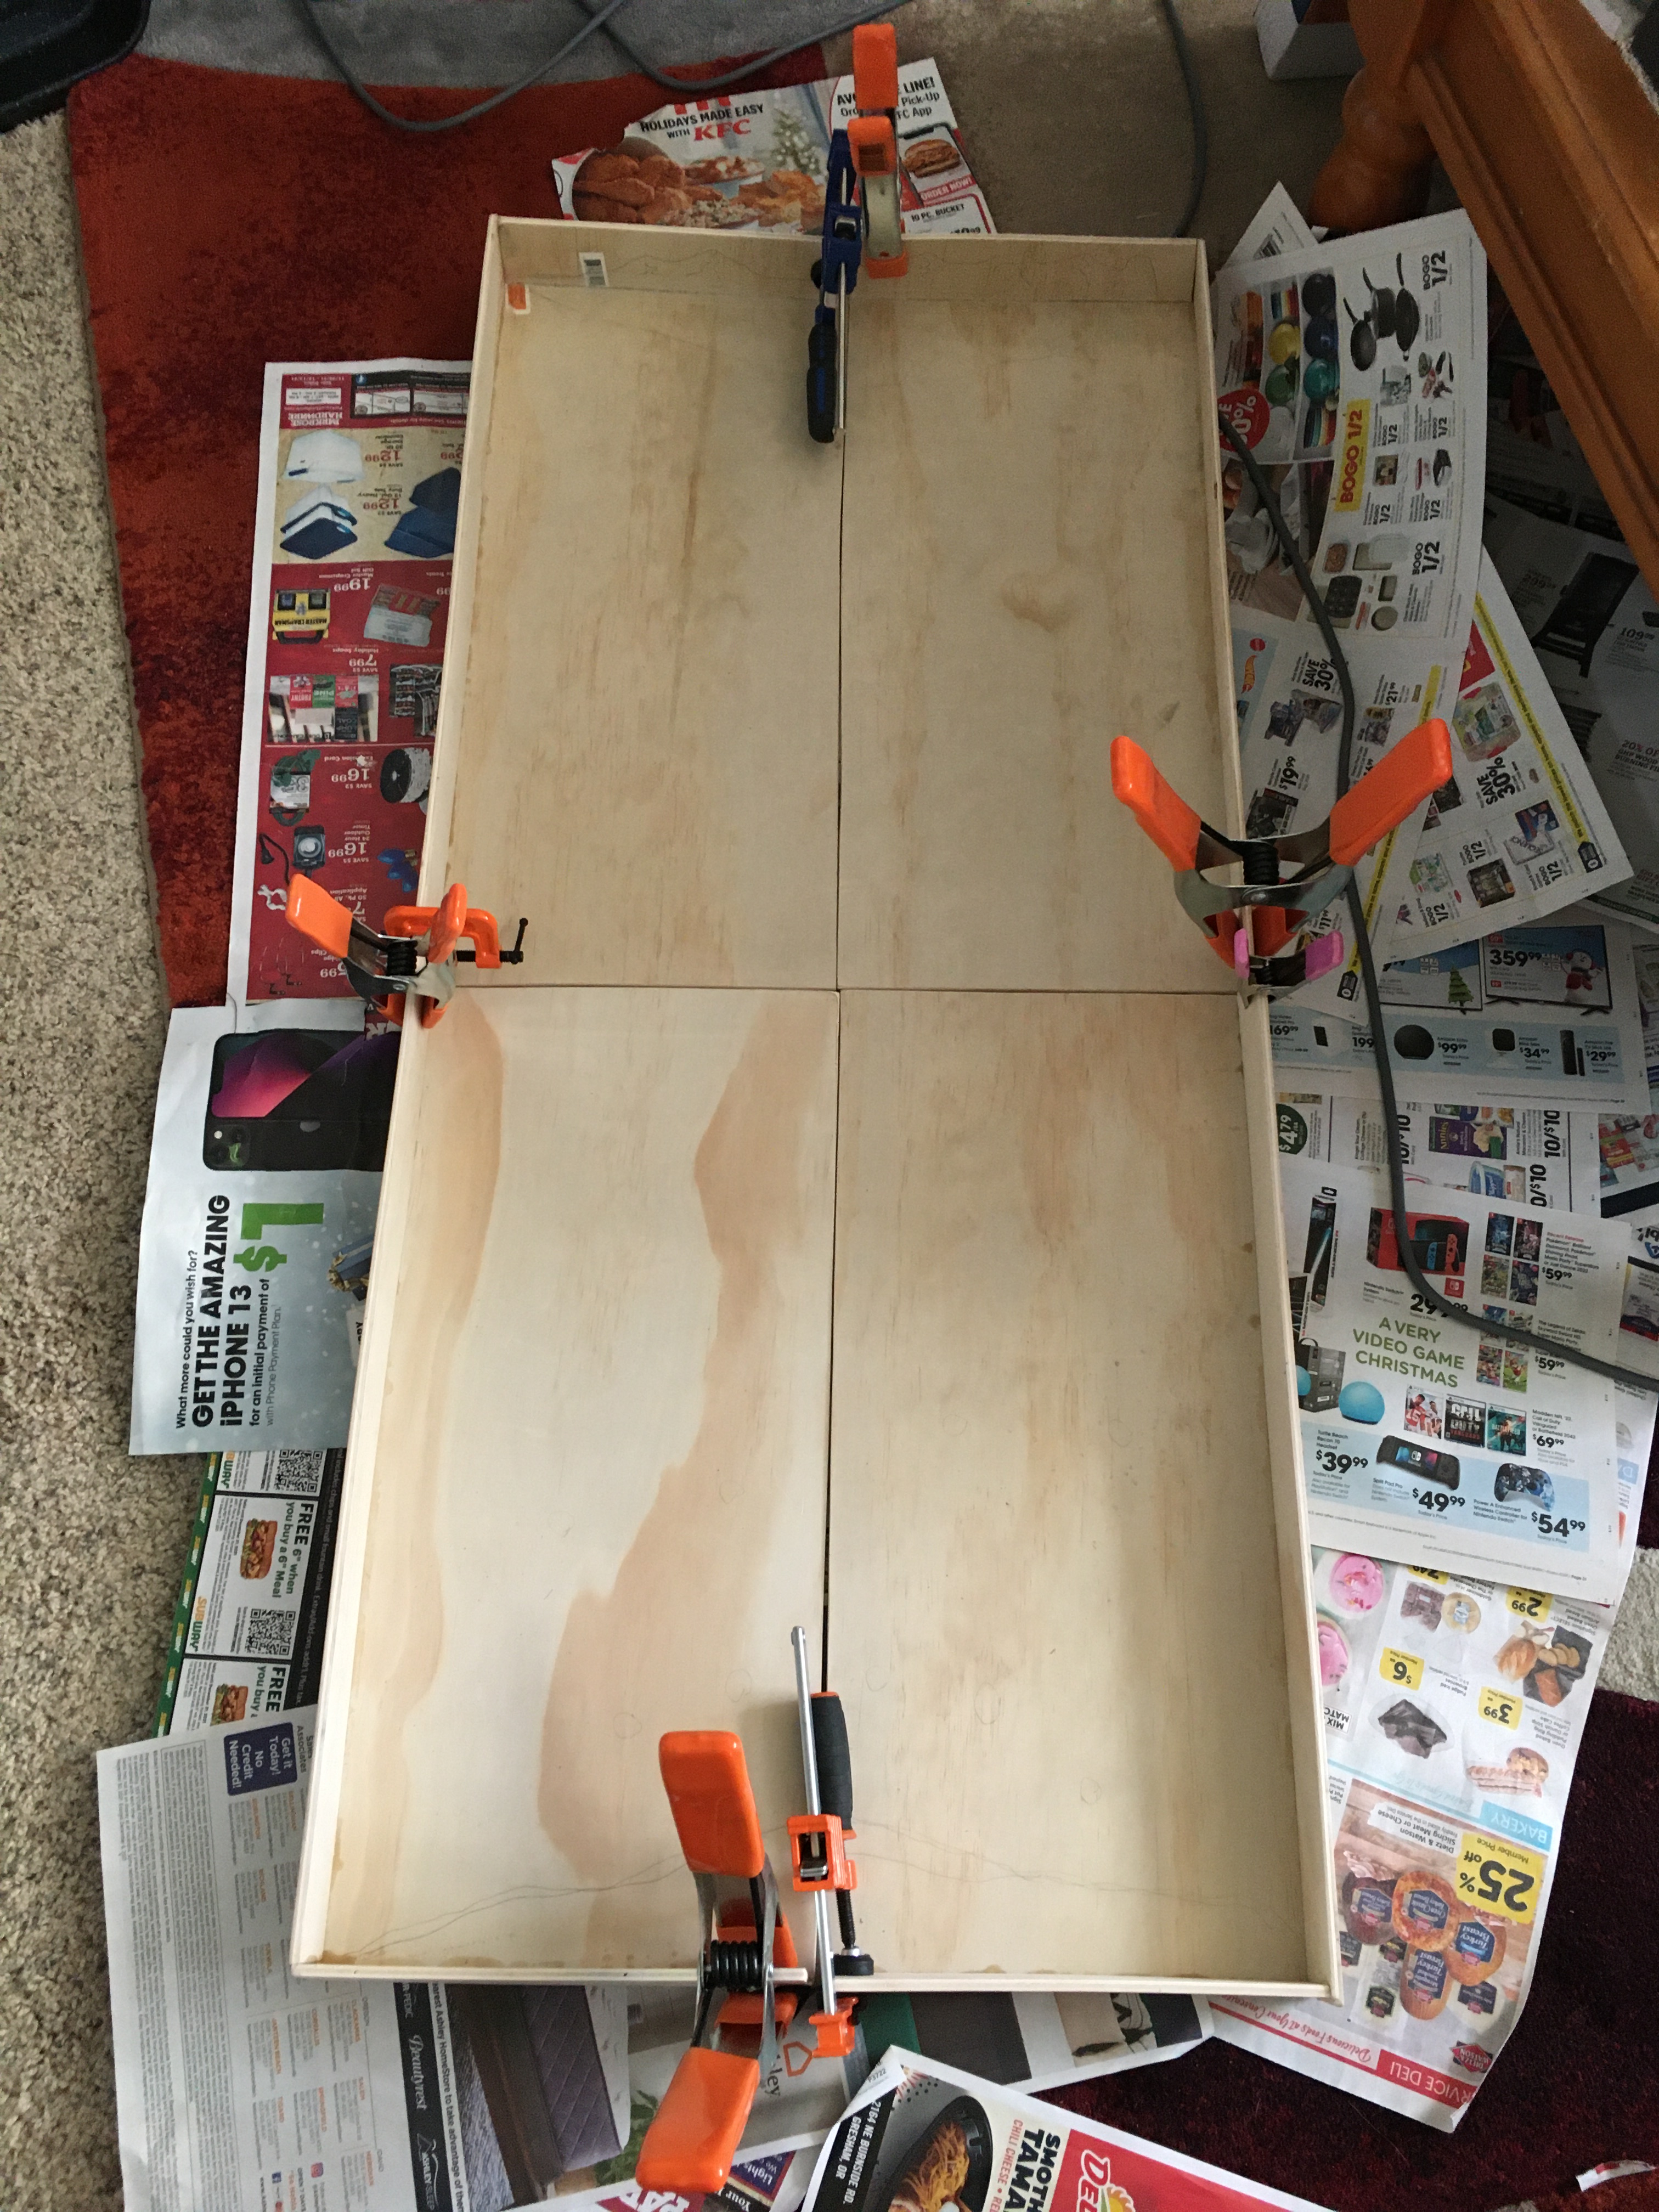
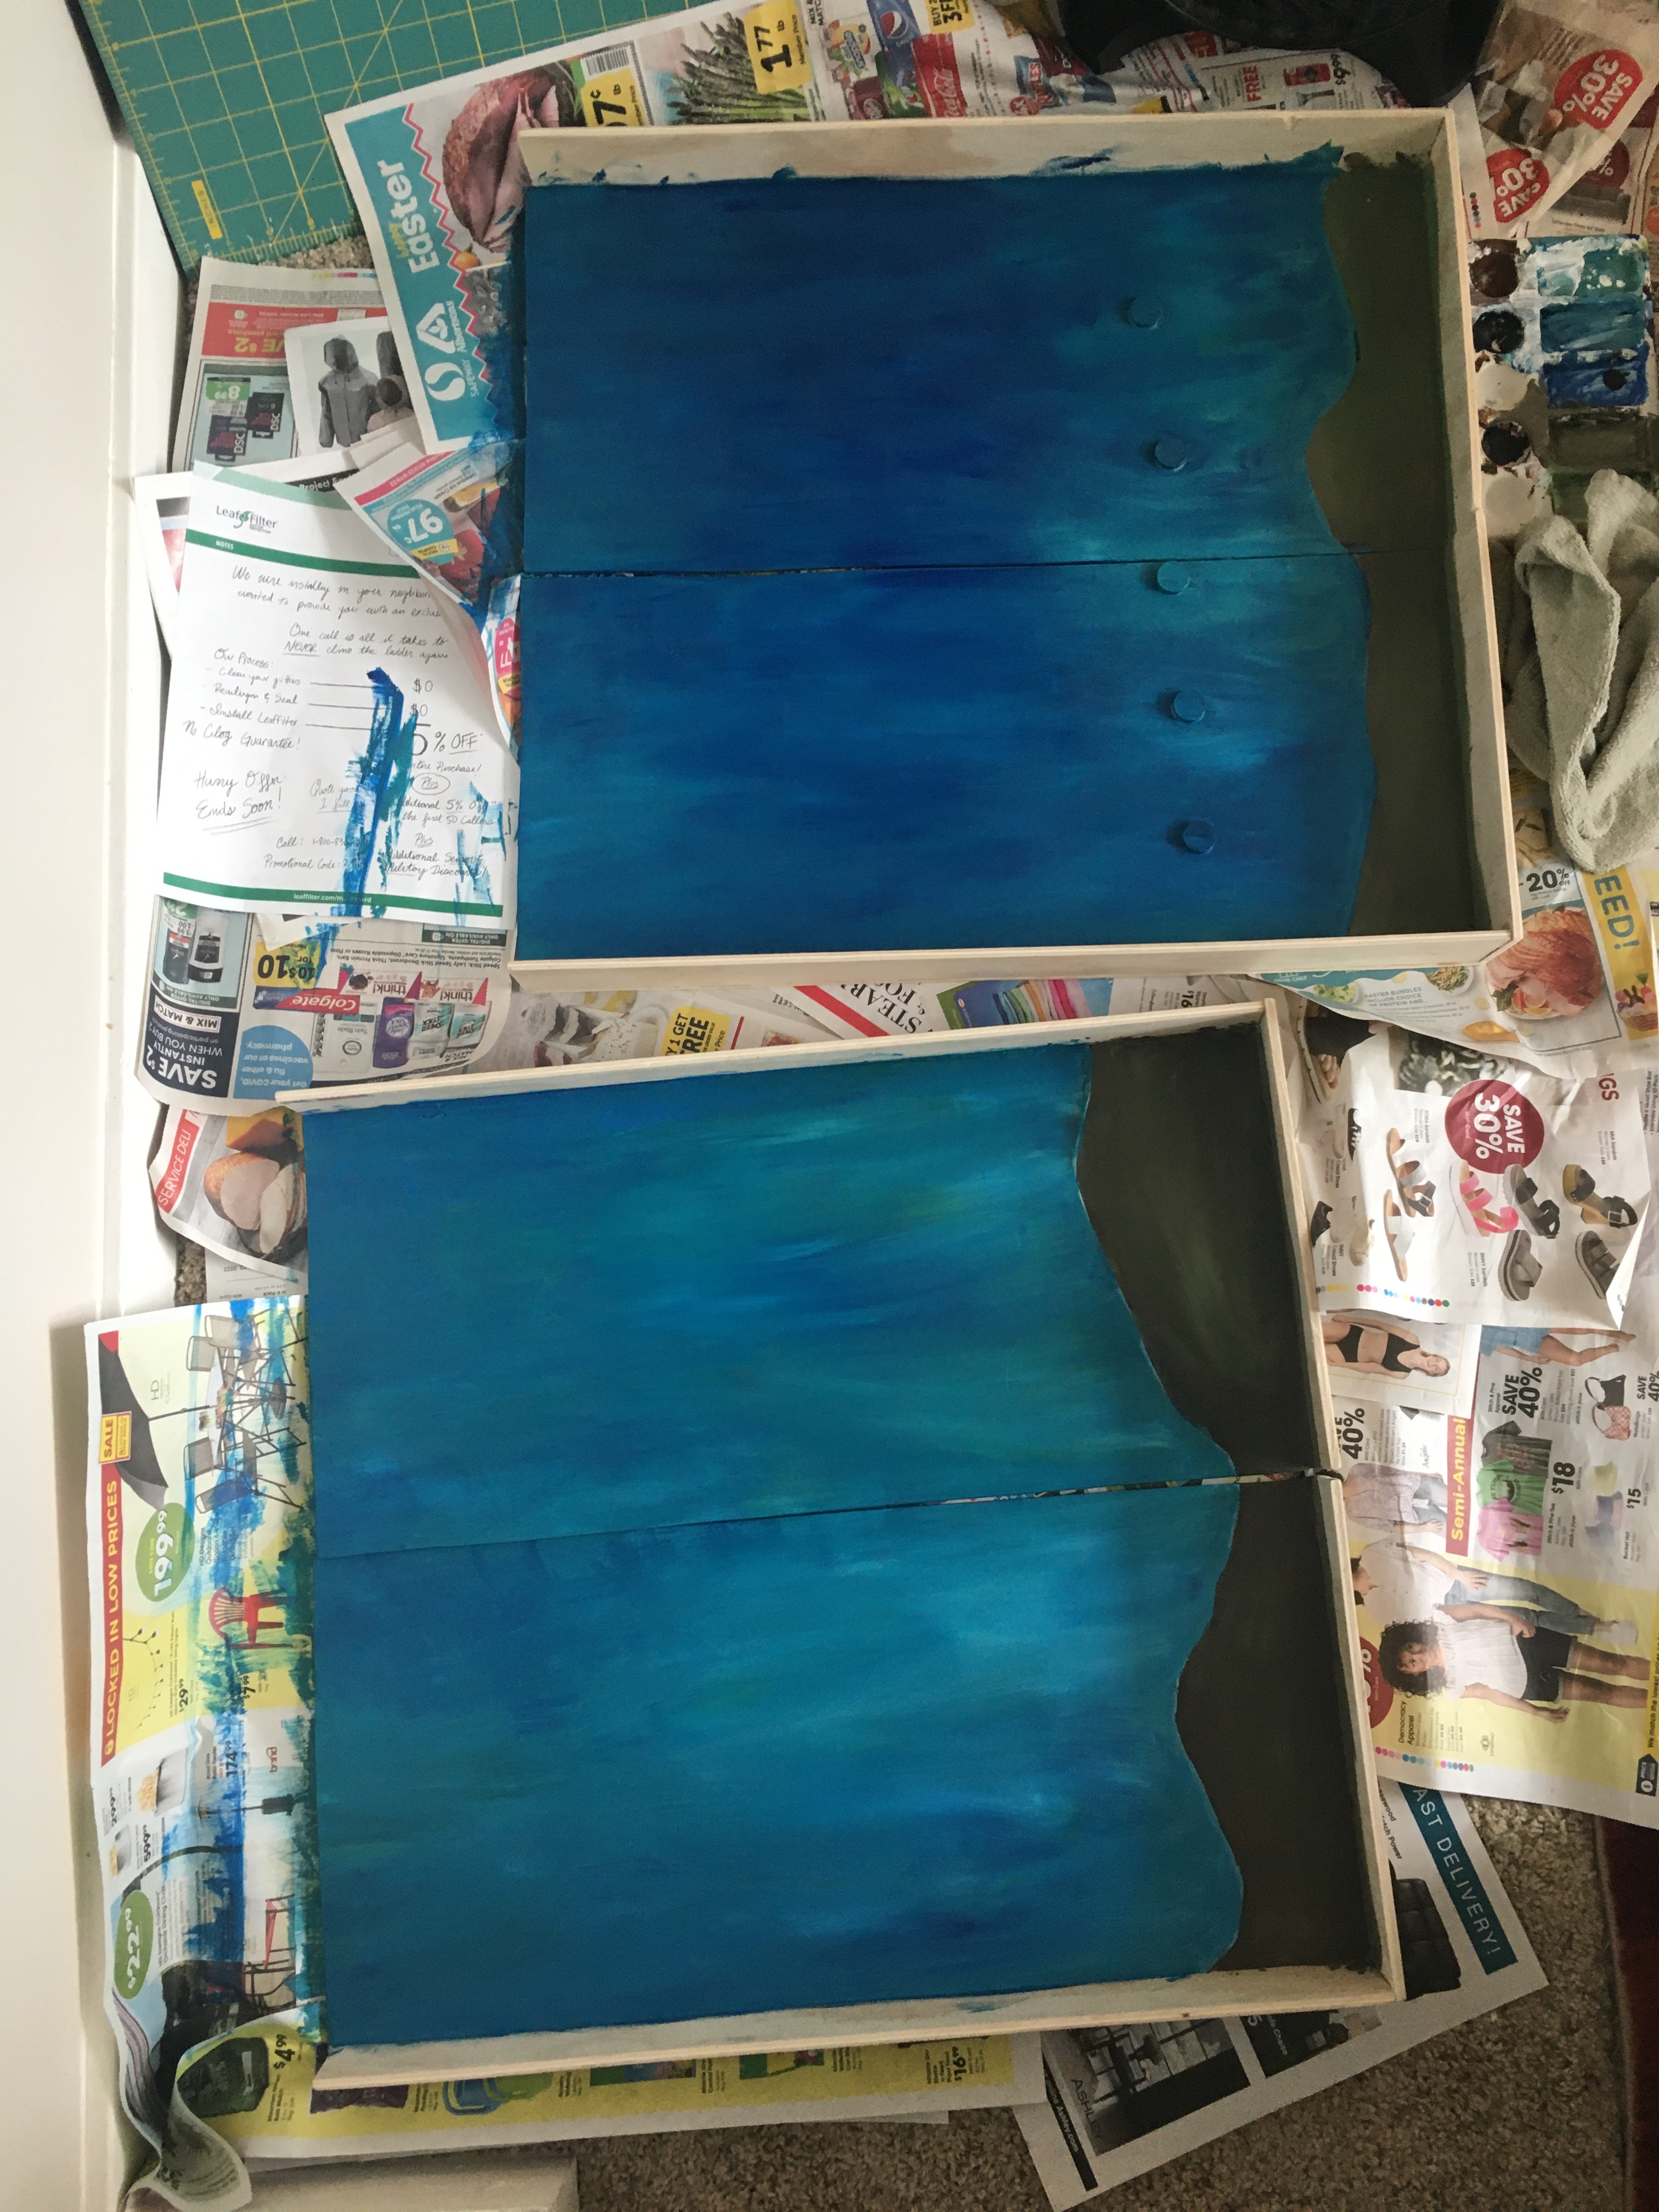
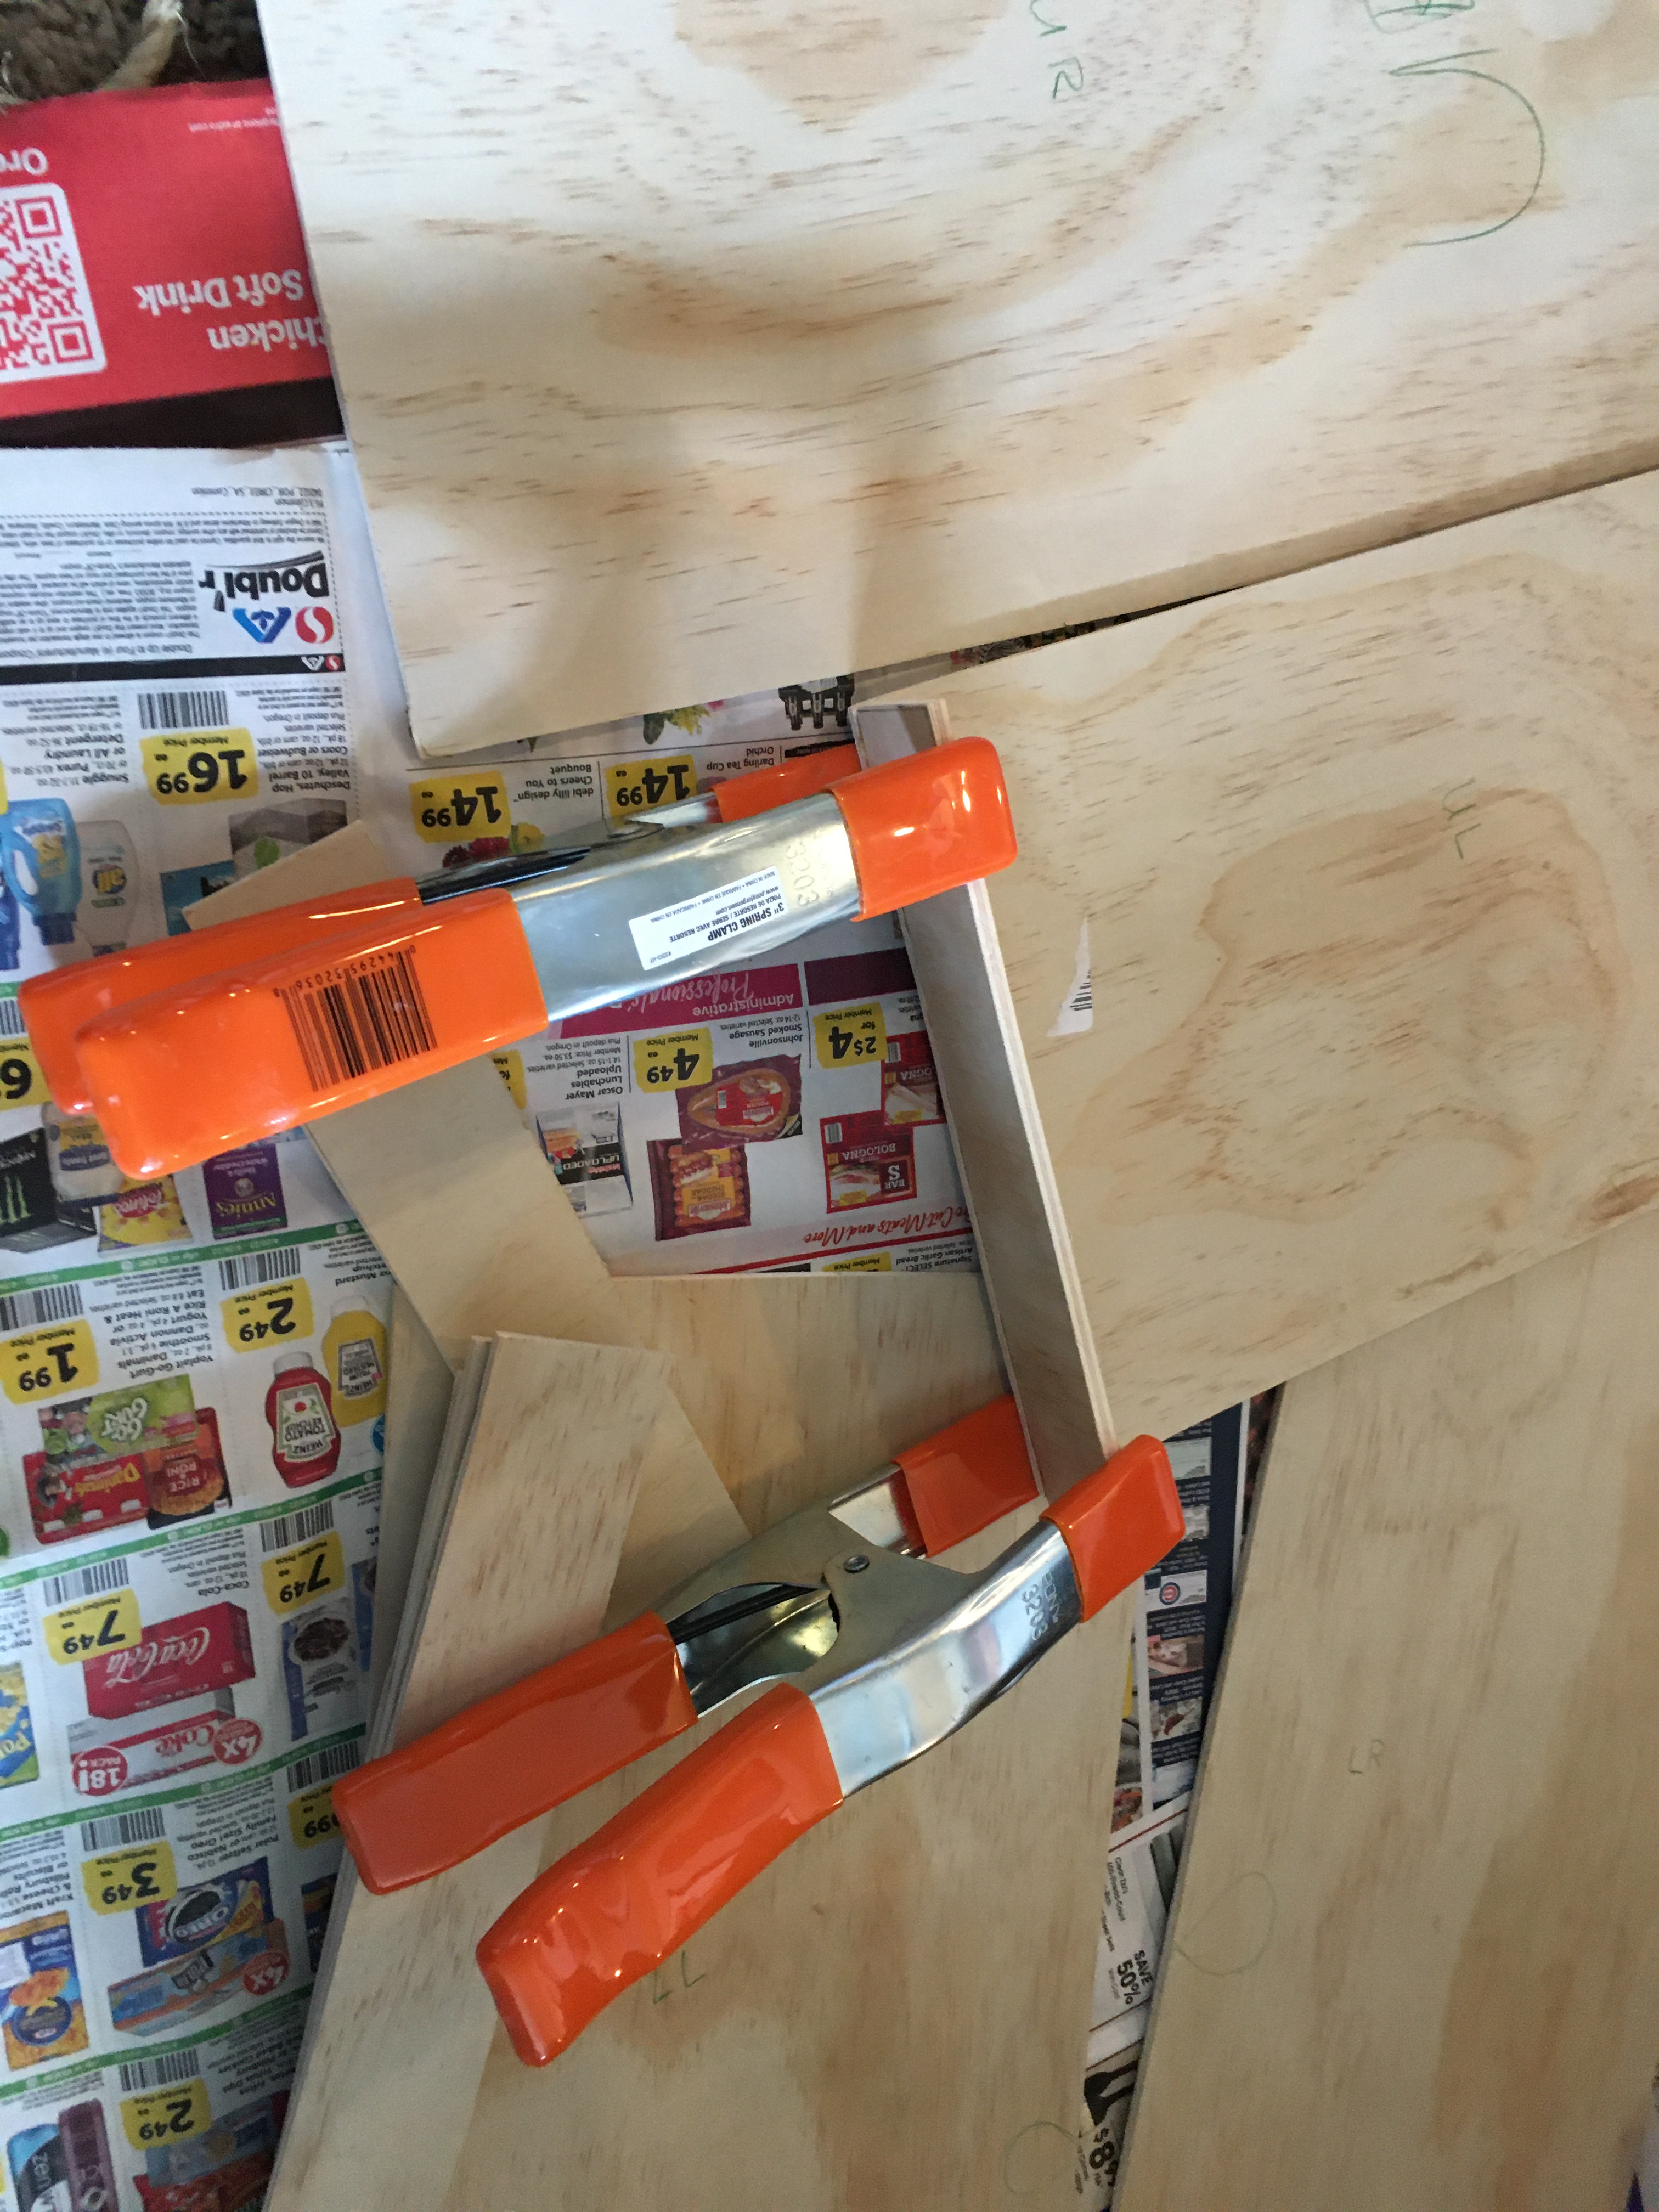
For the outreach component of my internship, I developed a hands-on activity demonstrating how human activity moves organisms around the world. The activity is simple: a guest pushes a magnetic model boat across the ocean, and it picks up magnetic organisms. When the boat reaches the opposite shore, stronger magnets pull the “organisms” off the boat, representing the introduction of a species to a new location.
Finally, in order to demonstrate that it is possible to prevent species introduction, I included a purple magnetic wand to represent the use of ultraviolet light to disinfect ballast water.
Activity participants can remove organisms with a “UV wand”.
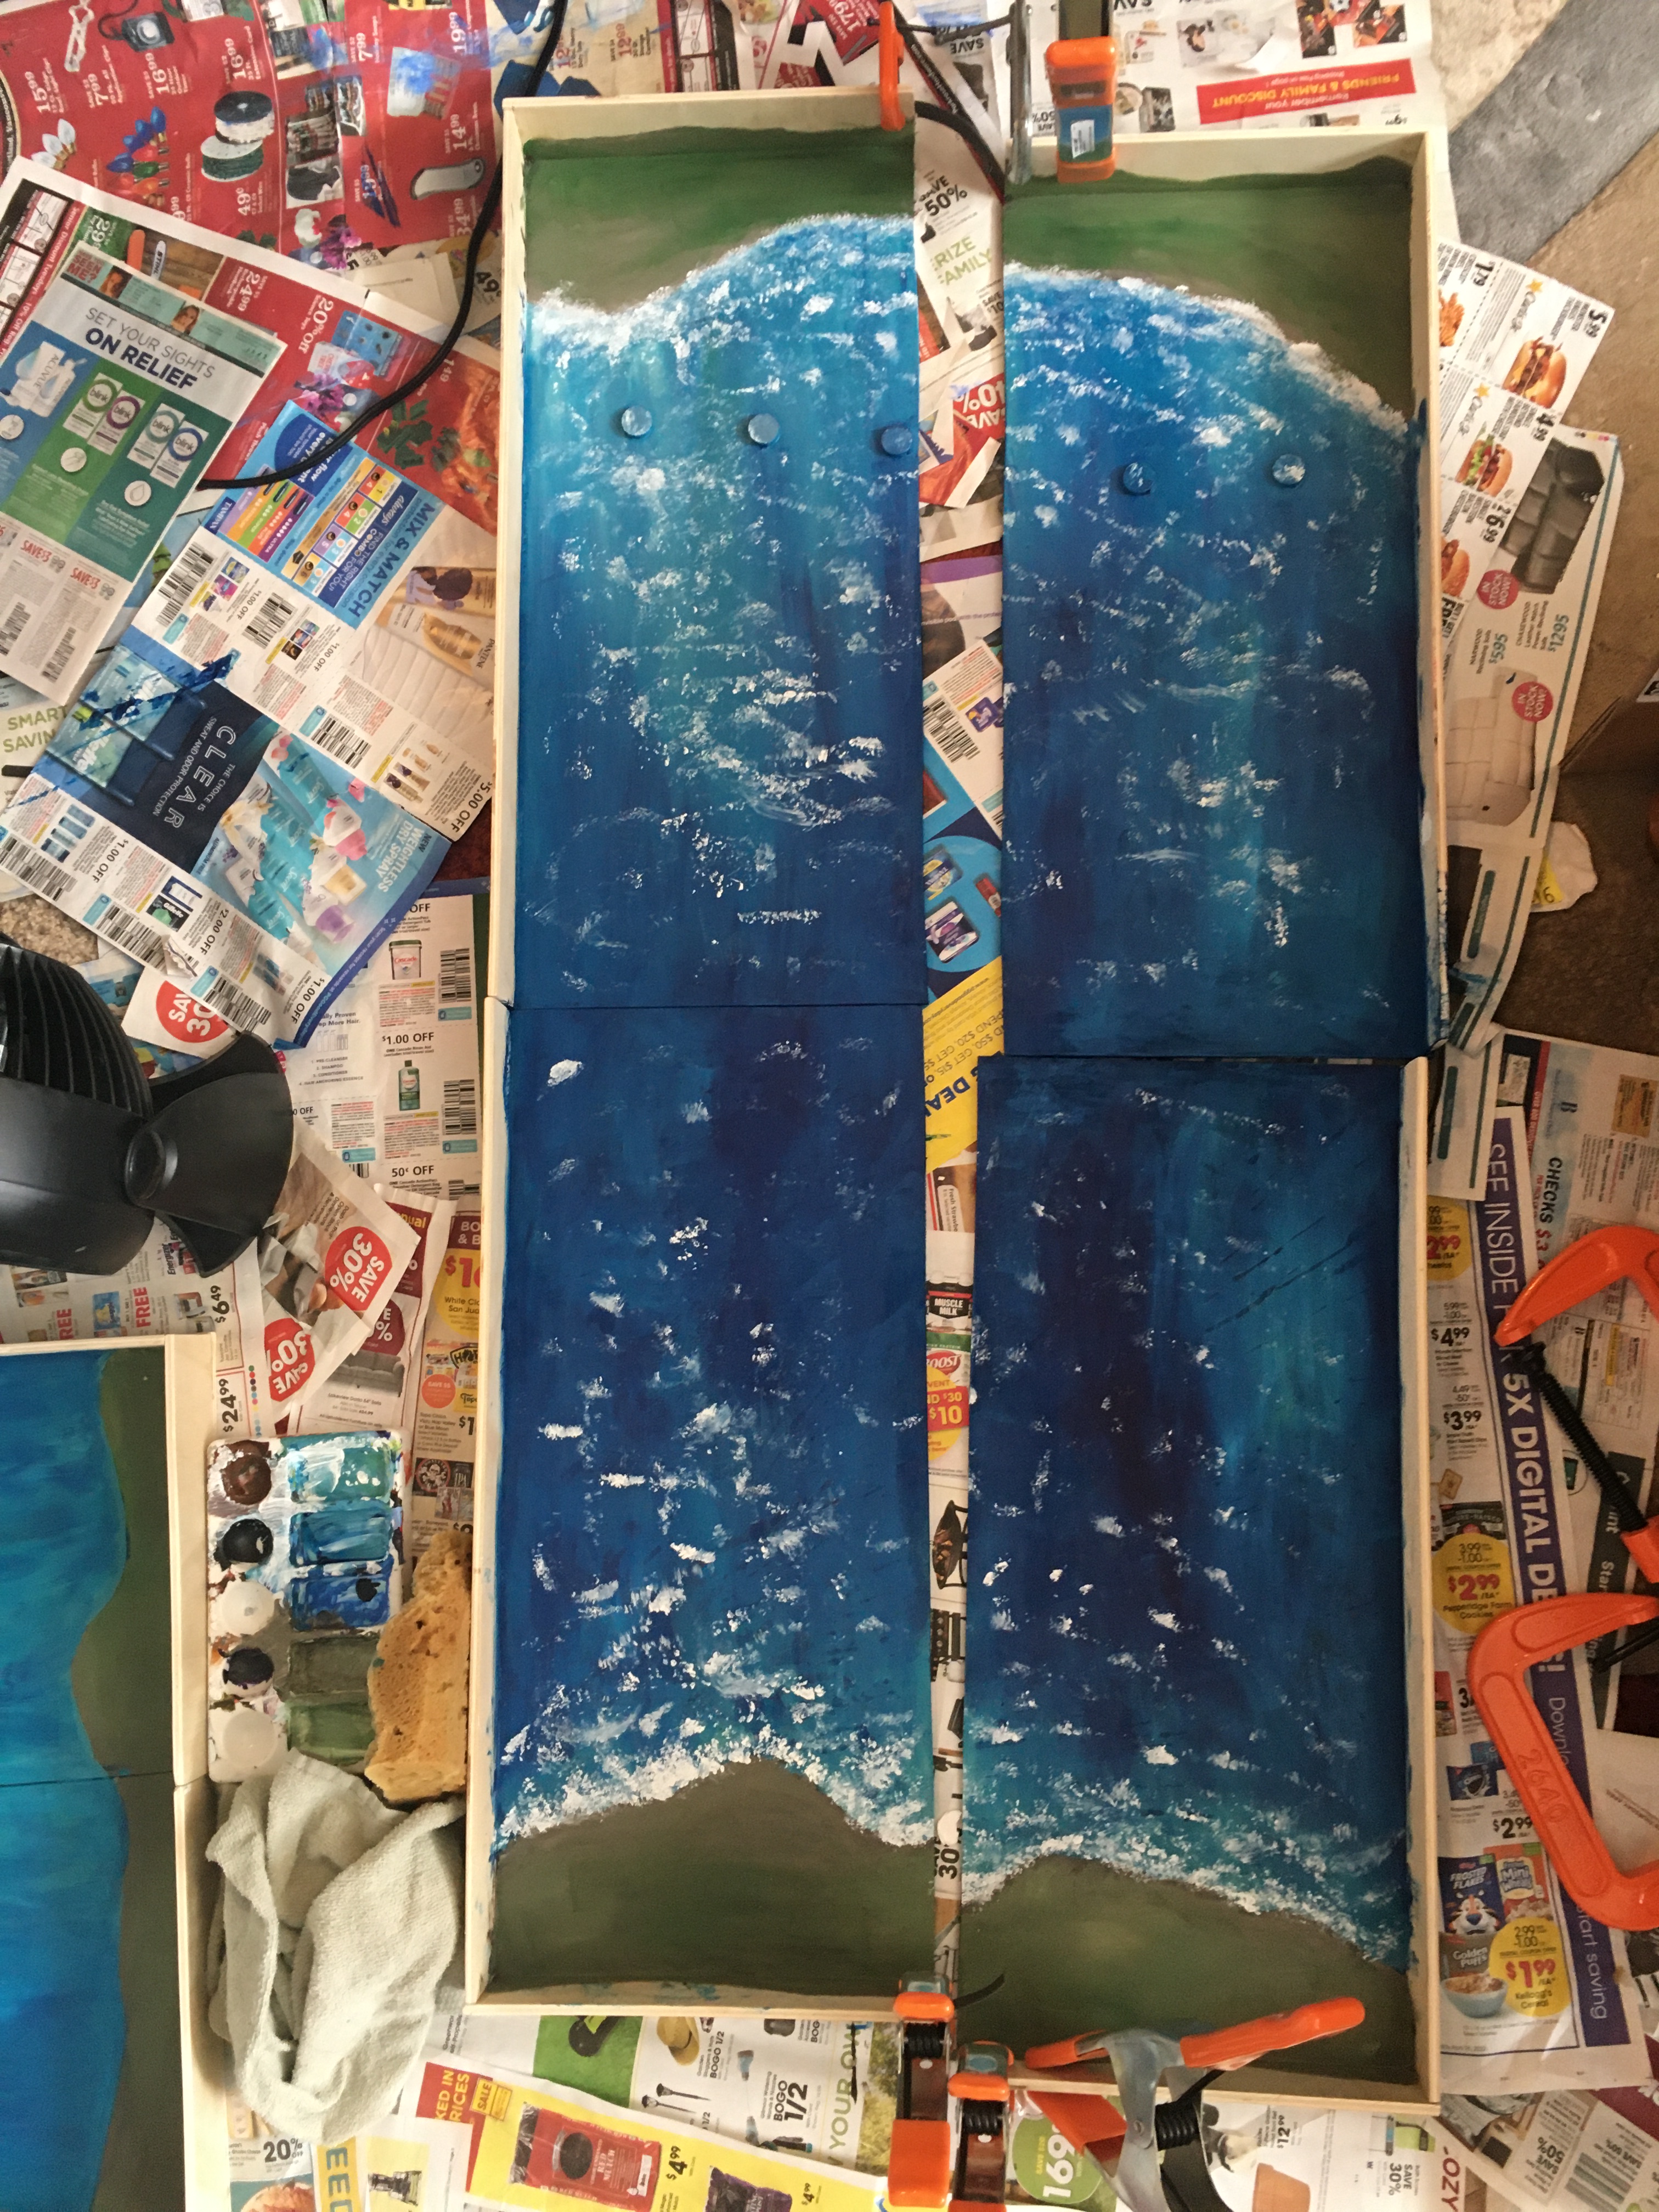
I made three of these activities (in-progress shots below) and they’ve been shipped out for use at Isle Royale National Park and Indiana Dunes National Park. Maybe someday you’ll encounter them out there!
Warning: there are up-close pictures of spiders in this post.
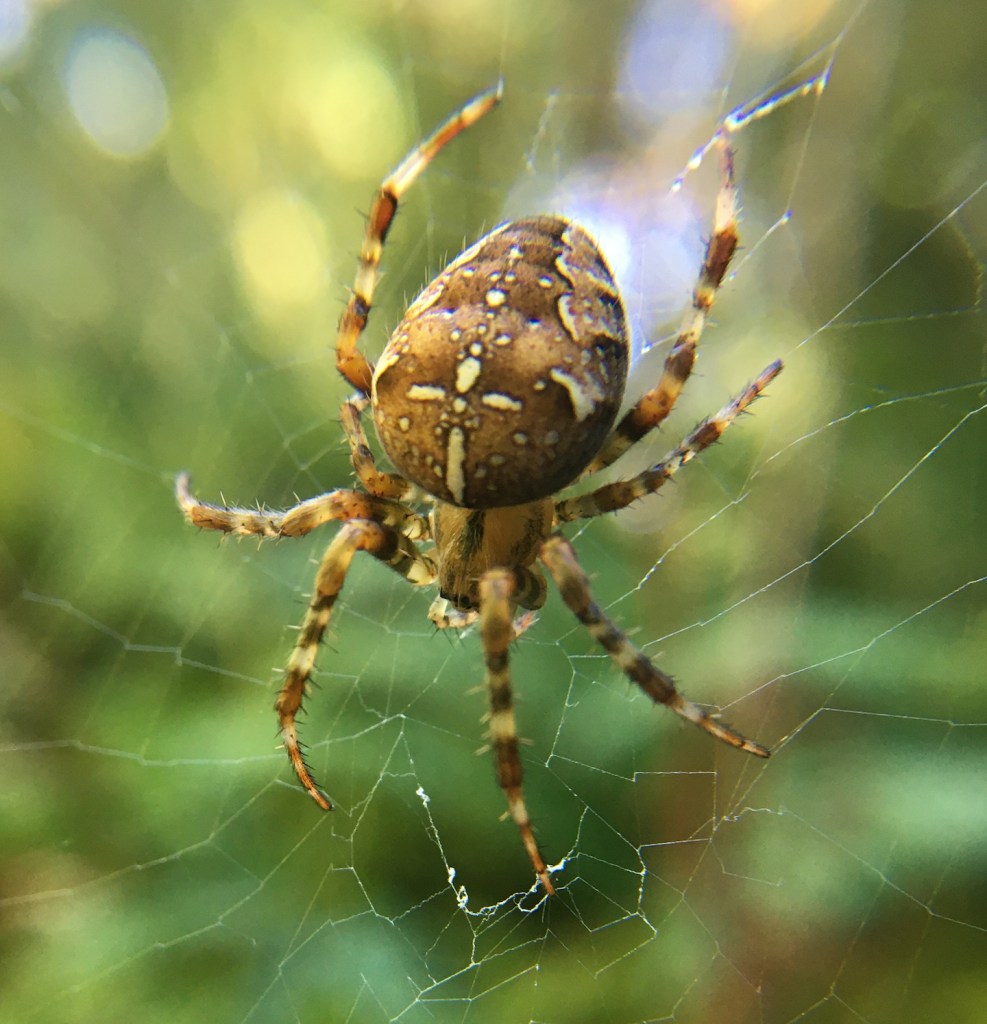
When I moved to the Pacific Northwest, I had no idea that autumn here meant encountering unnervingly large spiders that would stretch their webs all the way across my porch. They also have a propensity for building webs across trails at head-height, and get big enough to make an audible “thump” on the forest floor when I take down the web with a stick. But, their size has an advantage: I can actually see and photograph the neat patterns on their abdomens. Below are a couple of my favorites!
So many cool spots and patterns on this one! I’m not sure of the species, but it’s some kind of orb weaver.According to iNaturalist, this one’s a Nordmann’s Orb Weaver. Scope out those stripy legs!
Back in 2018, I had the opportunity to participate in the Pacific Science Center’s Science Communication Fellowship Program. Not only did I take classes on science communication, I made my very own, hands-on demo of my research topic.
My graduate research focused on how water interacts with soil, addressing the question of why soil sometimes does not absorb water from a molecular standpoint. Most rocks and minerals are readily wettable, so any water resistance must come from the other major component of soil: the organic material from soil microorganisms and decaying plants. I focused on one particular class of molecule, the phospholipid, which forms cell membranes. One end of a phospholipid readily interacts with water; the other does not. The hydrophobic ends of molecules like these were hypothesized to cause soils to repel water. I wanted to find out if and how that might occur.
Demonstrating the whole scale of my project was a big hurdle for designing my demo. I opted to start at the macroscopic and work my way down to the molecular.
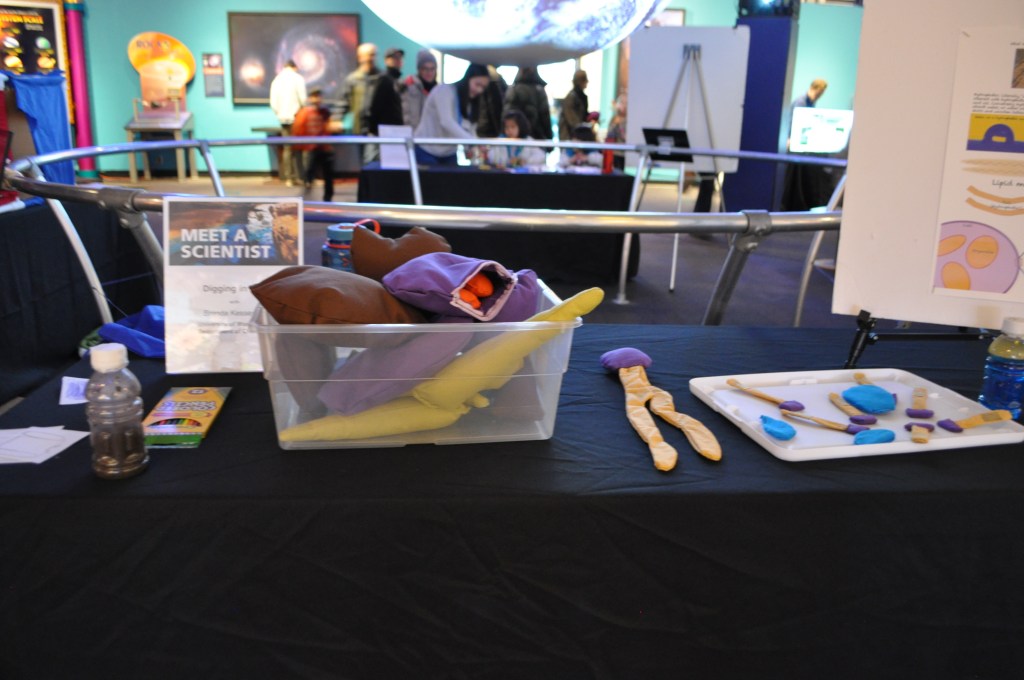
The very first time I ran my demo! I would start at the left with a jar of dirt and work across the table to the molecular scale.
Starting off with a jar of dirt, I asked participants to tell me what they saw inside the soil. Typically, participants were quick to find small rocks. I would then ask them if they saw the twigs and pine needles as well. This way, I introduced the concept of soil’s two major components: inorganic (rock and mineral) and organic (plant and animal matter).
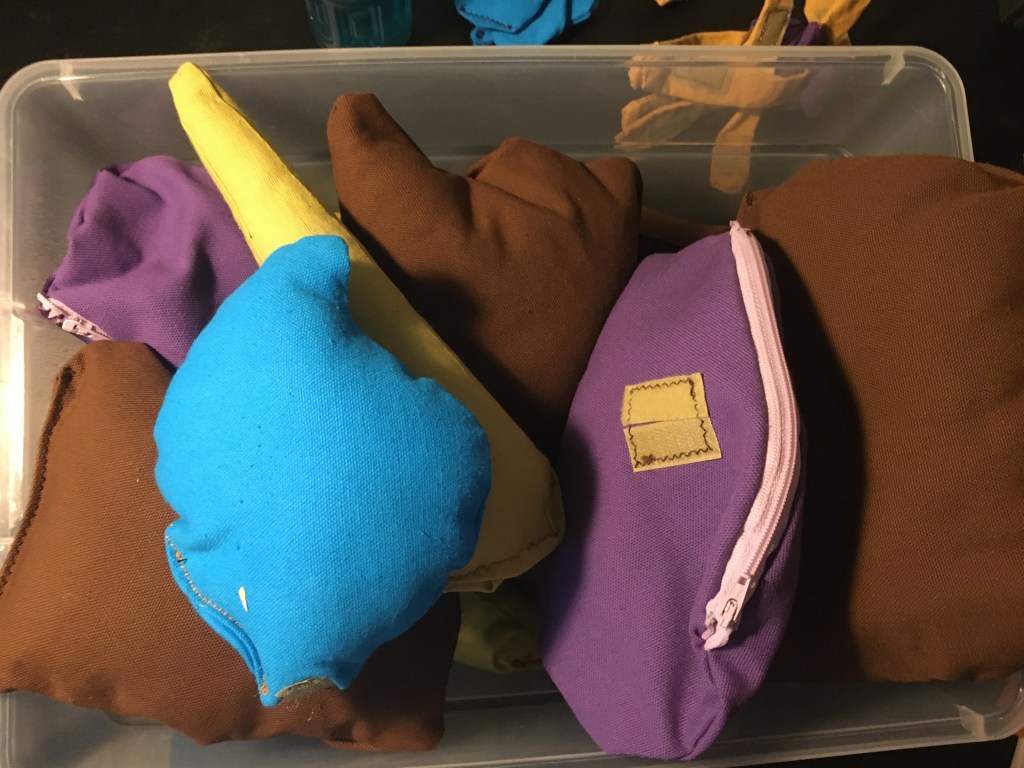
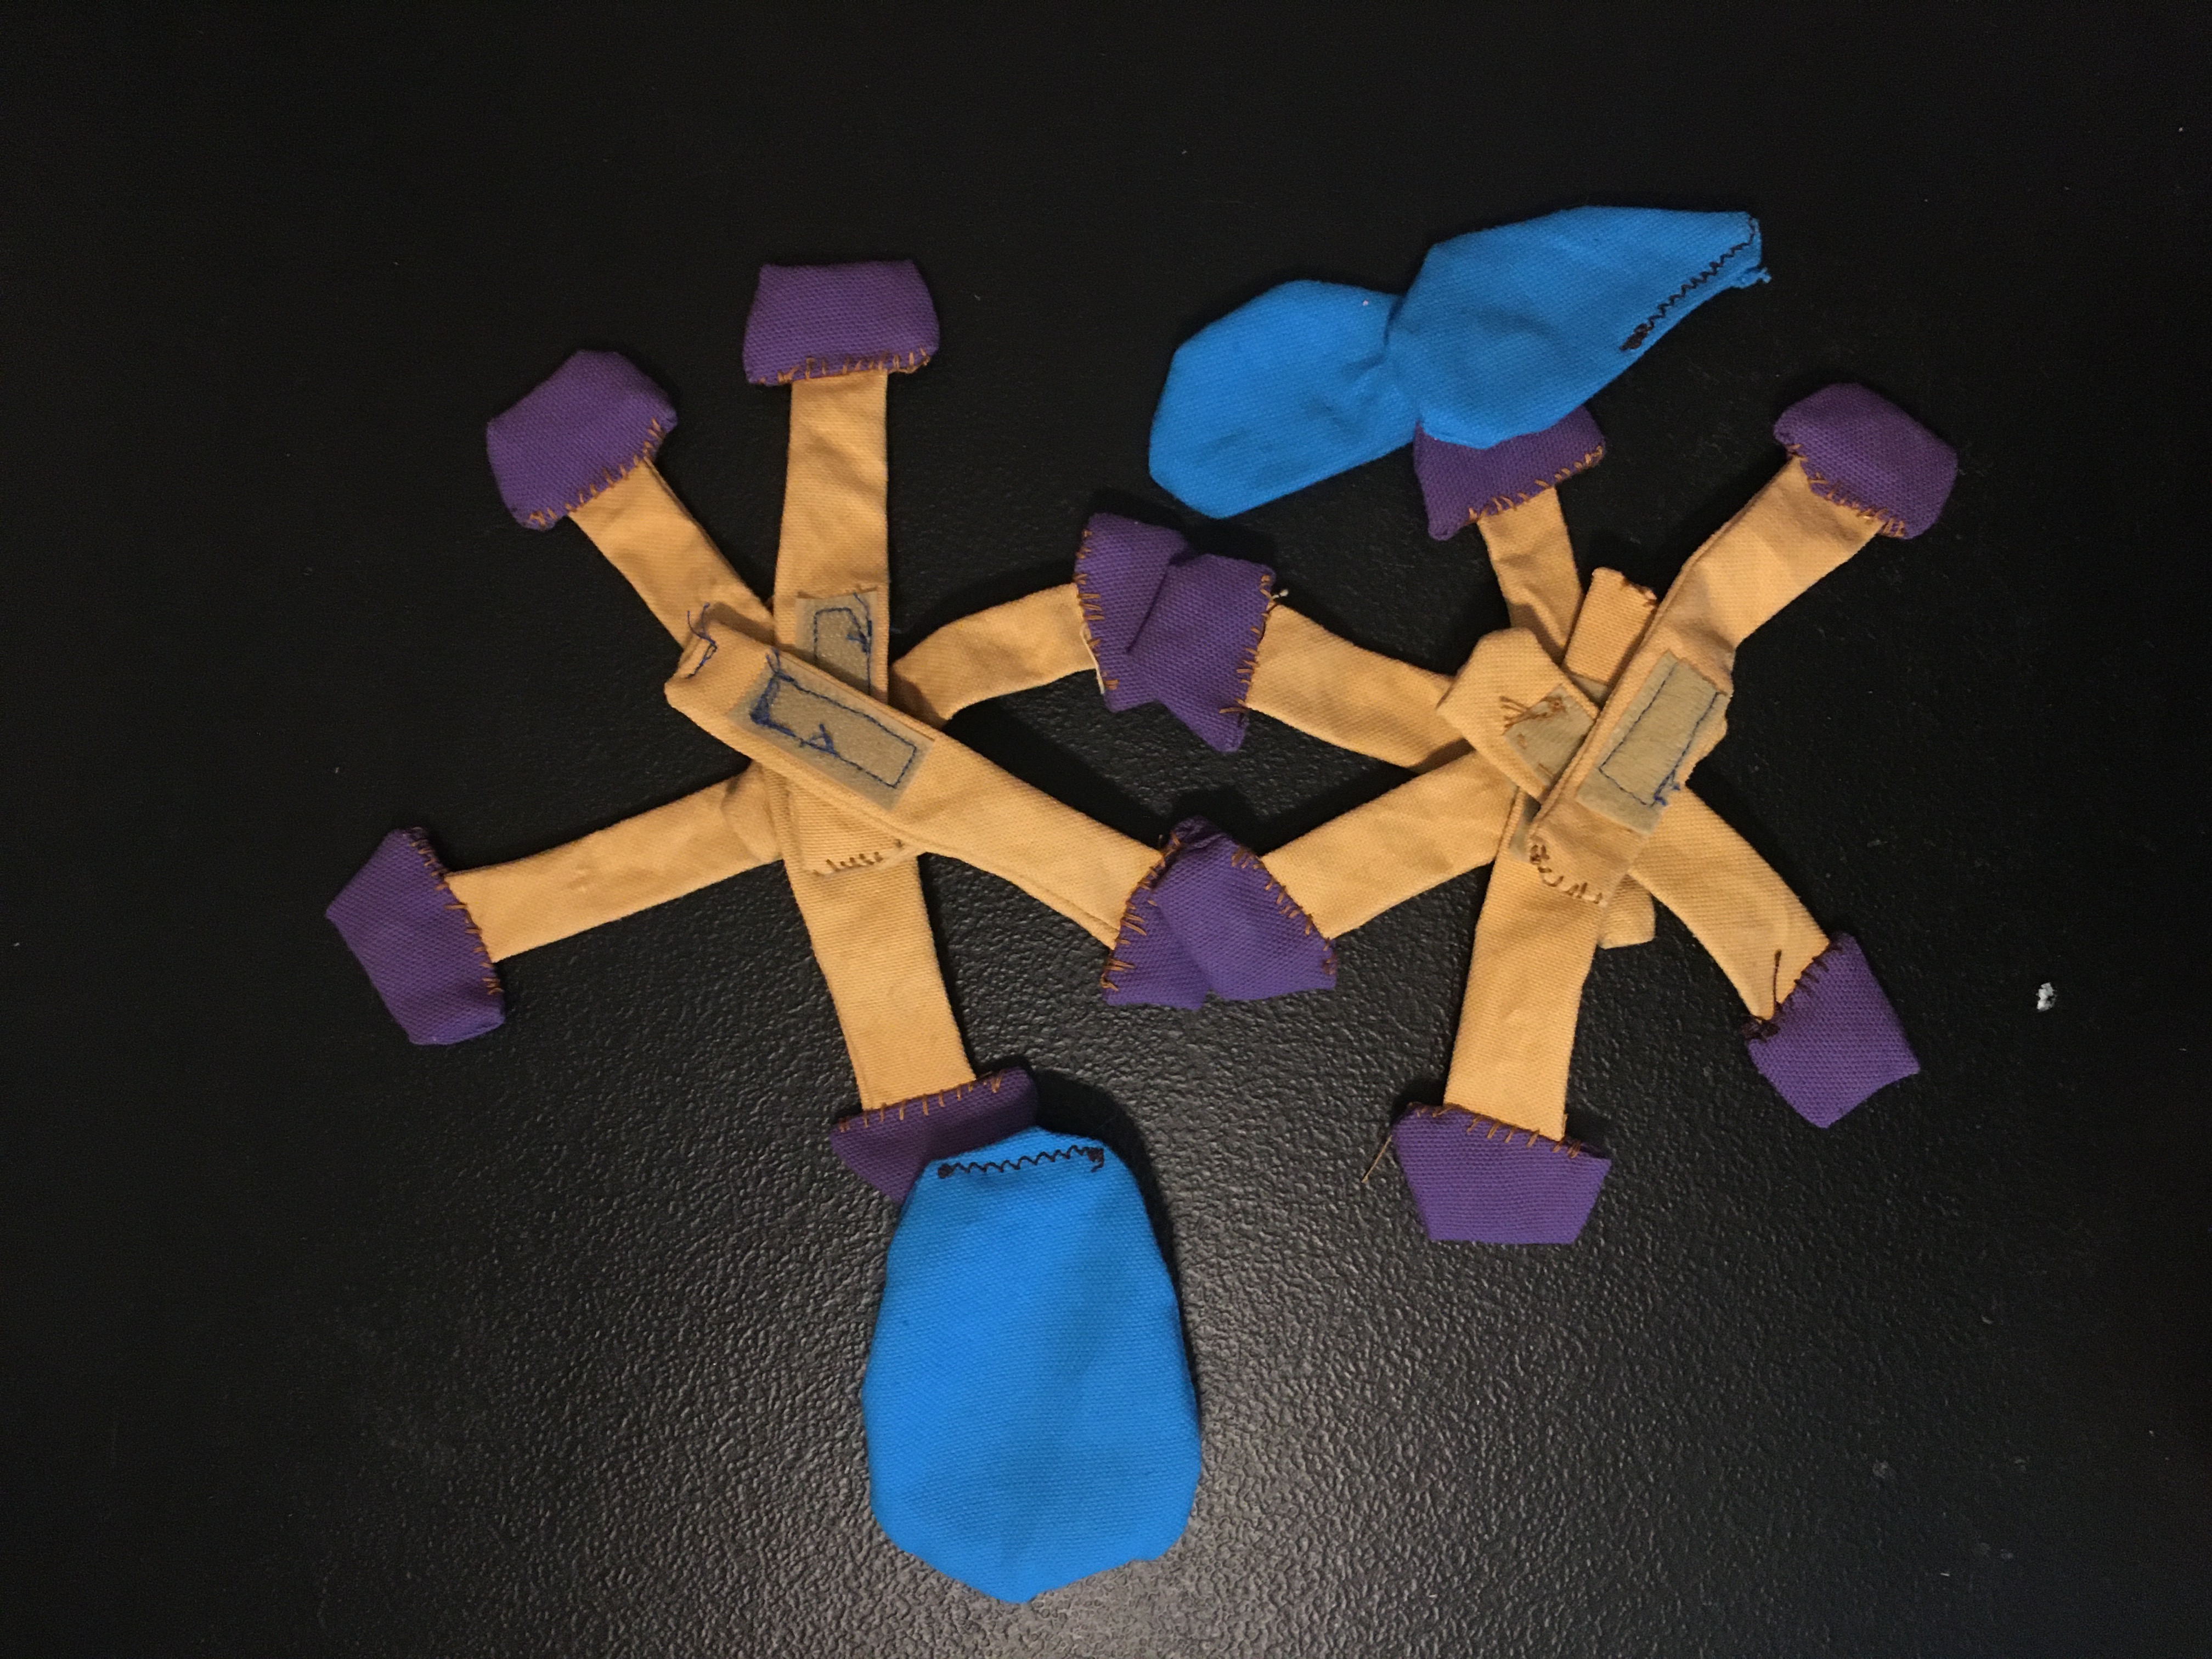
Next, I had a box full of plush mineral grains, single-cell organisms, and plant detritus. I asked participants if they could find all the soil components they saw in the real dirt in the box. I included a big drop of water to spark conversation about how water might move through soil. Most participants guessed quickly that the purple blobs were bacteria and other microorganisms, which let me segue into talking about cell membranes and the molecules that make them up.
Magnified “dirt”. Green = plant detritus, purple = microorganisms, brown = sand and clay, blue = water.
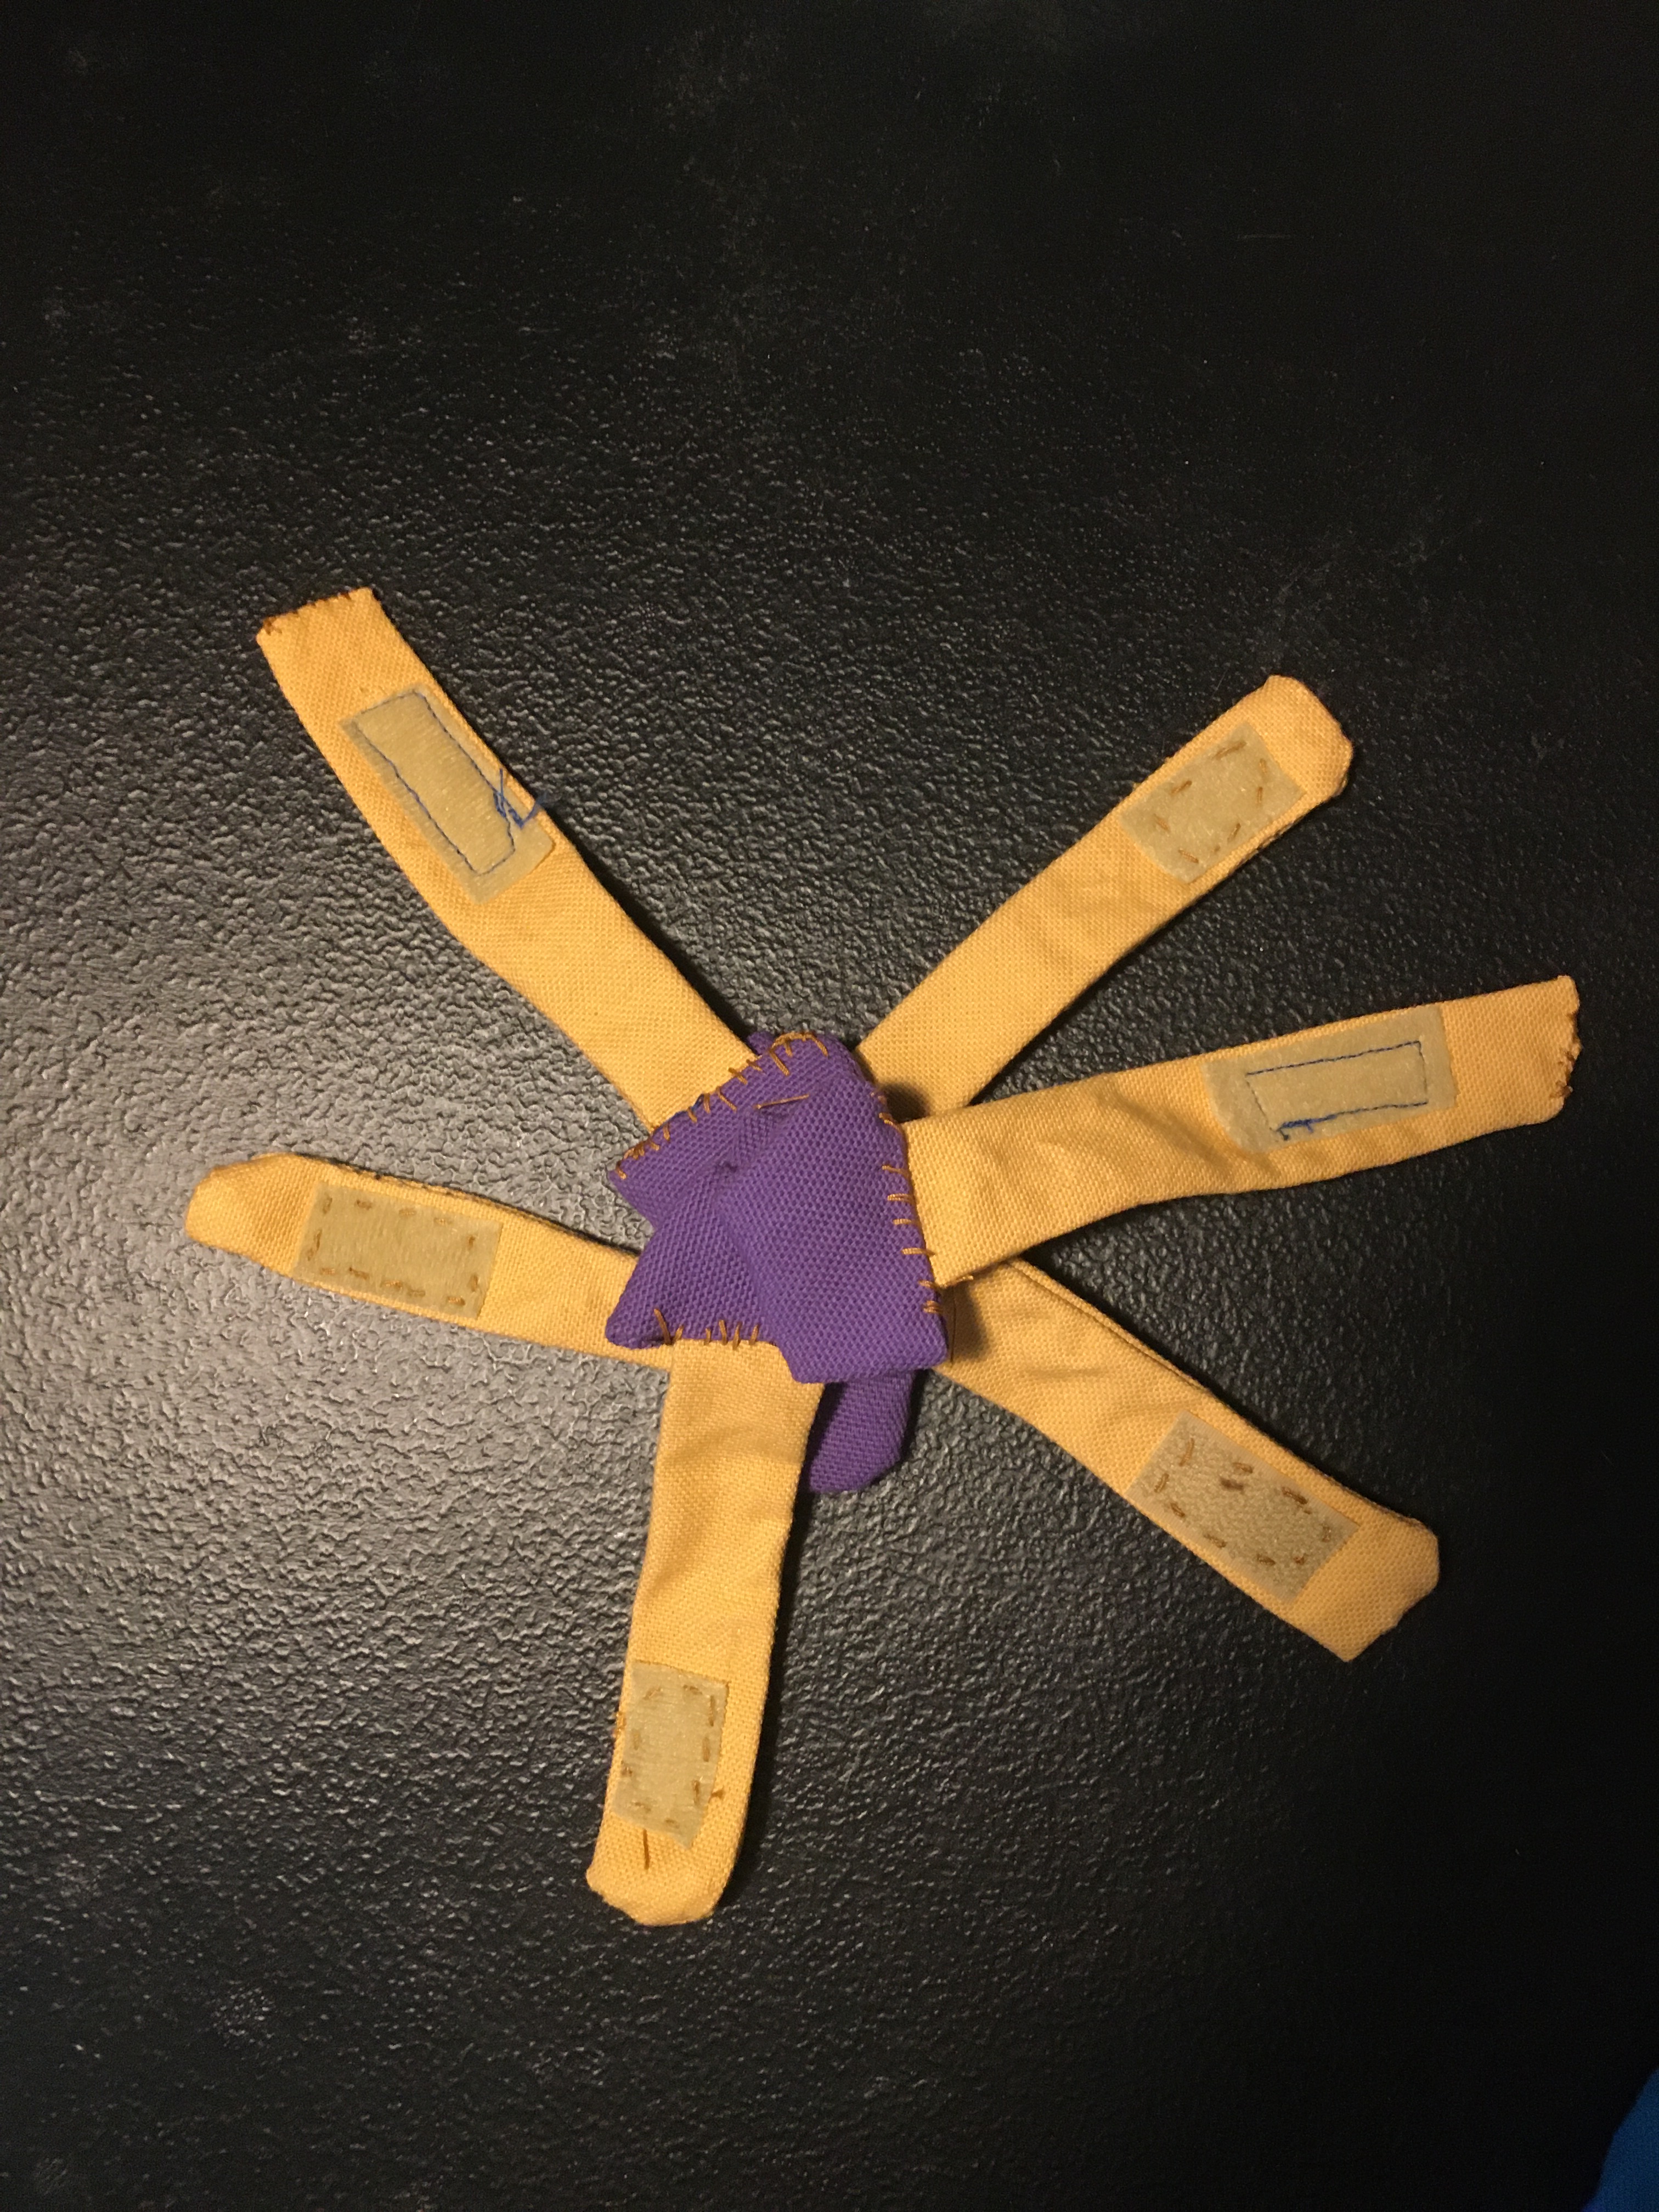
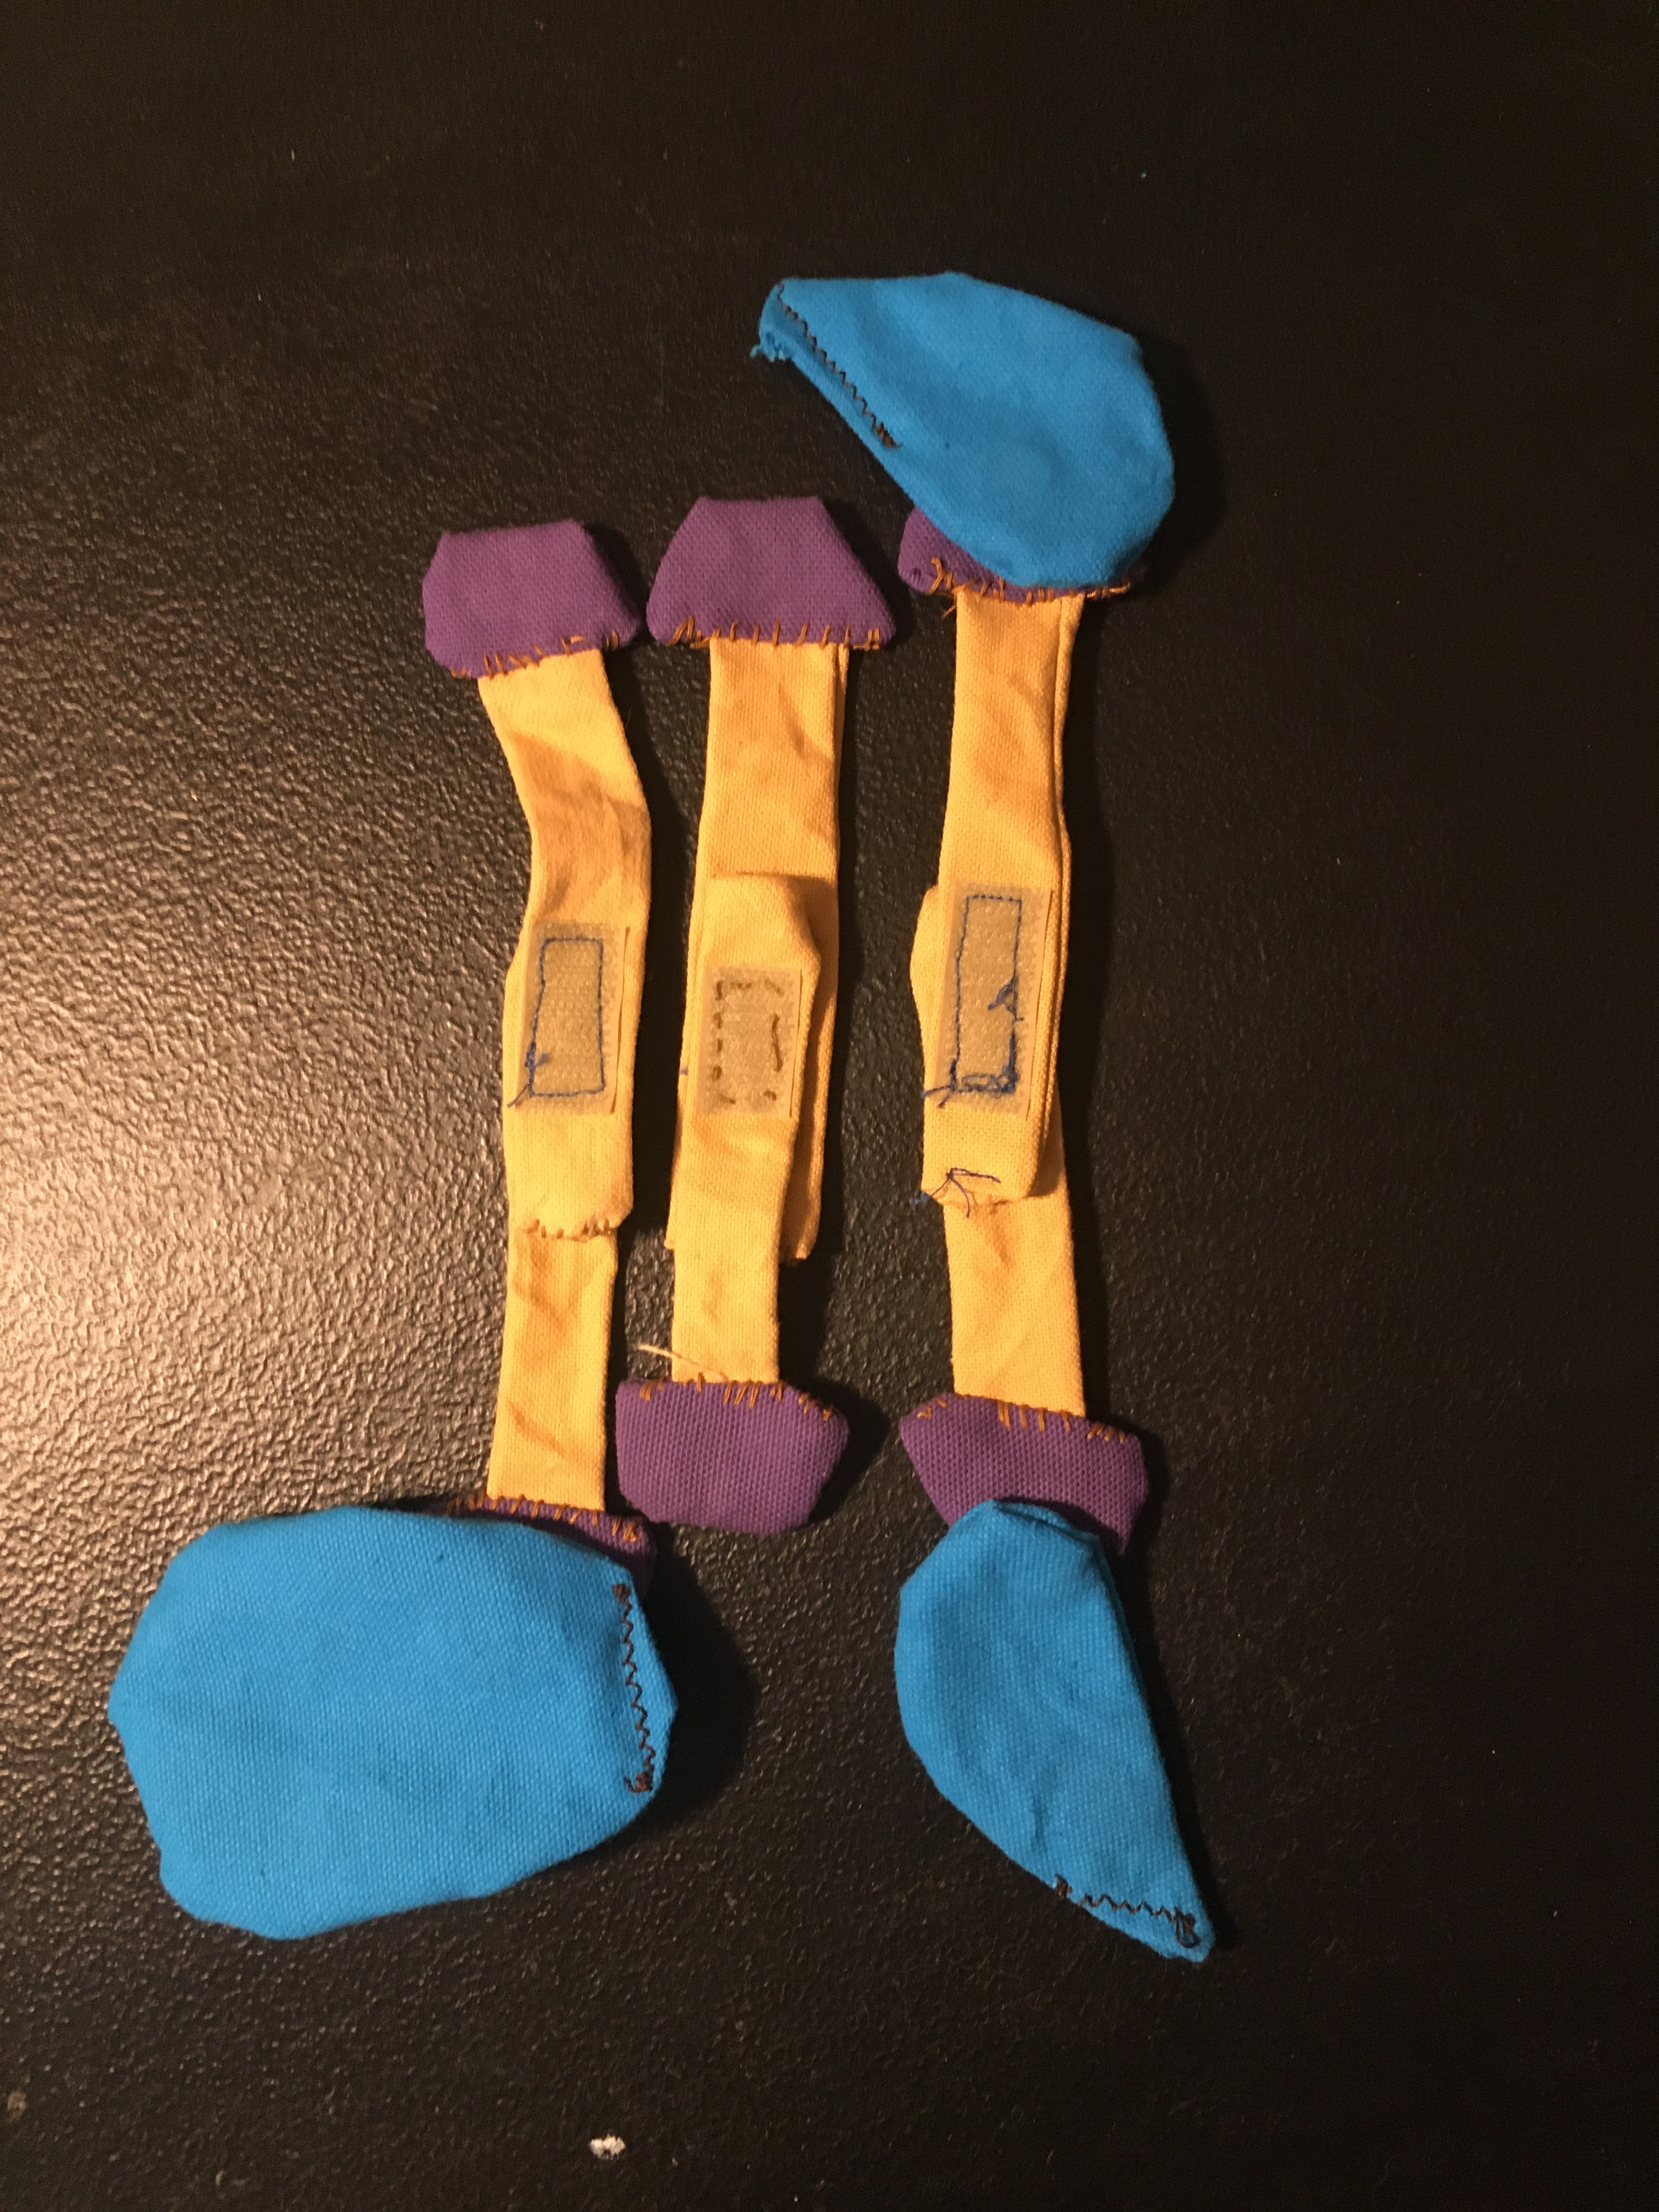
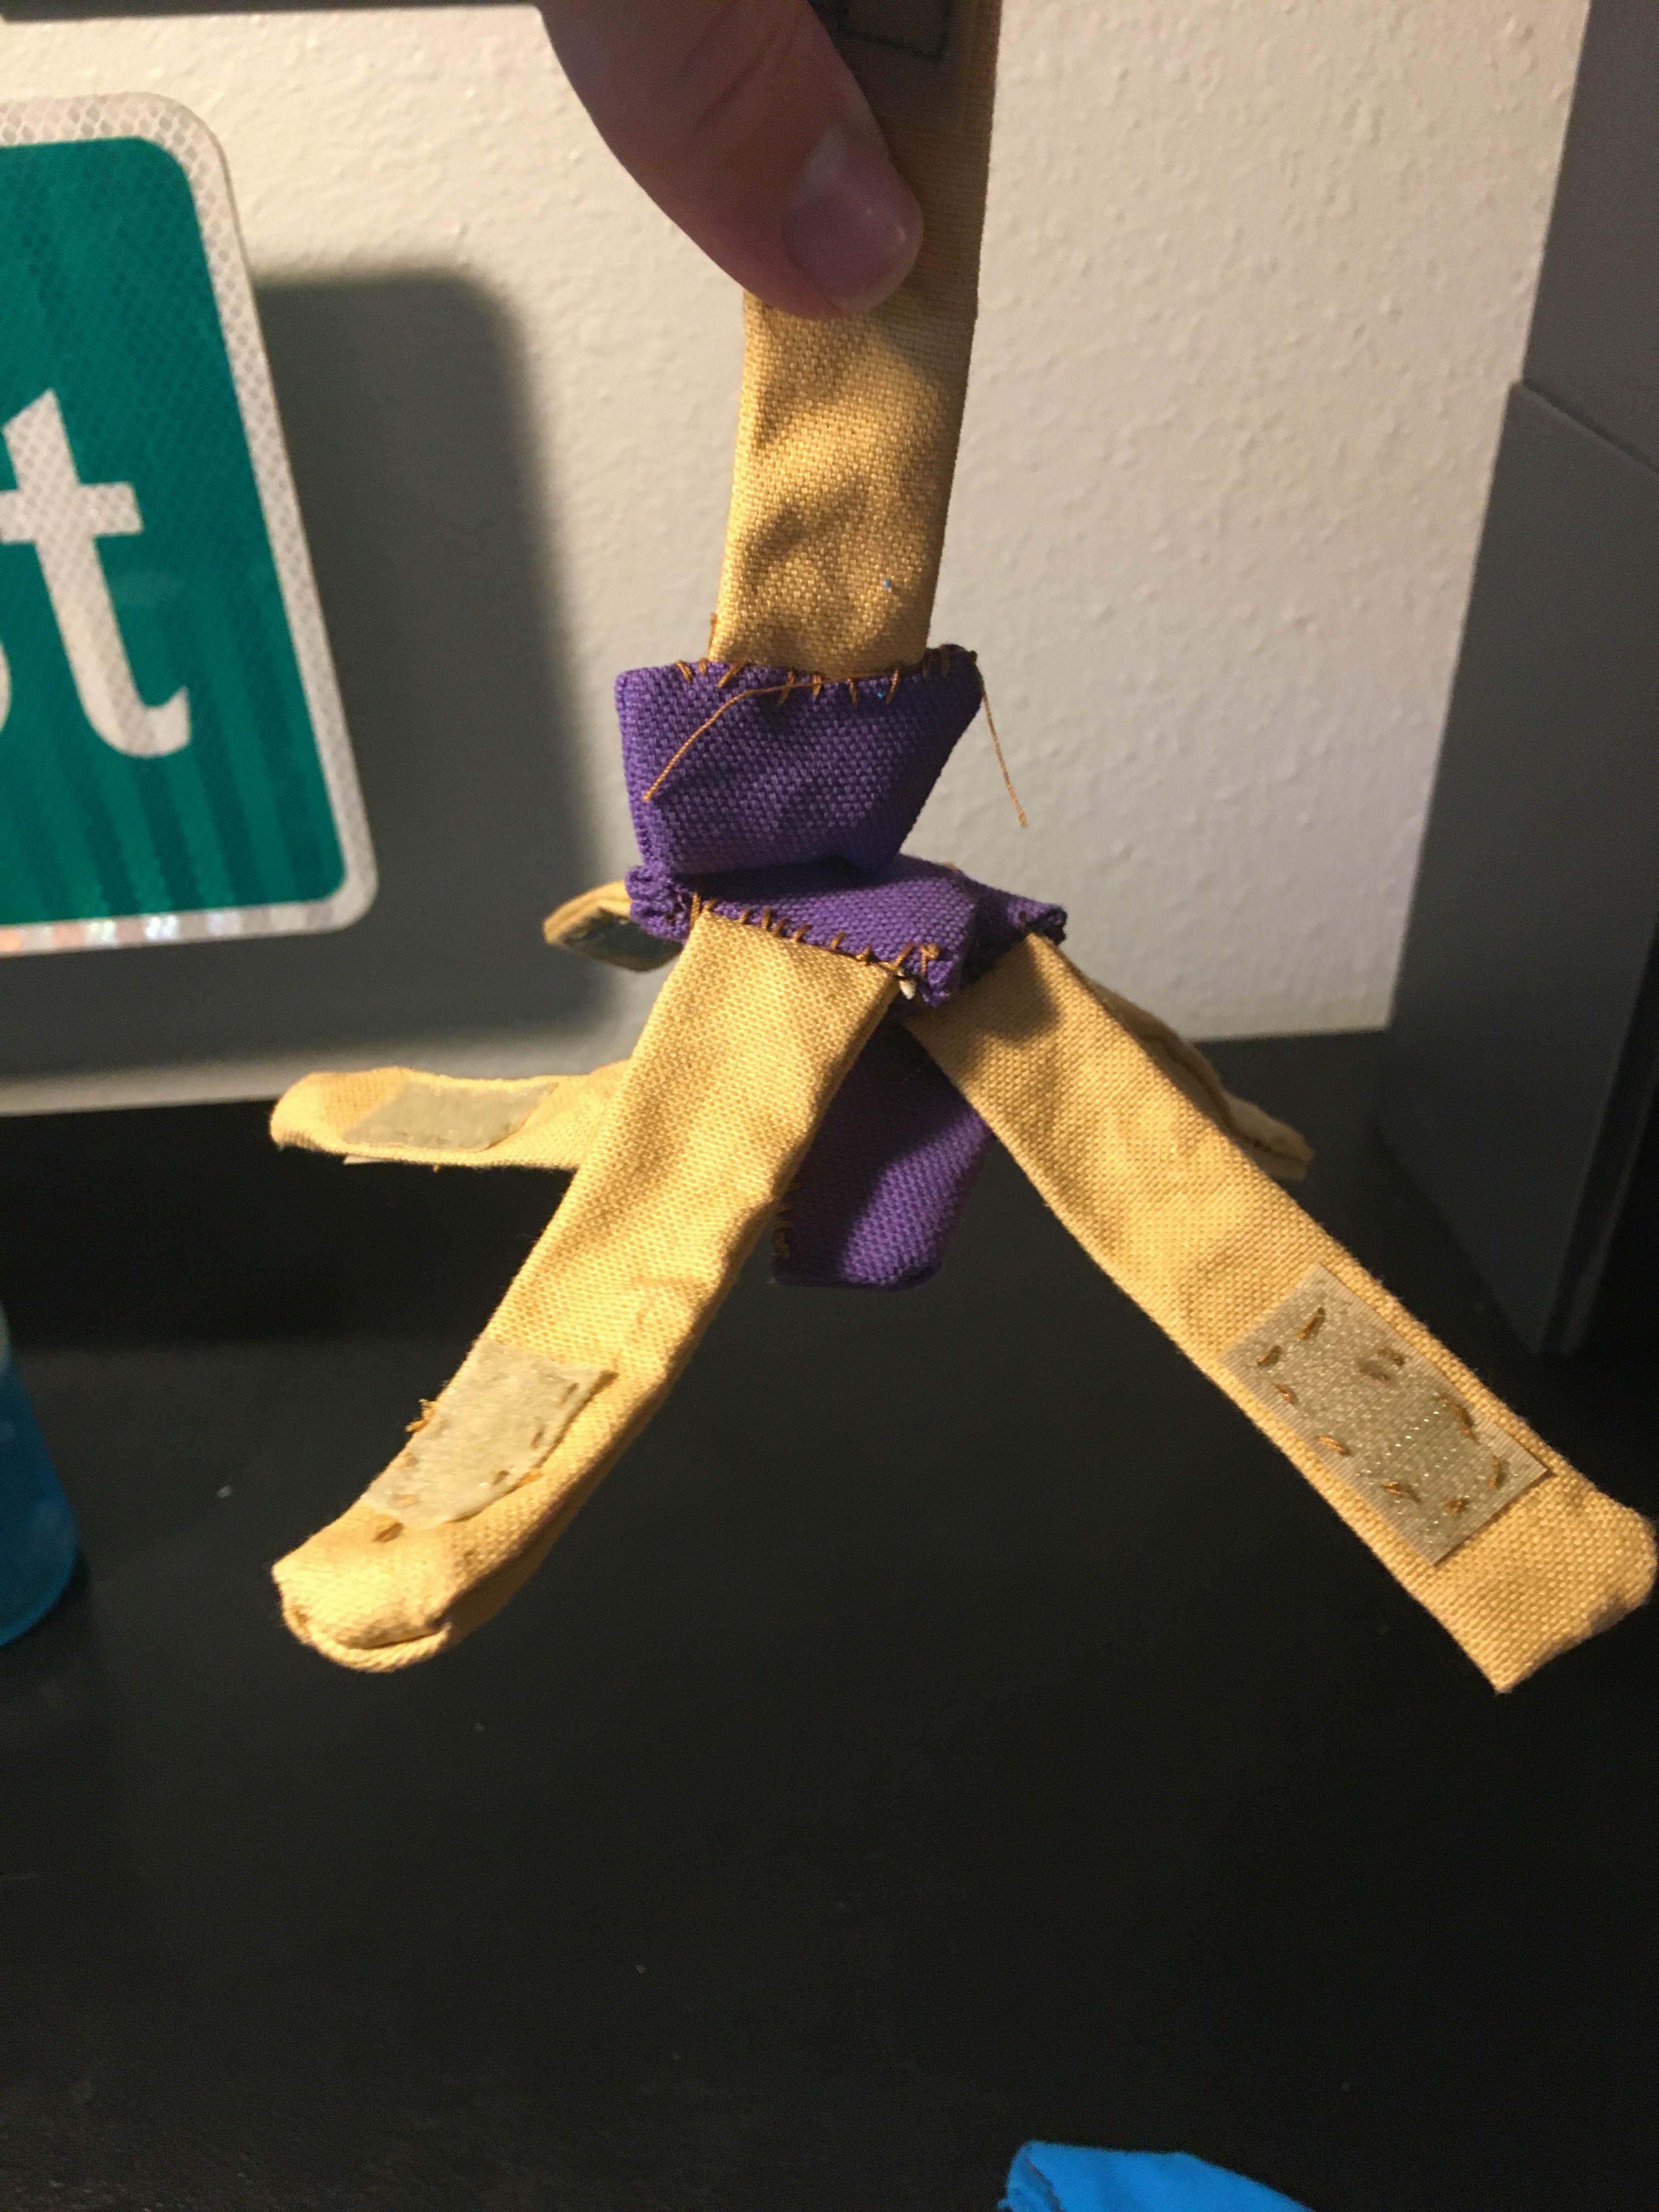
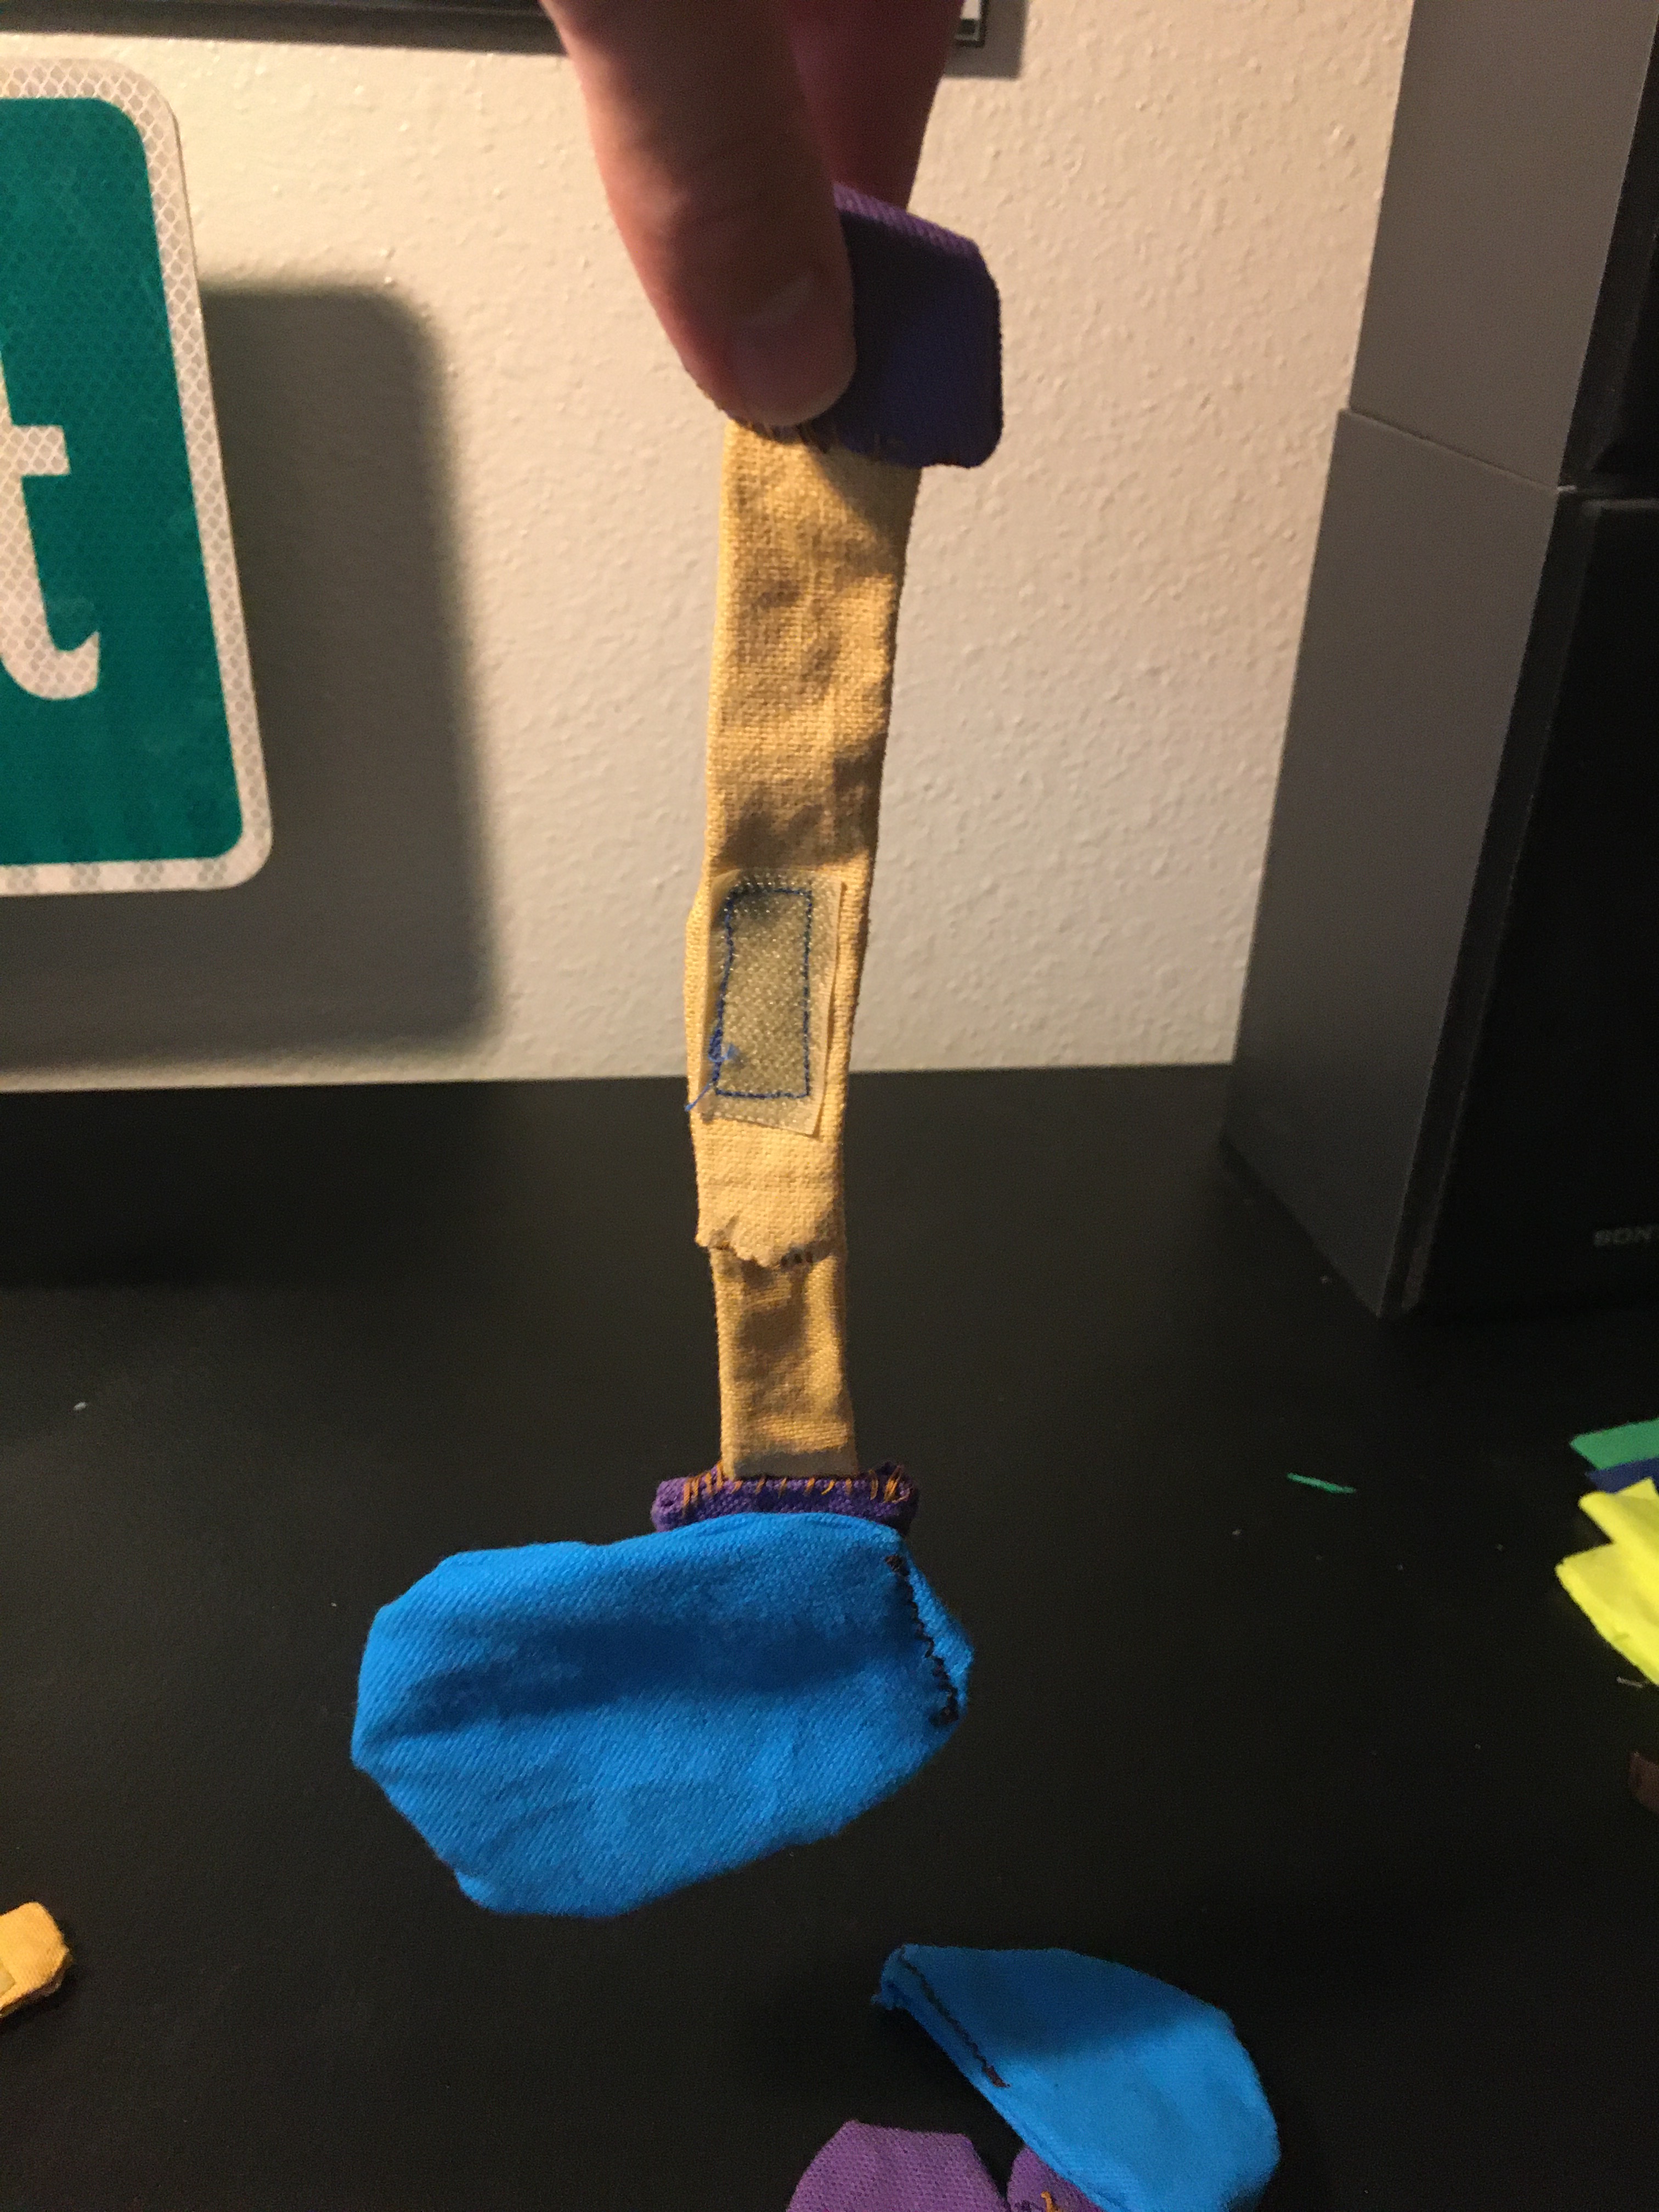
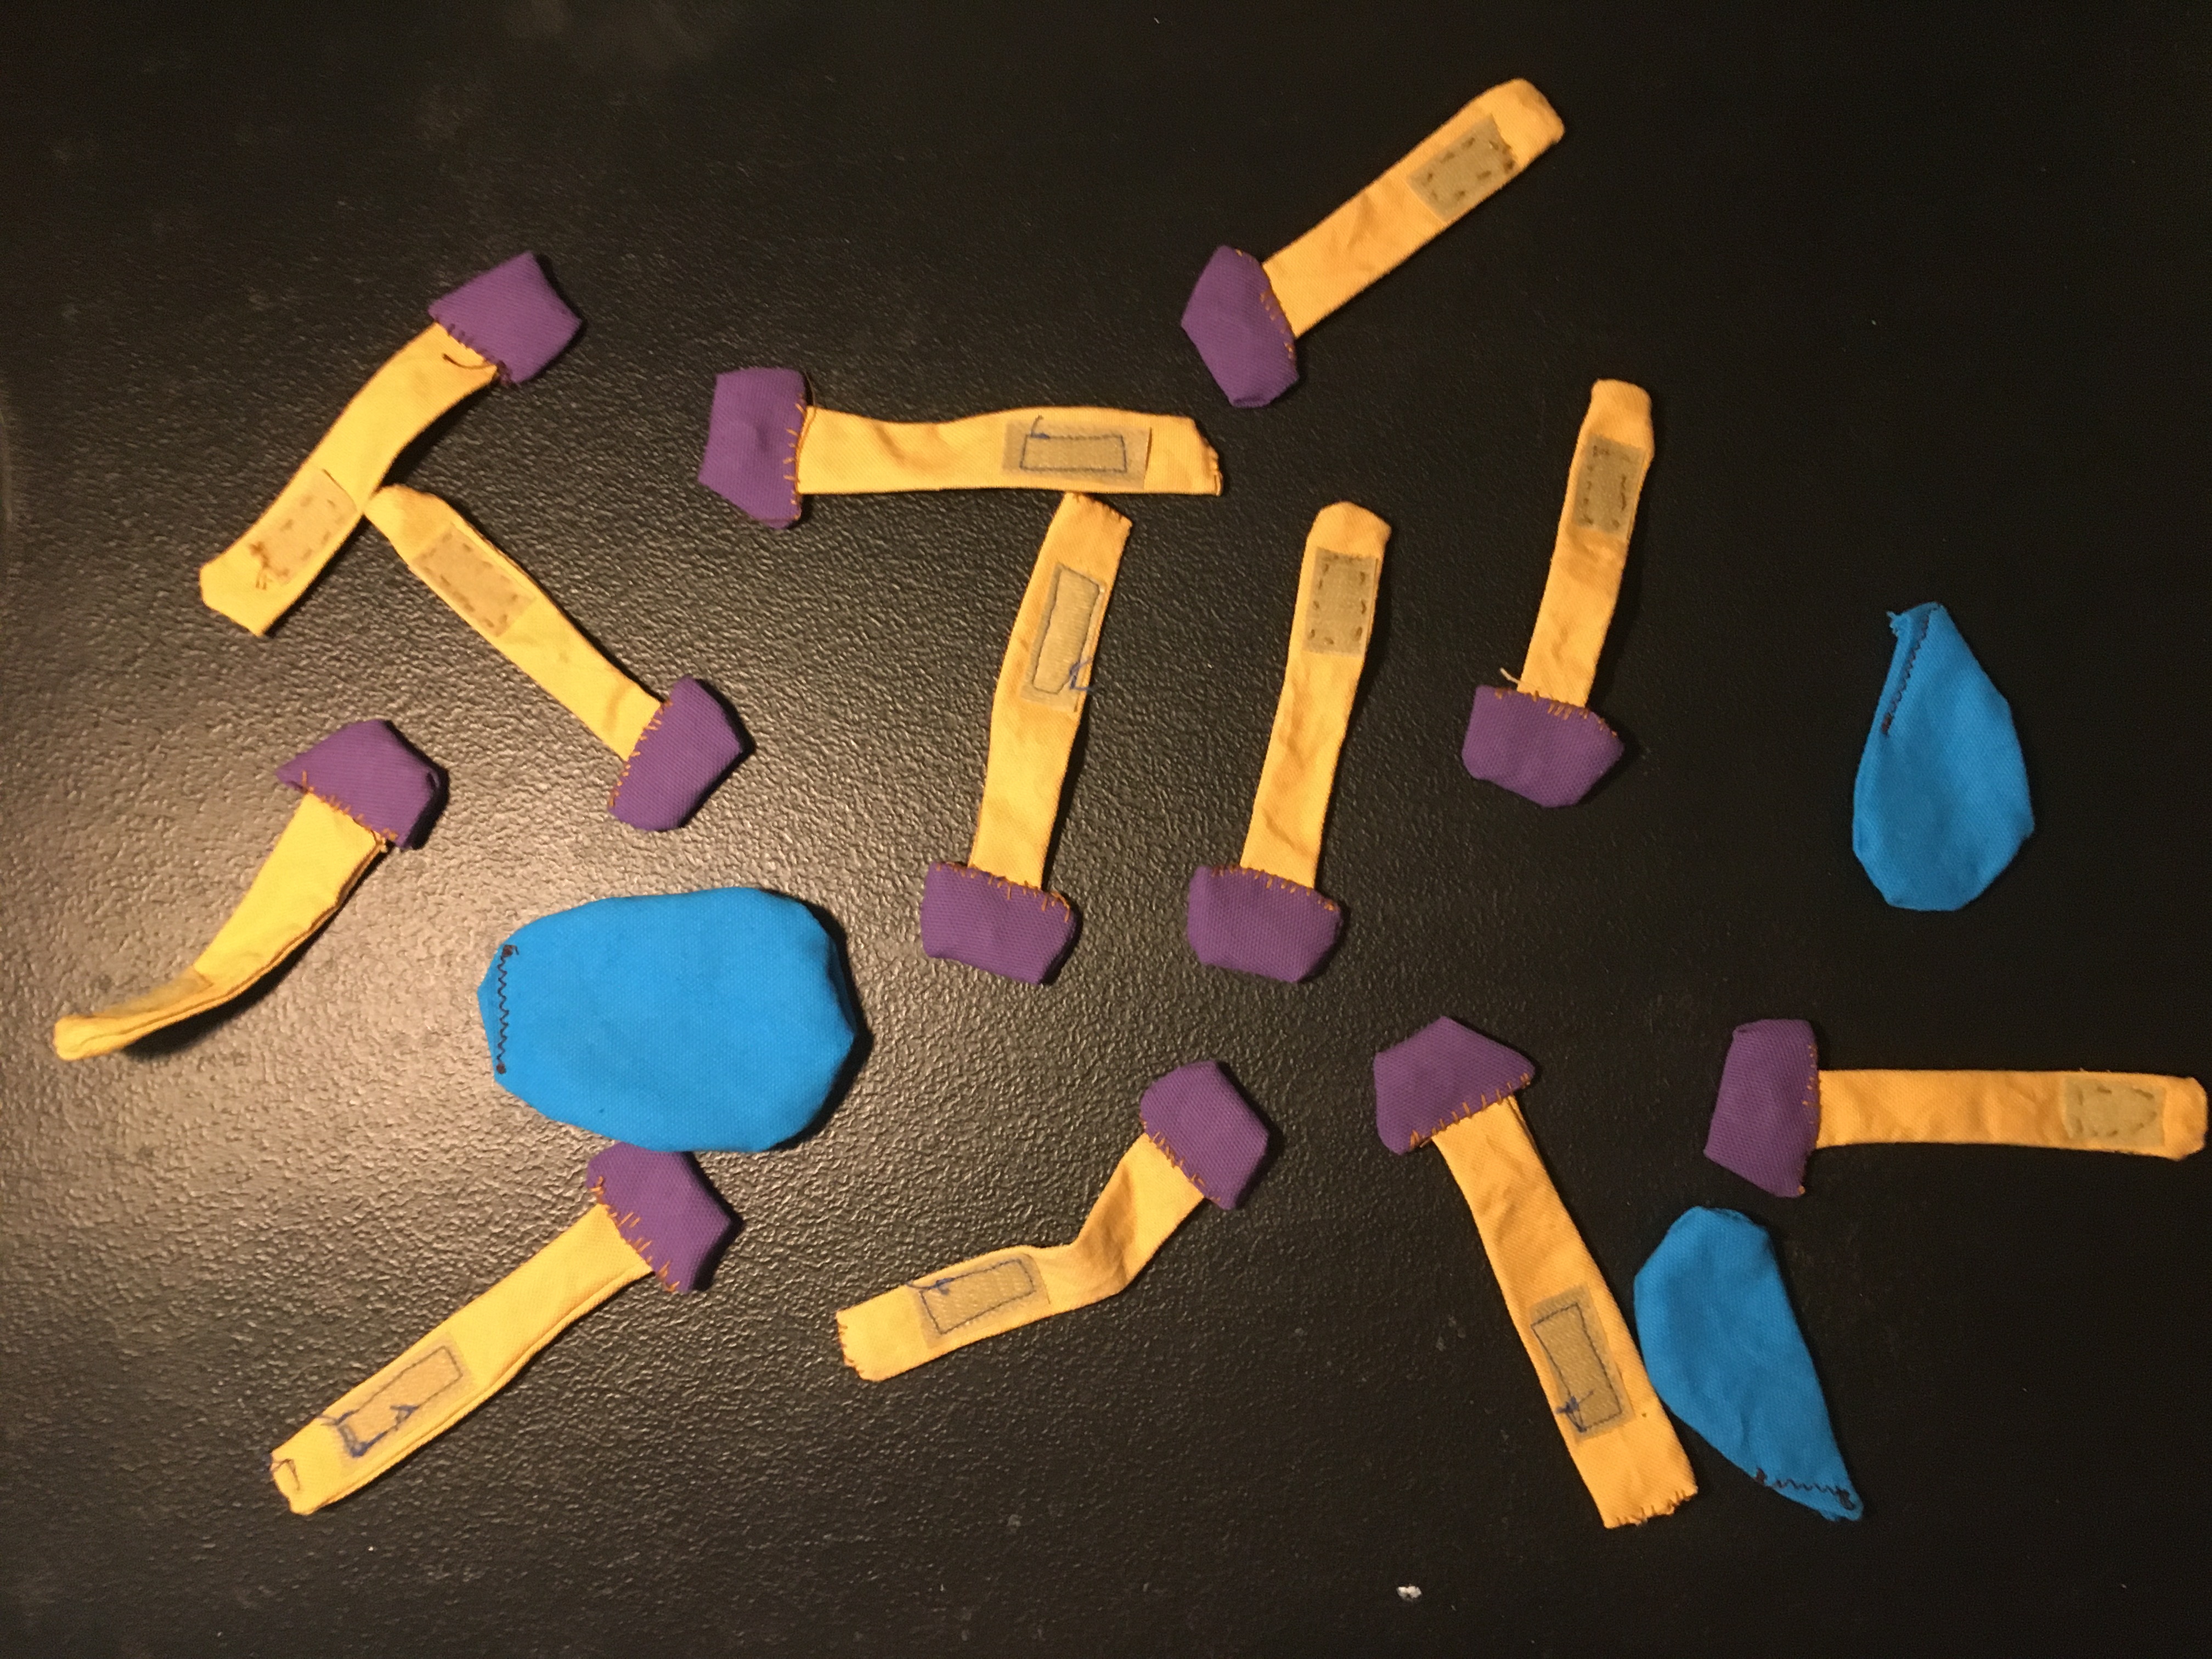
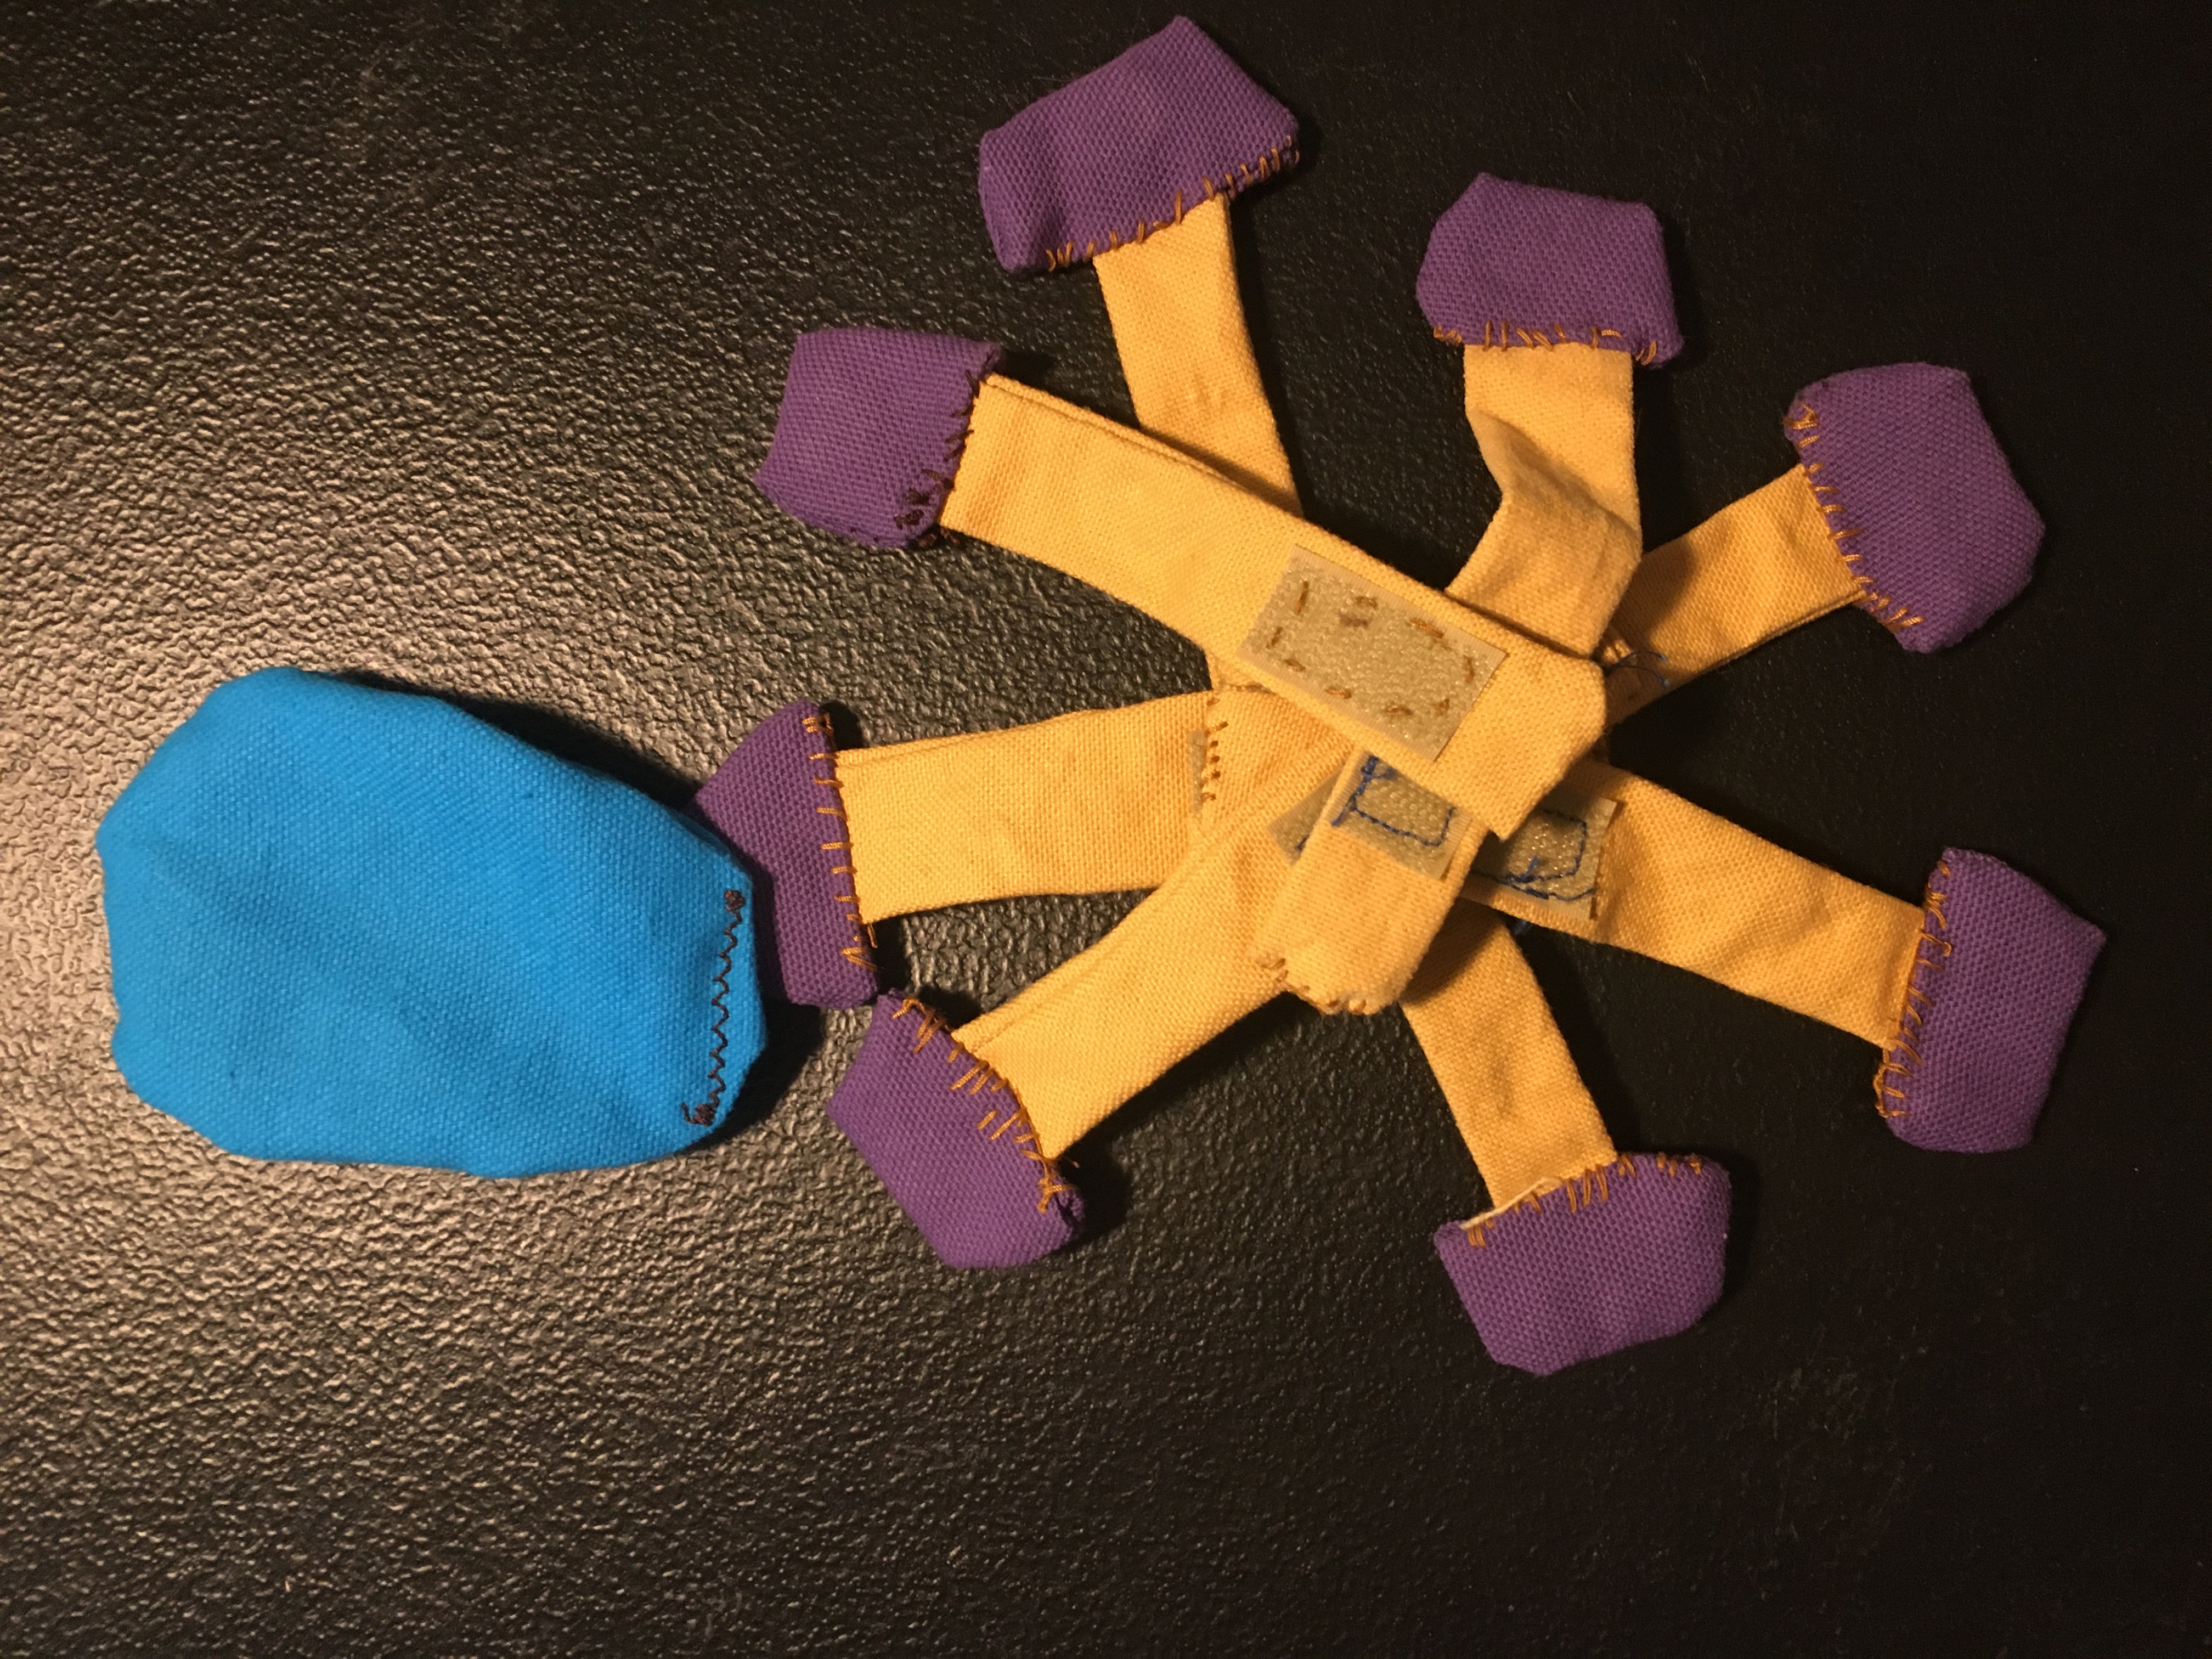
Lipids can self-aggregate in a number of ways depending on their surroundings; they have polar ends that interact with water, and long carbon tails that do not interact with water. To demonstrate the behavior of lipids, I made model lipids with magnetic “heads” and velcro “tails.” I also made magnetic water droplets to demonstrate how the different ends of lipids behave. Once visitors had played with the molecules and figured out how they interacted with each other and water, I would ask them to form their own hypothesis for how lipids could make soil hydrophobic. (See photo gallery below. Purple = lipid head groups, yellow = lipid tails.)
Having now done this demo several times, I’ve seen that the magnetic/velcro molecules get the best reception from visitors. Once in-person interaction resumes, I plan to revamp the activity to mostly focus on the molecular scale. I will make magnetic “mineral grains” so that participants can build the lipid structures that have been hypothesized to form on mineral surfaces. As a bonus, since I’ve now finished my Ph.D. project, I can tell them if their results match mine!
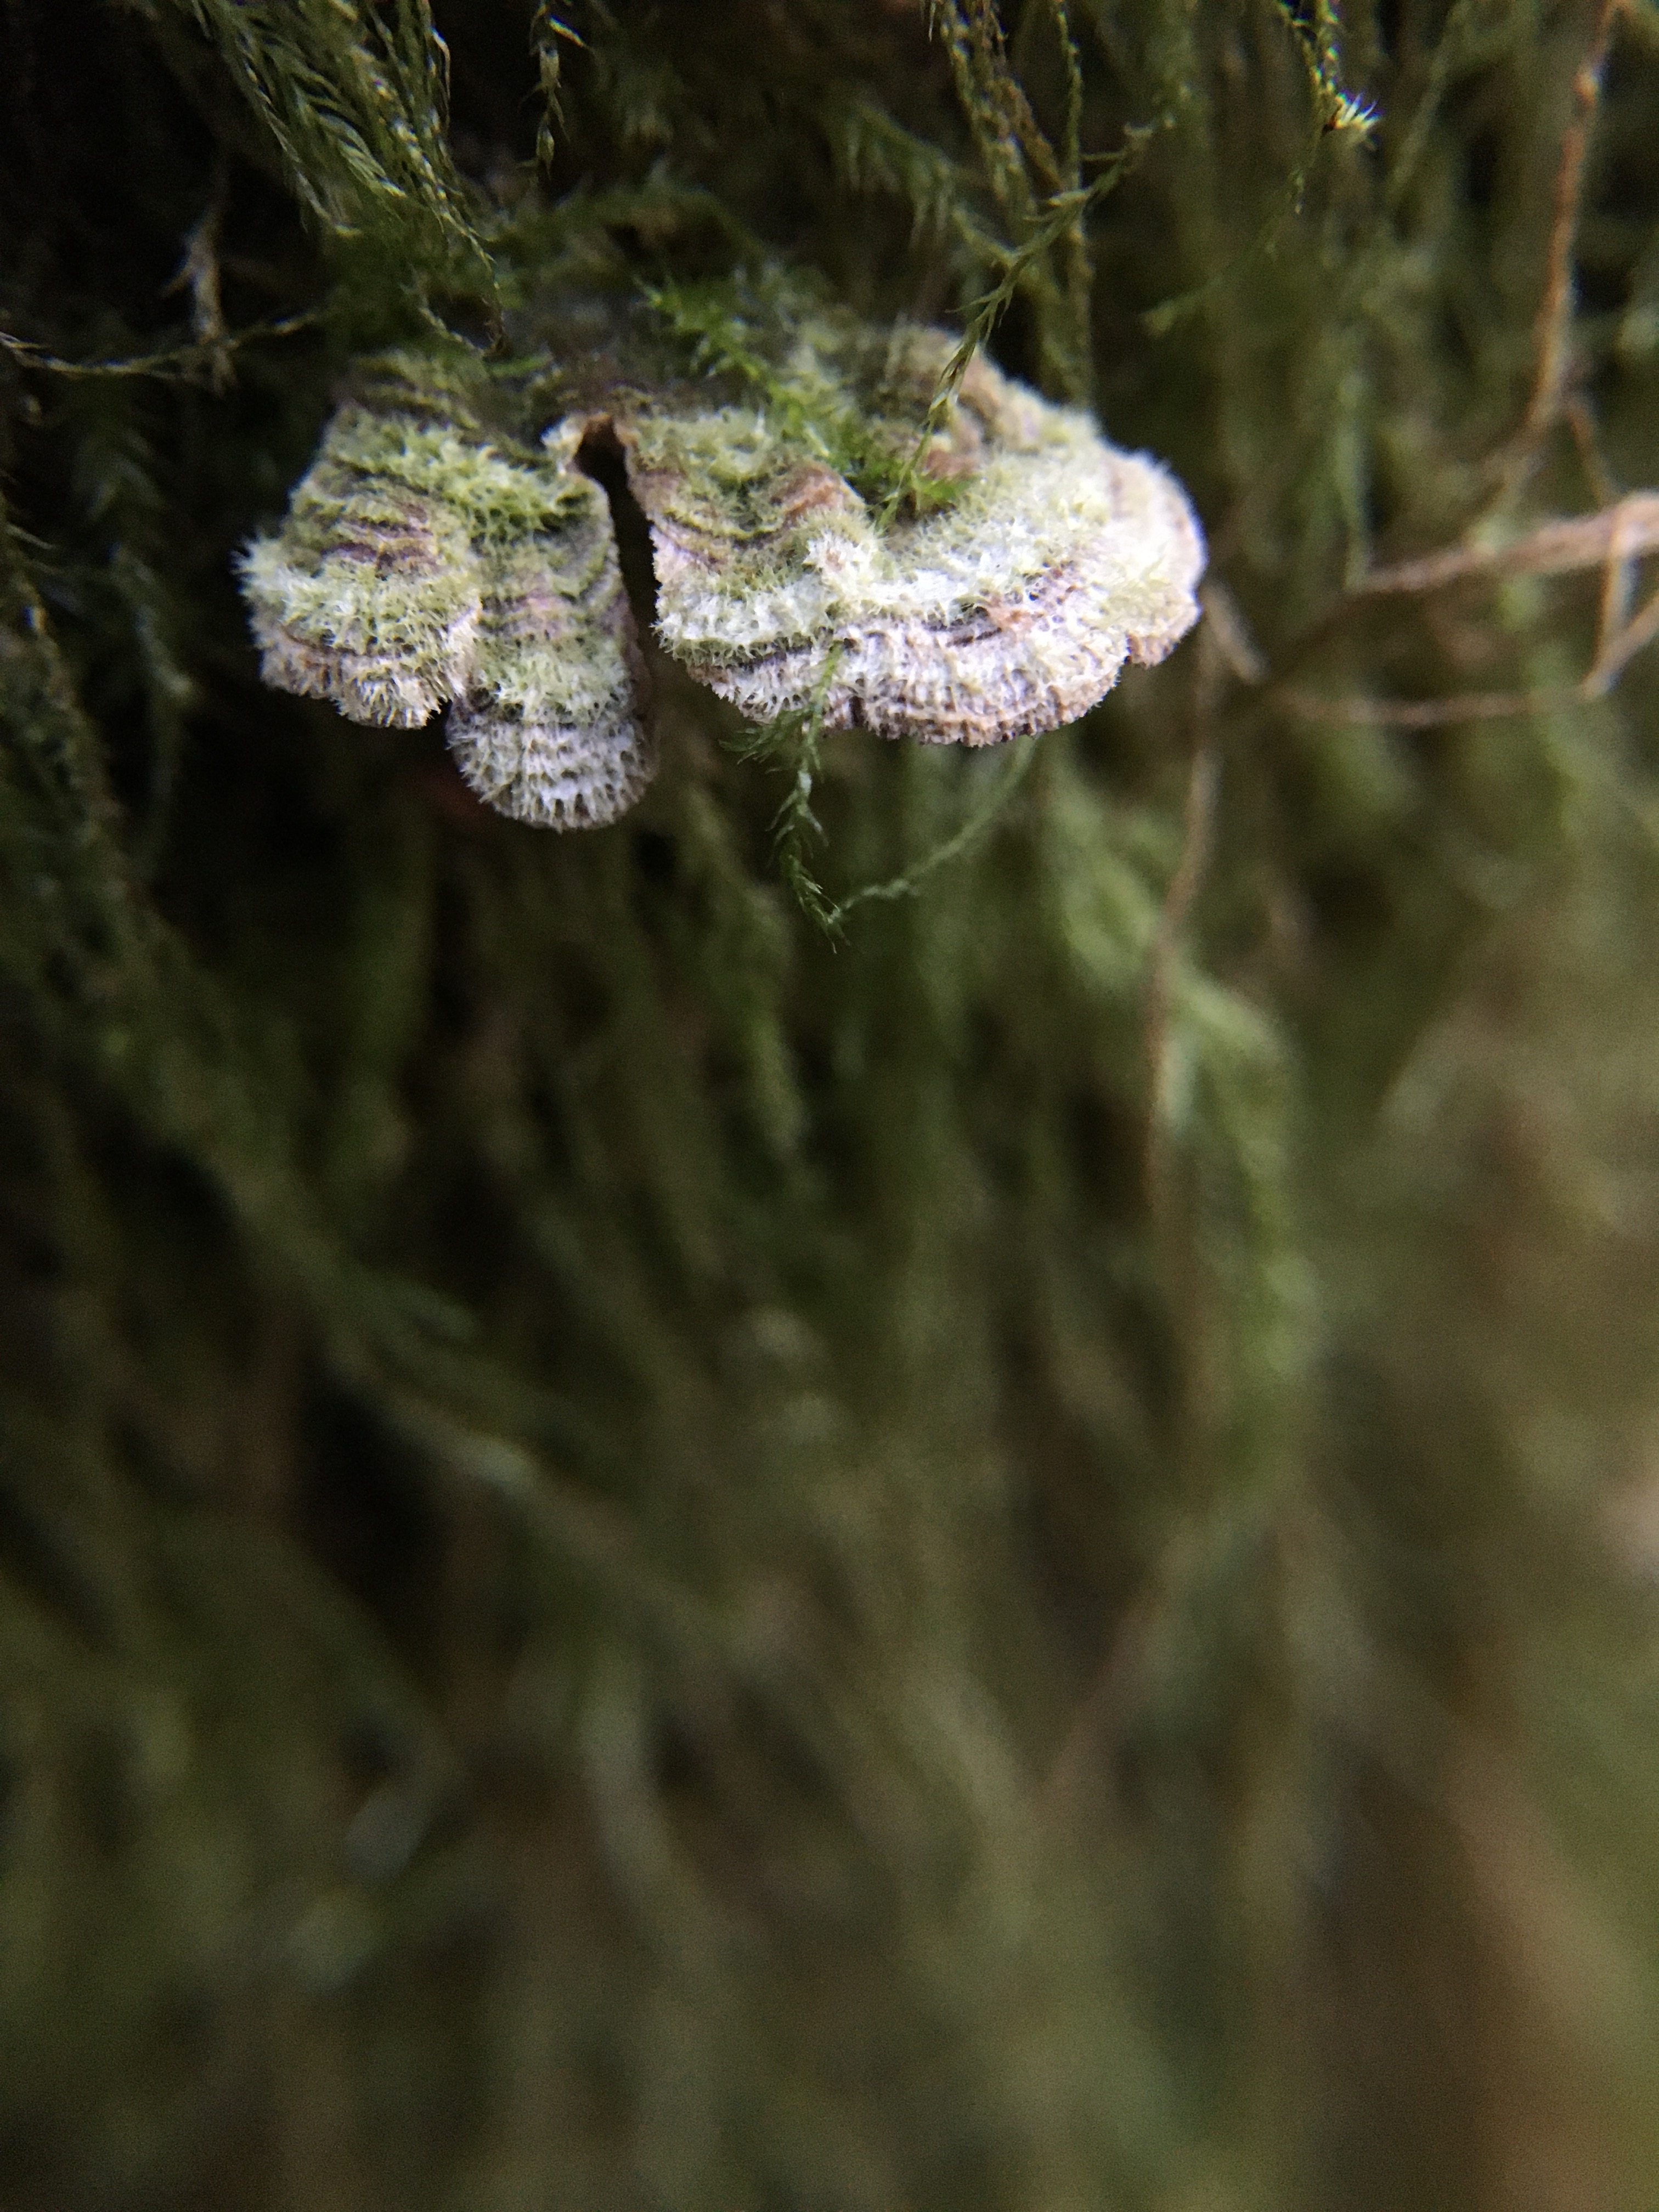
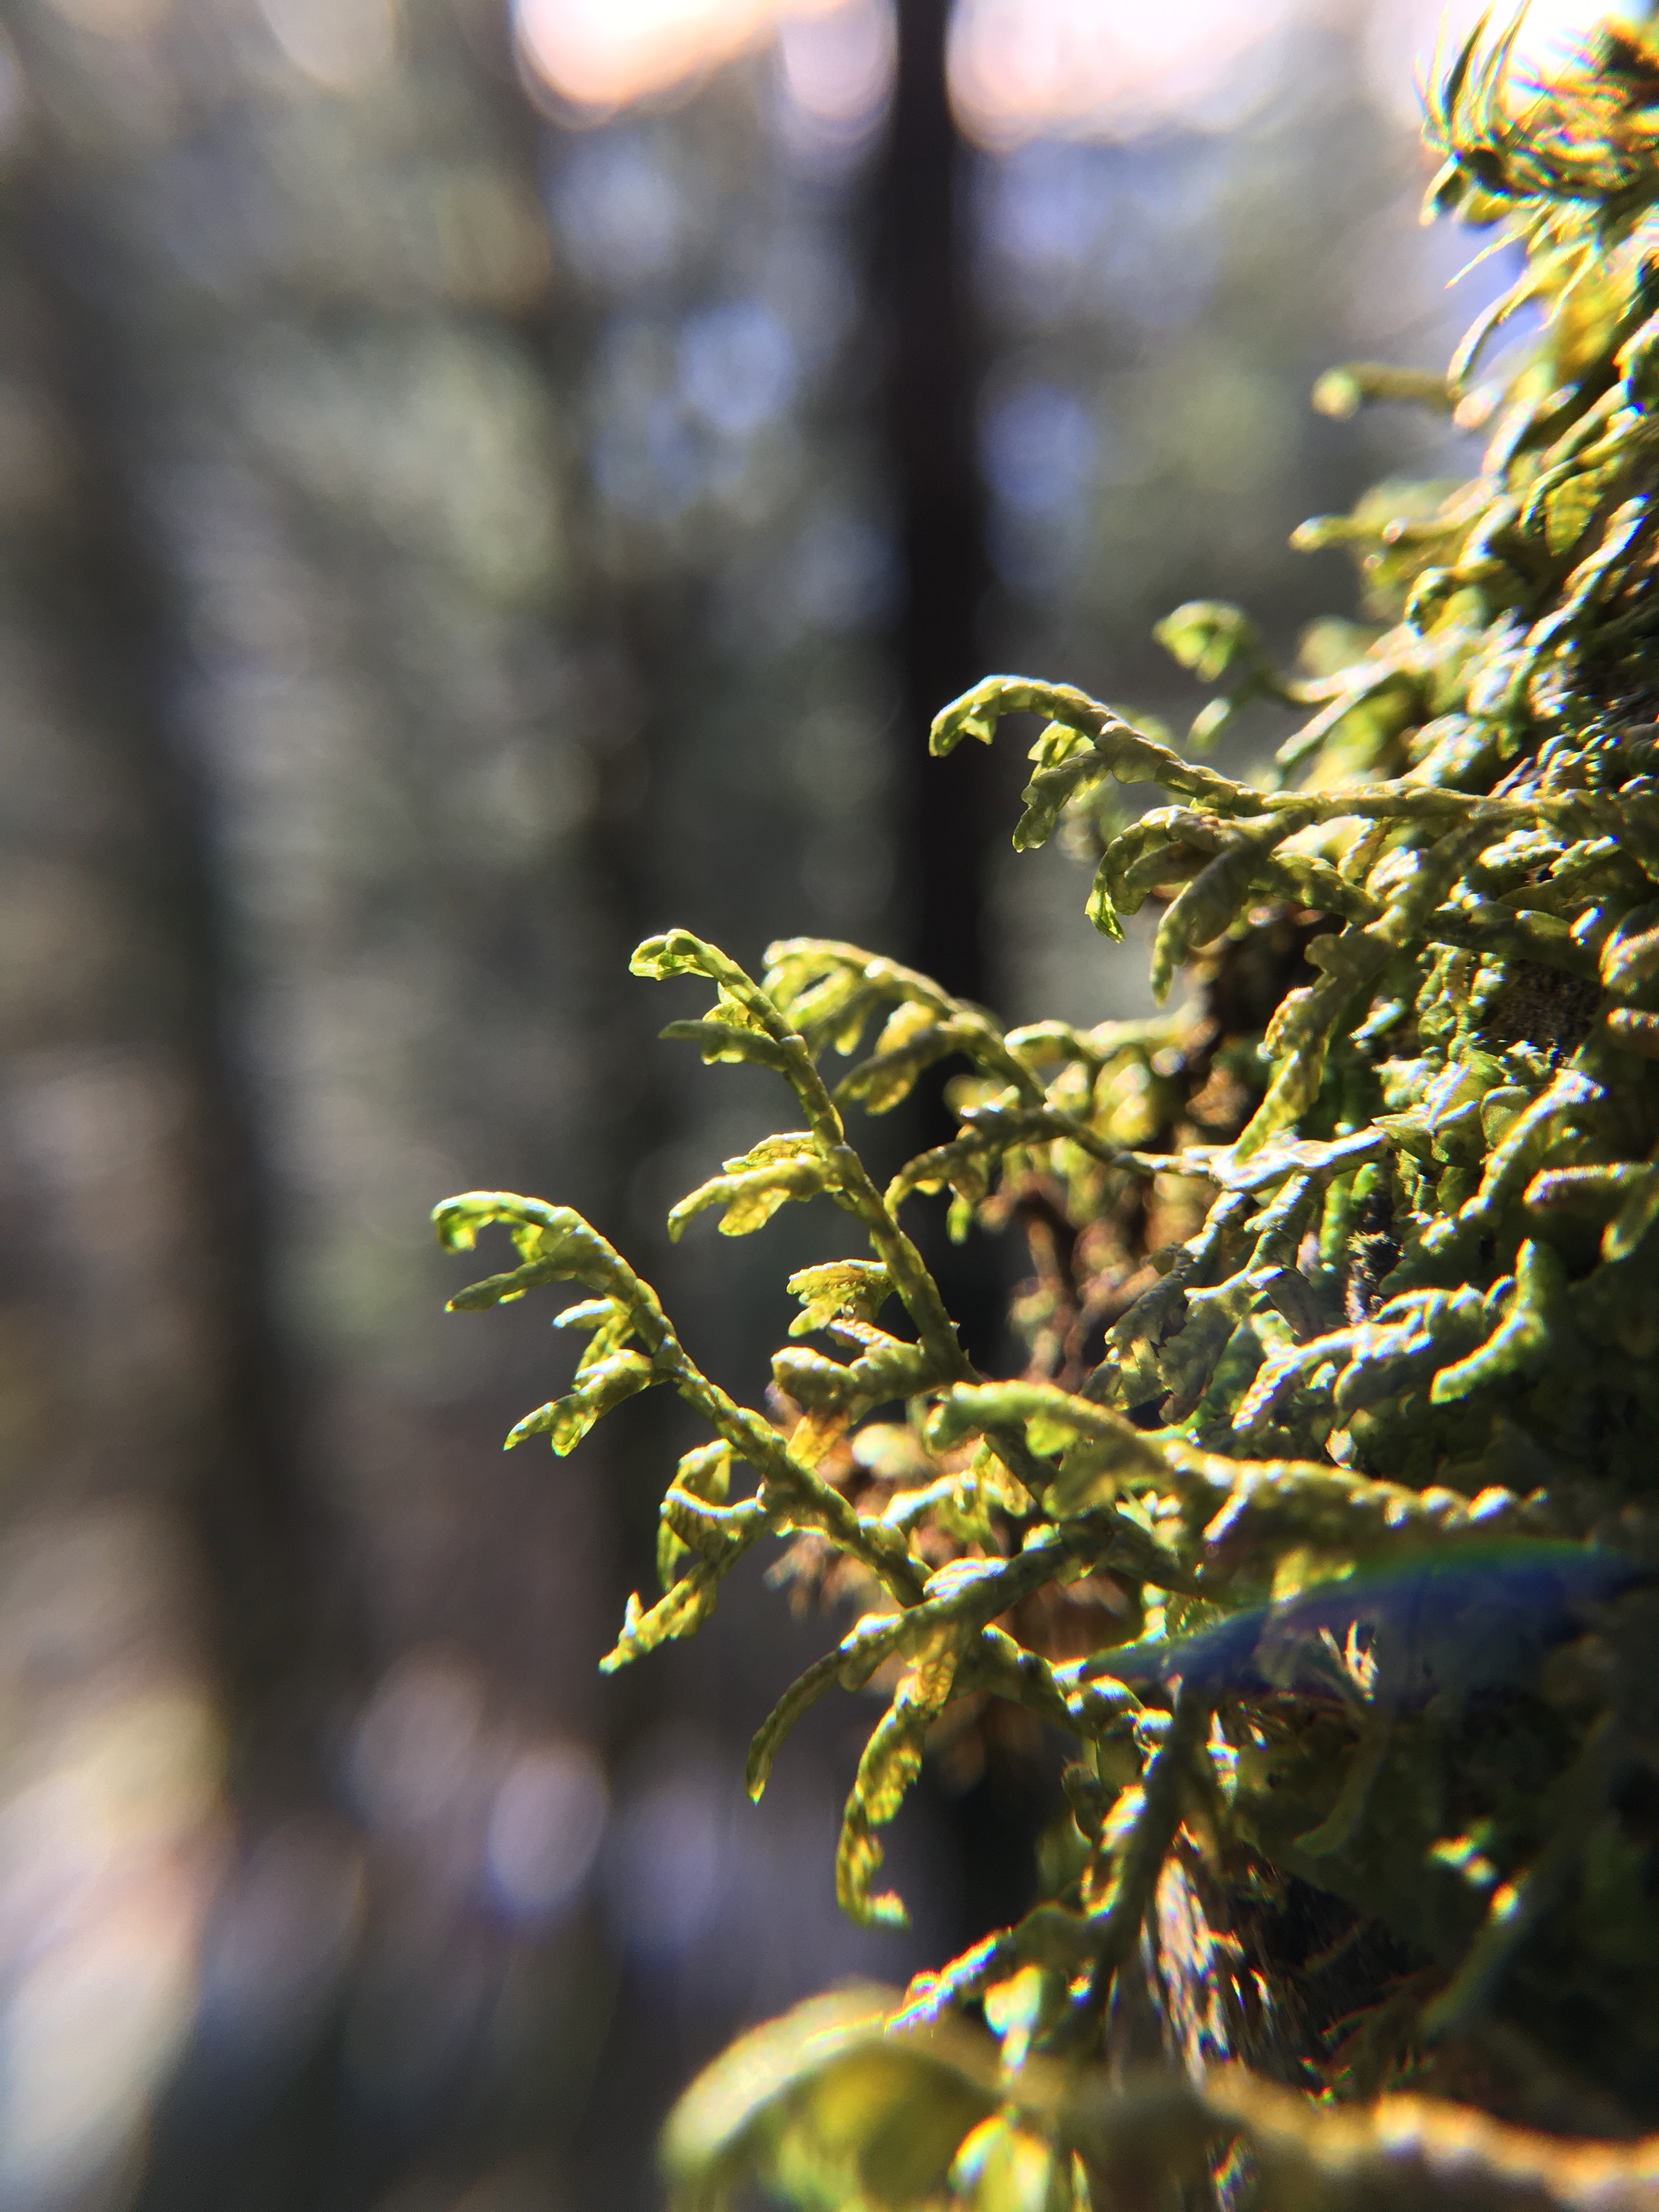
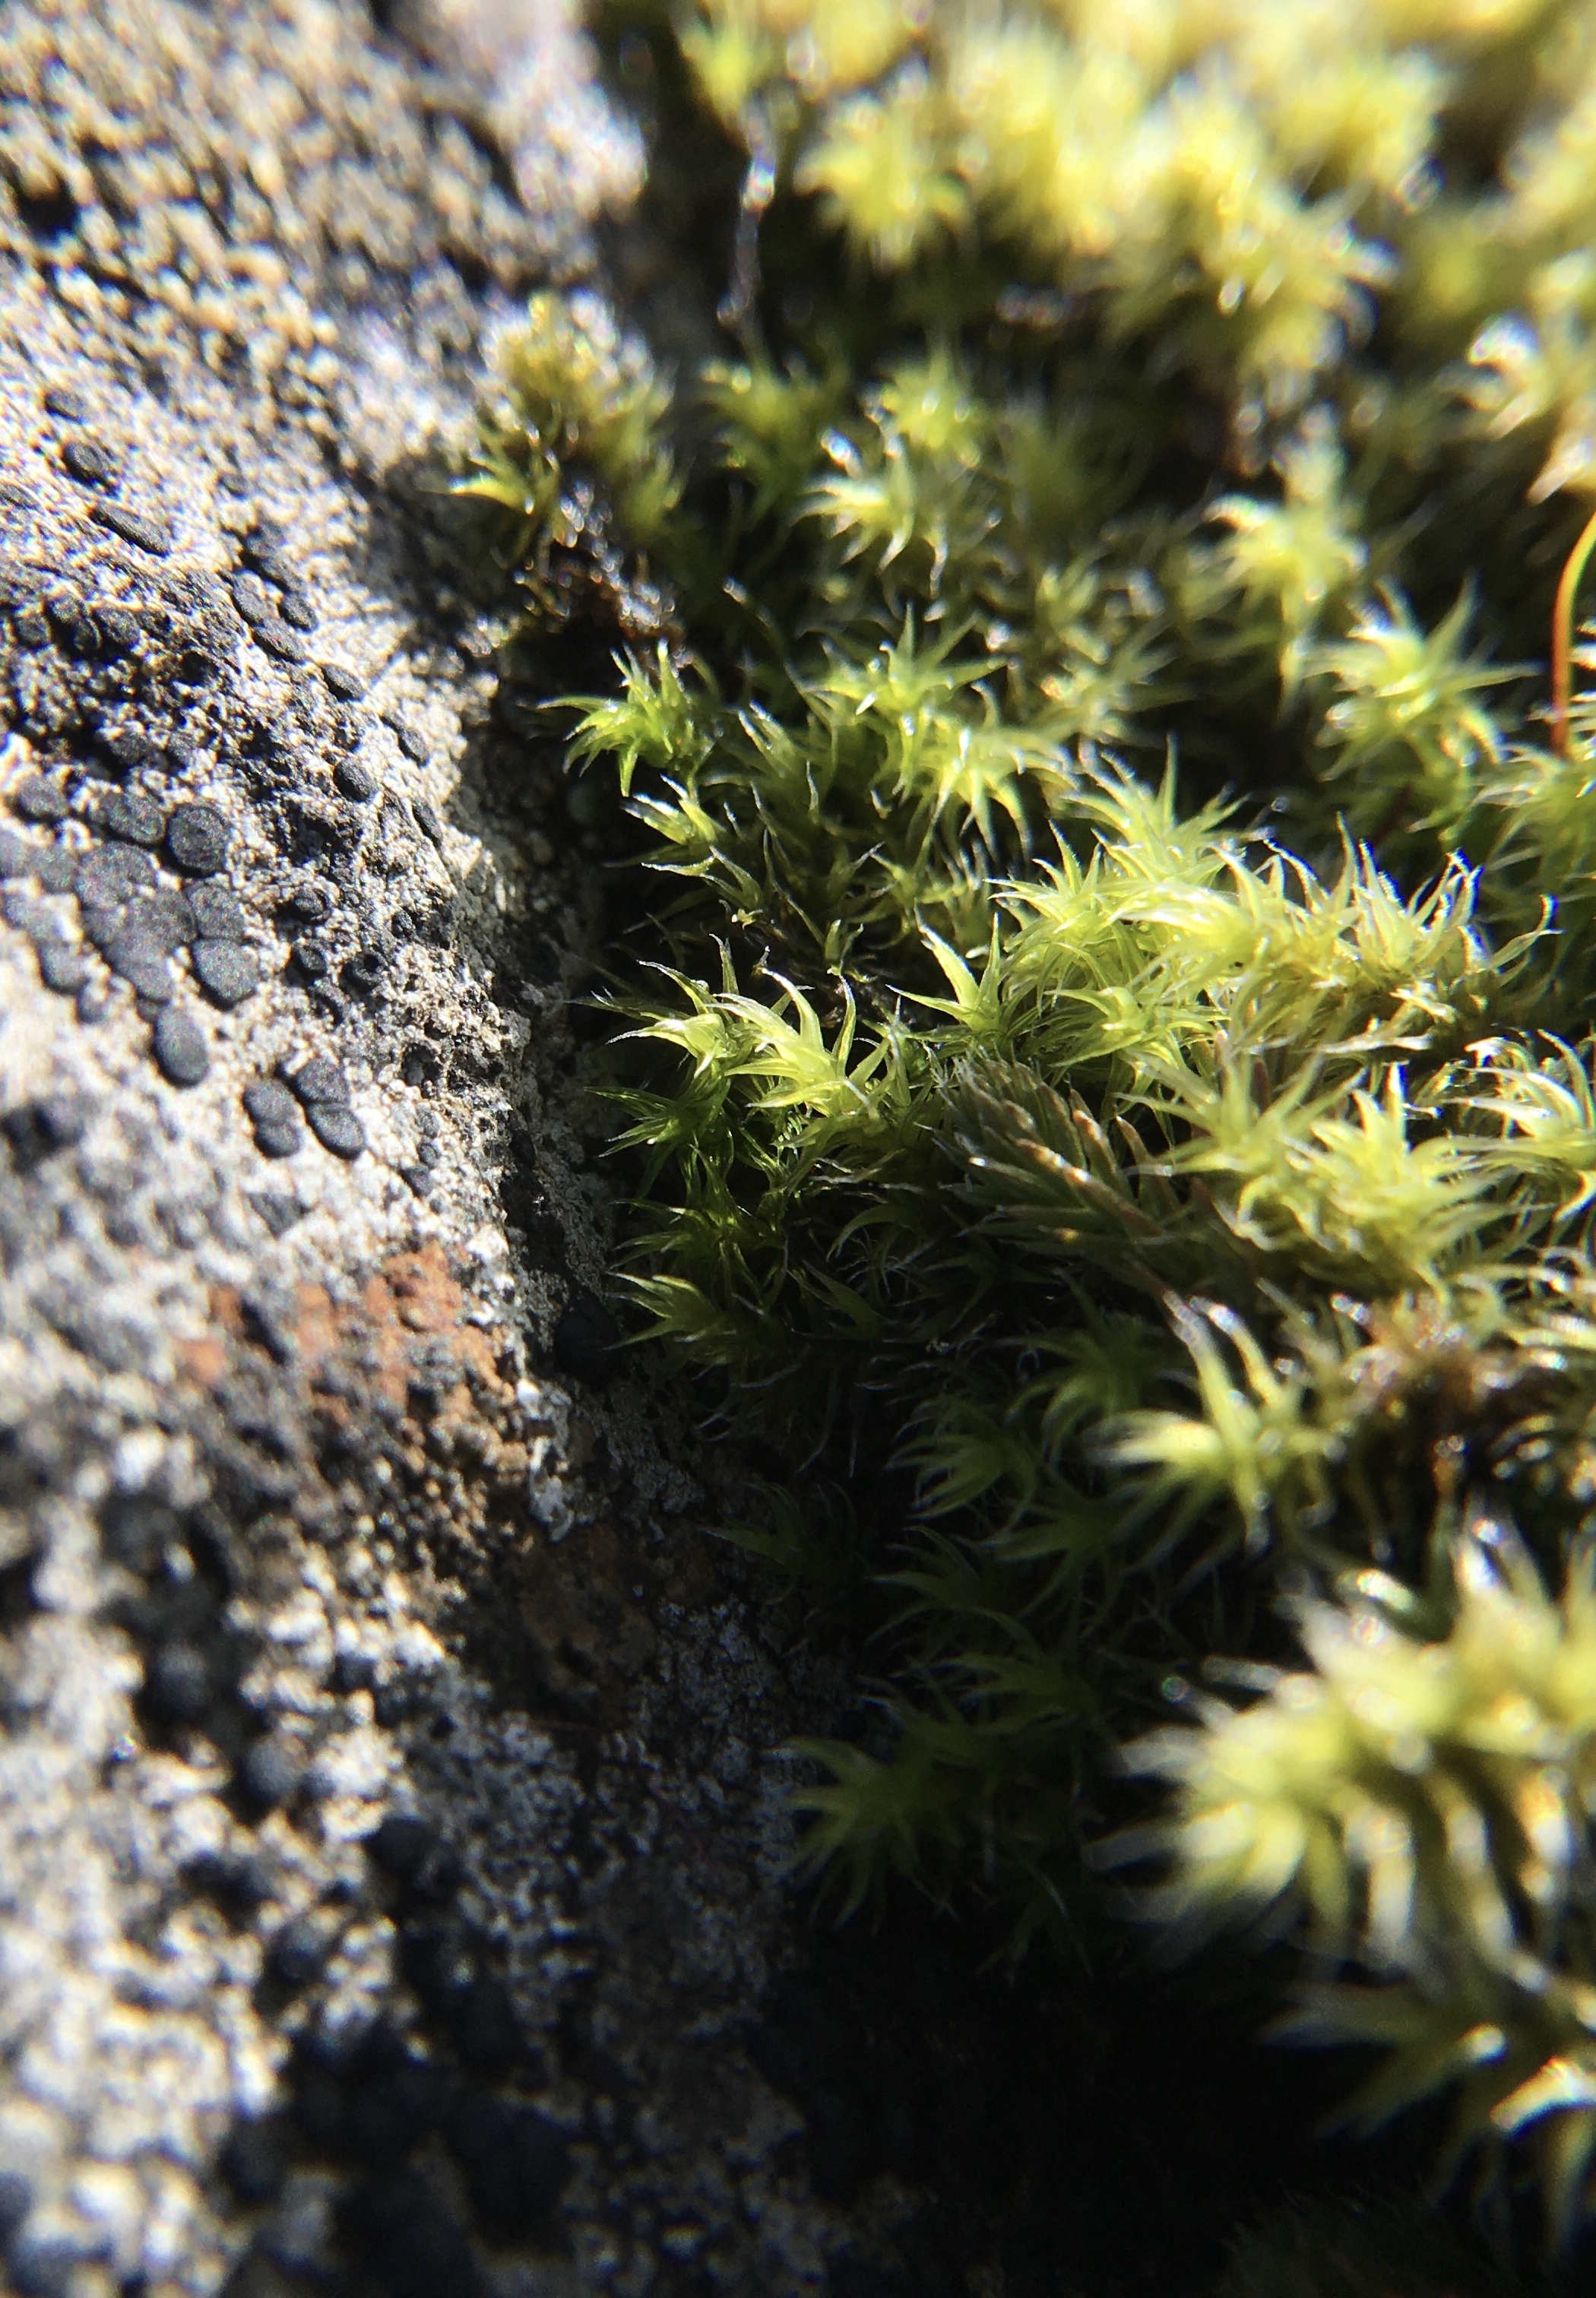
I was gifted a clip-on macro lens for my phone camera over the holidays, opening up a whole new level of hiking photography! I’m posting my favorite tiny mushrooms and moss from the last couple months below. I’ve really enjoyed getting a closer look at the details of these tiny little dudes.
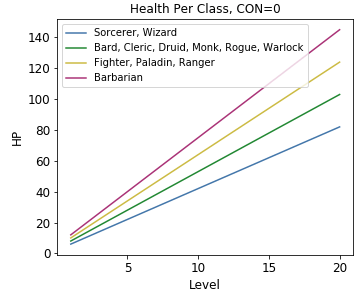
Since I’m not currently writing code for my research, I’m keeping myself entertained by plotting Dungeons and Dragons stats. My first plot here is a visualization of how health varies by class in 5th edition – trying to put in perspective how relatively “squishy” a spellcaster is versus everyone else.
Turns out a lot of classes use a d8.
Note that all these lines assume a constitution of 10 (CON+0). Someday I will have a plot of what health looks like if every time there’s a chance to add points to stats, the player chooses to maximize constitution.
I do a lot of Atomic Force Microscopy (AFM) for my graduate research. AFM uses a very, very small stick to determine the topography of a sample. Think of a topographic map of the mountains, but the scale bar is on the order of a hundred nanometers, rather than a few miles.
Because AFM can detect picometer-scale changes in topography, it’s important to have a flat, clean surface to put your sample material on. I’m talking… as close to atomically flat as we can get.
Luckily, nature makes a really cool substance that does this: mica! You can think of mica as like a stack of slightly-sticky paper. When you peel off the top sheet of paper, you’re left with a pristine surface. Now let’s shrink that down so that the sheet of paper is only a couple nanometers tall and made of aluminum and silicon oxide. Peeling mica nicely by hand presents a challenge – how do you get a grip on something that small?
Tape!
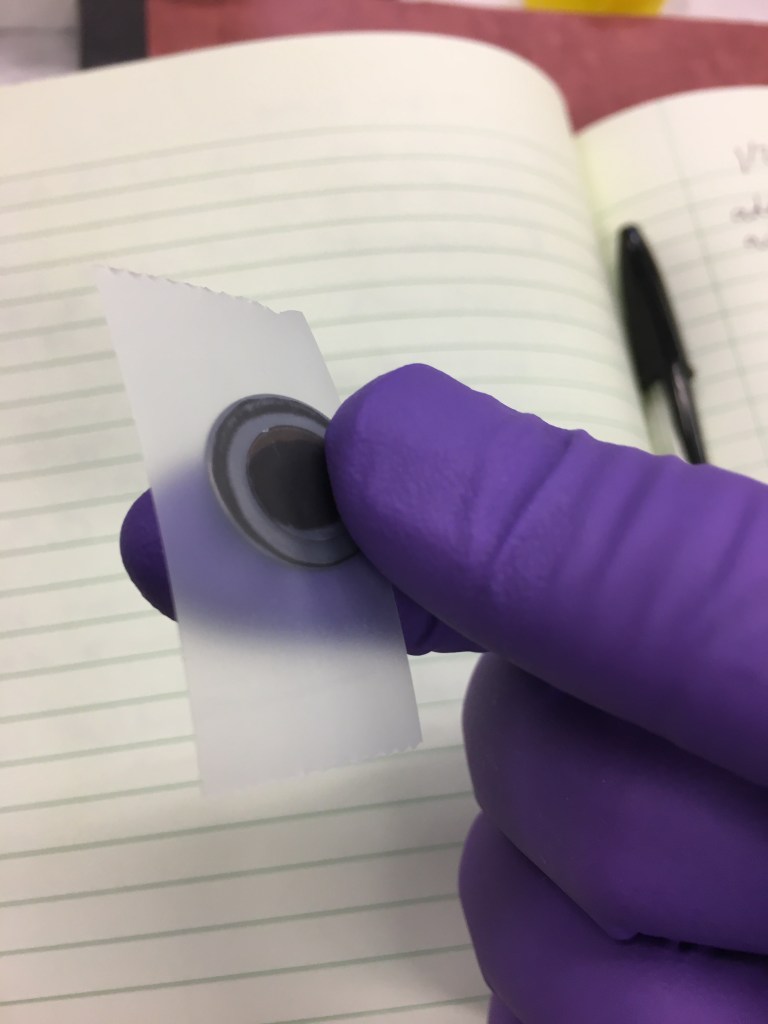
Here I am holding a piece of mica that’s glued to a round magnet. I’ve just pressed a piece of regular tape to the mica surface.
Pressing a piece of scotch tape against the mica surface and then ripping it off can get you that perfect surface, as a couple layers of mica come off with the tape. This is similar to how graphene was first made – much like mica, graphite has a sheet-like structure that can be peeled apart. In fact, for some AFM samples, graphite is a really great substrate.
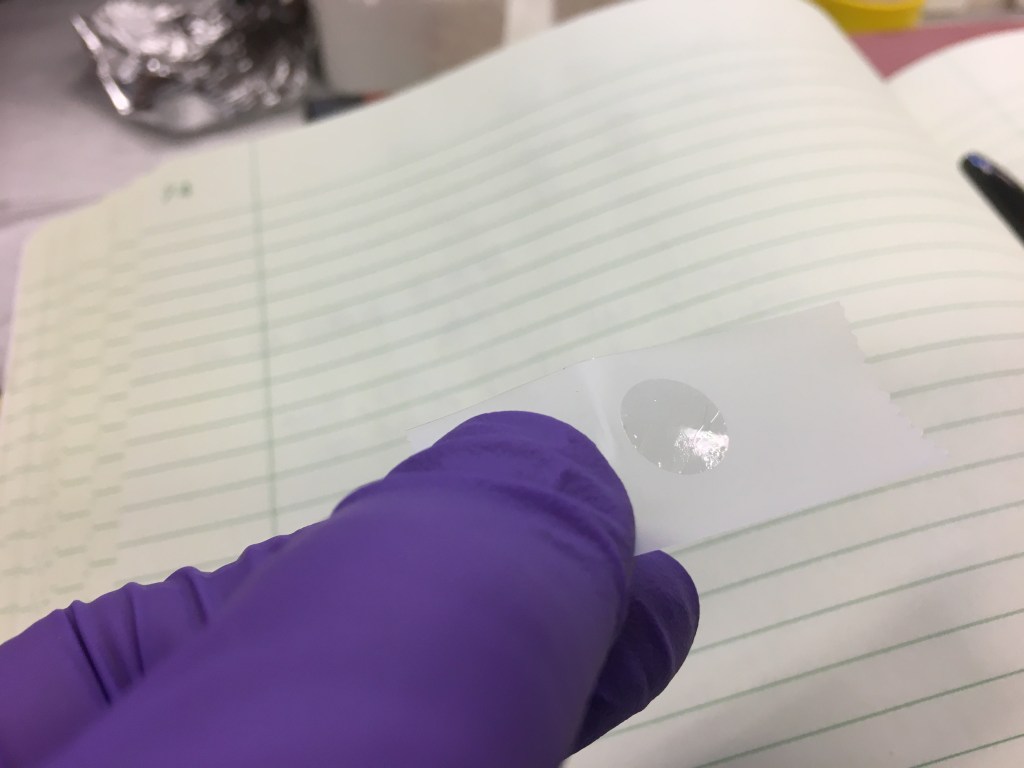
When I rip the tape off, I’m left with that shiny circle stuck to the tape – that’s a few layers of mica!
That’s the explanation for my blog header: Scotch tape is an indispensable research tool for me! Plus, I really enjoy putting in fancy purchase orders with thousands of dollars of highly specialized AFM equipment… and ten dollars of scotch tape tagged on at the end.